Love this? Save it for later!
Share the inspiration with your friends
“You have to try this,” my friend texted me late one evening, and honestly, I was skeptical. Cookie butter? Cheesecake? Cups? It sounded like a sugar overload waiting to happen. But curiosity got the best of me, and that’s how these Cookie Butter Cheesecake Cups came into my life. The first time I made them, I wasn’t expecting much—just a quick treat to satisfy a sweet craving after a long day. What happened next was unexpected: the creamy texture was so smooth it practically melted on my tongue, and the rich cookie butter flavor wrapped everything in cozy warmth.
It reminded me a little of the time I obsessed over perfecting my easy Oreo balls recipe, tweaking the balance between creaminess and crunch until it was just right. But these cheesecake cups? They’re a whole new kind of magic, subtle yet indulgent. And they fit perfectly in the palm of your hand, which means no fork, no fuss, just pure enjoyment.
Making these cups felt like a quiet little victory in a busy week—something simple, yet indulgent enough to feel like a treat. What really stuck with me was how the cookie butter’s spiced notes danced with the tang of cream cheese, creating a flavor twist I didn’t see coming. So yeah, these aren’t your usual cheesecake cups. They’re a little adventure, a little comfort, and honestly, a little bit addictive.
Now every time I open my fridge and see them waiting, I’m reminded that sometimes the best recipes come from a casual nudge, a text from a friend, and the willingness to try something new. And that’s why this recipe has stayed close to my heart (and my dessert rotation) ever since.
Why You’ll Love This Recipe
Let me tell you, this Cookie Butter Cheesecake Cups recipe is not just a dessert—it’s a little moment of joy you can whip up with ease. I’ve tested it multiple times (okay, maybe more than a few), and here’s what makes it stand out:
- Quick & Easy: Ready in under 30 minutes, these cheesecake cups are perfect for last-minute guests or a spontaneous treat after dinner.
- Simple Ingredients: No hunting for exotic items—just pantry staples like cream cheese, cookie butter, and a few basics you probably have on hand.
- Perfect for Any Occasion: Whether it’s a casual brunch or a cozy night in, these cups fit right in. They’re also a hit at potlucks thanks to their individual serving size.
- Crowd-Pleaser: Kids, adults, cookie lovers, cheesecake fans—they all ask for seconds. The creamy texture pairs beautifully with the spiced cookie butter flavor for a crowd-pleasing combo.
- Unbelievably Delicious: The secret is in the perfect balance—the creamy, tangy cheesecake meets the sweet, warmly spiced cookie butter in a match made for dessert heaven.
This isn’t just another cheesecake recipe. The trick is in blending the cookie butter smoothly into the cream cheese for that irresistibly creamy texture without overpowering sweetness. It feels like the best of both worlds—rich yet light, indulgent yet approachable. Honestly, it’s the kind of dessert that makes you pause and really savor each bite, closing your eyes and appreciating the simple goodness.
What Ingredients You Will Need
This recipe uses straightforward ingredients that come together to deliver bold flavor and that melt-in-your-mouth creamy texture. Most are pantry staples, which makes this treat as convenient as it is delicious.
- For the Cheesecake Cups Base:
- 1 cup (240 ml) cookie butter (I prefer Lotus Biscoff for its authentic flavor)
- 8 oz (225 g) cream cheese, softened (room temperature for best blending)
- 1/3 cup (67 g) granulated sugar (adjust slightly if you like it sweeter)
- 1 large egg (room temperature helps with smooth mixing)
- 1/2 teaspoon vanilla extract (pure vanilla makes a difference)
- 1/4 teaspoon ground cinnamon (optional, but adds a subtle warmth)
- For the Crust:
- 1 cup (100 g) crushed speculoos cookies or graham crackers (adds a crunchy, buttery base)
- 3 tablespoons (42 g) unsalted butter, melted (helps bind the crust)
- For Topping (Optional):
- Whipped cream or a dollop of cookie butter
- Chopped nuts like pecans or walnuts for a little crunch
If you want to try a gluten-free version, swap the cookie crumbs with almond flour or gluten-free cookie crumbs. Also, you can use dairy-free cream cheese and coconut oil instead of butter for a vegan-friendly spin.
Equipment Needed
- Standard muffin tin or silicone baking cups — I’ve used both, but silicone cups make removal easier and cut down on cleanup.
- Mixing bowls — one large for the cream cheese mixture, one smaller for the crust.
- Electric mixer or hand whisk — makes beating the cream cheese smooth and lump-free.
- Measuring cups and spoons — accuracy helps keep that creamy texture just right.
- Spatula — for scraping down the bowl and folding ingredients gently.
If you don’t have a mixer, a sturdy whisk and some elbow grease will do—just make sure your cream cheese is really soft so it blends smoothly. For budget-friendly options, silicone baking cups are often inexpensive and reusable, which I love.
Preparation Method
- Preheat your oven to 325°F (160°C). Line a muffin tin with silicone cups or paper liners if preferred.
- Prepare the crust: In a small bowl, combine 1 cup (100 g) crushed speculoos cookies with 3 tablespoons (42 g) melted butter. Stir until crumbs are evenly coated. Press about a tablespoon of this mixture firmly into the bottom of each muffin cup to form the crust layer. This should take about 5 minutes. Set aside.
- Make the cheesecake filling: In a large mixing bowl, beat 8 oz (225 g) softened cream cheese until smooth and creamy (about 2-3 minutes). Add 1 cup (240 ml) cookie butter and 1/3 cup (67 g) granulated sugar. Beat again until combined and silky.
- Incorporate the egg and flavorings: Add 1 large egg, 1/2 teaspoon vanilla extract, and 1/4 teaspoon cinnamon (if using). Mix gently to combine, avoiding over-mixing which can cause cracks during baking. The mixture should be thick but pourable, with a glossy finish. This step takes about 2 minutes.
- Fill the cups: Spoon the cheesecake batter evenly over the crust in each muffin cup, filling almost to the top. Tap the pan lightly on the counter to release air bubbles and level the batter.
- Bake: Place the muffin tin on the middle rack and bake for 18-22 minutes. The edges should be set but the center will still have a slight jiggle. Keep an eye on them to avoid overbaking, which dries out the creamy texture.
- Cool and chill: Remove from oven and let the cups cool to room temperature (about 30 minutes). Then refrigerate for at least 3 hours or overnight to firm up and develop flavor.
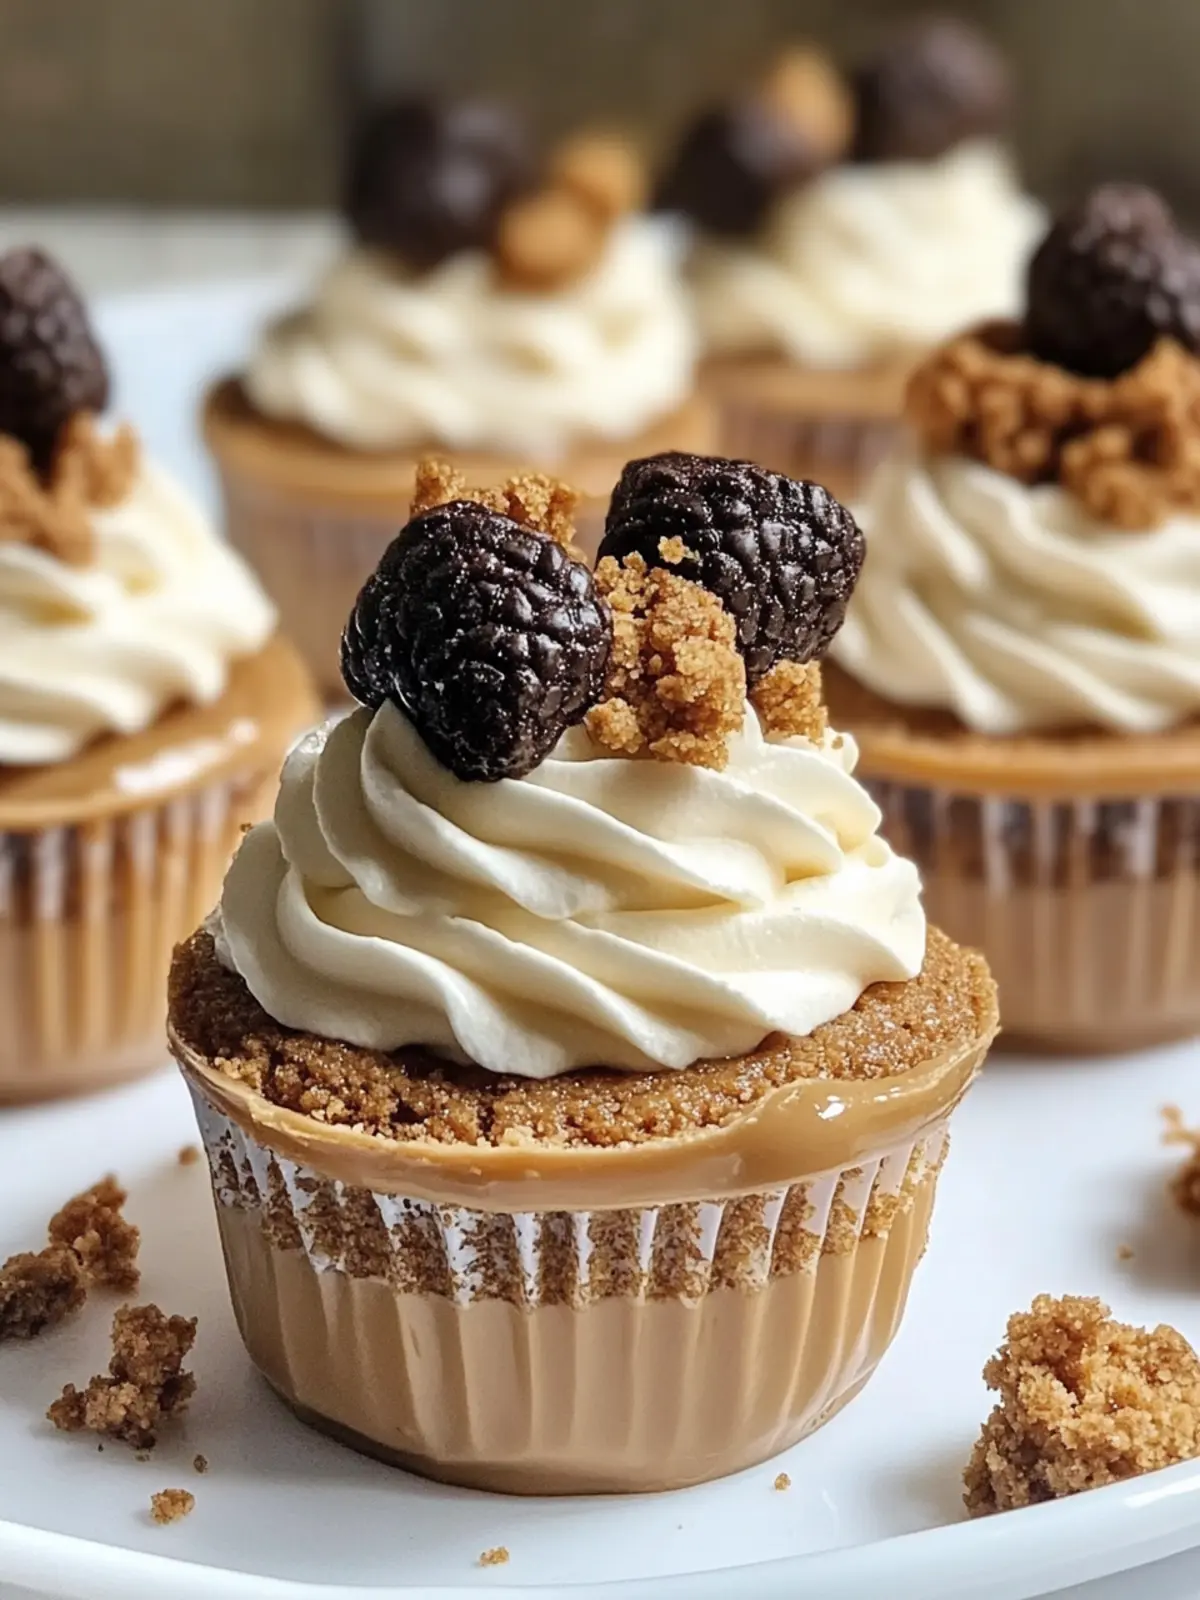
- Serve: Top with whipped cream, a drizzle of cookie butter, or chopped nuts if desired. Enjoy chilled for the best creamy texture.
Pro tip: If you notice any cracks forming on top, don’t worry—it’s usually due to overbaking or rapid cooling. A gentle tap on the counter before chilling can help smooth the surface. Also, letting the cream cheese soften fully before mixing makes a big difference in texture.
Cooking Tips & Techniques
The secret to these Cookie Butter Cheesecake Cups is all in the texture. Here’s what I’ve learned from several trials (and a few small failures):
- Room temperature ingredients matter: Cream cheese and egg should be at room temp for smooth mixing without lumps.
- Don’t rush the baking: Underbaking leaves a gooey mess, while overbaking dries out the cheesecake. Watch for that slight jiggle in the center as your sign to pull them out.
- Mix gently after adding the egg: Overmixing incorporates too much air, which can cause cracks.
- Crust compression is key: Press the cookie crumbs firmly to create a solid base that won’t crumble when you bite in.
- Chill thoroughly: These cups improve with time in the fridge—don’t skip the chilling step for the best creamy finish.
- Multitasking tip: While the cups bake, clean up your mixing bowls and prep toppings so you’re ready to serve as soon as they’re chilled.
Honestly, the first time I made these, I overbaked a bit and ended up with crumbly edges. But after tweaking the timing and mixing technique, the creamy texture hit just right. It’s that kind of recipe where a little patience pays off big time.
Variations & Adaptations
These cheesecake cups are surprisingly versatile. I’ve tried a few variations to suit different moods and diets:
- Chocolate swirl: Add a tablespoon of melted dark chocolate into the batter and swirl with a toothpick before baking for a marbled effect.
- Seasonal fruit topping: Fresh berries or a berry compote add a bright contrast. In summer, a few sliced strawberries really brighten the cookie butter richness.
- Nutty crunch: Mix chopped pecans or walnuts into the crust or sprinkle on top for texture.
- Vegan/dairy-free: Use dairy-free cream cheese and coconut oil instead of butter. Swap the egg with a flax egg for binding.
- Spiced twist: Add a pinch of nutmeg or cardamom to the batter to deepen the warm spice profile.
One personal favorite is adding a pinch of sea salt on top just before chilling—the contrast is incredible. Another time, I swapped cookie butter for peanut butter to make a rich, nutty cheesecake cup variation. If you want an easier no-bake option, you could try chilling the filling in cups without baking, similar to my vegan cookie monster ice cream recipe, for a creamy, chilled treat.
Serving & Storage Suggestions
These cheesecake cups are best served chilled straight from the fridge. The creamy texture shines when cold, and the flavors deepen after resting a bit. I like to garnish mine with a small dollop of whipped cream and a sprinkle of crushed cookie crumbs for a little extra crunch.
They pair wonderfully with a cup of coffee or a light herbal tea—perfect for a mid-afternoon pick-me-up or a cozy dessert after dinner. For entertaining, these individual servings are a breeze to pass around without fuss.
Store leftovers in an airtight container in the refrigerator for up to 4 days. If you want to keep them longer, freeze the cups (without toppings) for up to 2 months. Thaw overnight in the fridge before serving and give them a gentle stir to refresh the texture.
Over time, the cookie butter flavor mellows and blends even more with the cheesecake, making every bite smooth and harmonious. If you enjoy desserts with a little chill and a lot of character, these cups will quickly become a favorite.
Nutritional Information & Benefits
Each serving (one cup) of these Cookie Butter Cheesecake Cups contains approximately:
| Nutrient | Amount |
|---|---|
| Calories | 280 |
| Fat | 18 g |
| Carbohydrates | 22 g |
| Protein | 4 g |
| Sugar | 15 g |
The cream cheese provides a good source of calcium and protein, while the cookie butter adds that irresistible spiced sweetness. If you swap in almond flour or nut crusts, you can boost the fiber and healthy fats. This dessert is gluten-free if you choose the right cookie crumbs, which is great for those avoiding gluten.
For those mindful of sugar, you can reduce the granulated sugar or try a natural sweetener alternative like monk fruit or erythritol. The richness of the cream cheese and cookie butter helps keep the flavor satisfying even with less sugar.
Conclusion
These Cookie Butter Cheesecake Cups aren’t just another dessert—they’re an easy, crowd-pleasing treat that feels special without any extra fuss. Whether you’re looking to impress guests or treat yourself on a quiet night, they deliver creamy texture and cozy flavor in every bite.
Feel free to play around with the toppings and spices to make them your own. I love how simple tweaks can create new flavor profiles, from chocolate swirls to nutty crunches. Honestly, these cups are a little slice of comfort I keep coming back to, especially when I want something sweet but not complicated.
If you try this recipe, I’d love to hear how you customized it or what your favorite variation is. Sharing those little tweaks always makes cooking feel more like a conversation. So go ahead, make a batch, and enjoy the creamy, cookie butter goodness one cup at a time.
FAQs about Cookie Butter Cheesecake Cups
Can I make these cheesecake cups ahead of time?
Yes! They can be made a day or two in advance and stored in the fridge. Just keep them covered to maintain their creamy texture.
What if I don’t have cookie butter?
You can substitute peanut butter or almond butter for a different but equally delicious flavor twist.
How do I prevent cracks on top of the cheesecake cups?
Avoid overmixing after adding the egg and don’t overbake. The center should still jiggle slightly when you take them out.
Can I freeze these cheesecake cups?
Absolutely. Freeze them without toppings for up to 2 months. Thaw in the fridge overnight before serving.
Are these gluten-free?
They can be! Use gluten-free cookie crumbs or almond flour for the crust, and ensure your cookie butter is gluten-free.
Pin This Recipe!
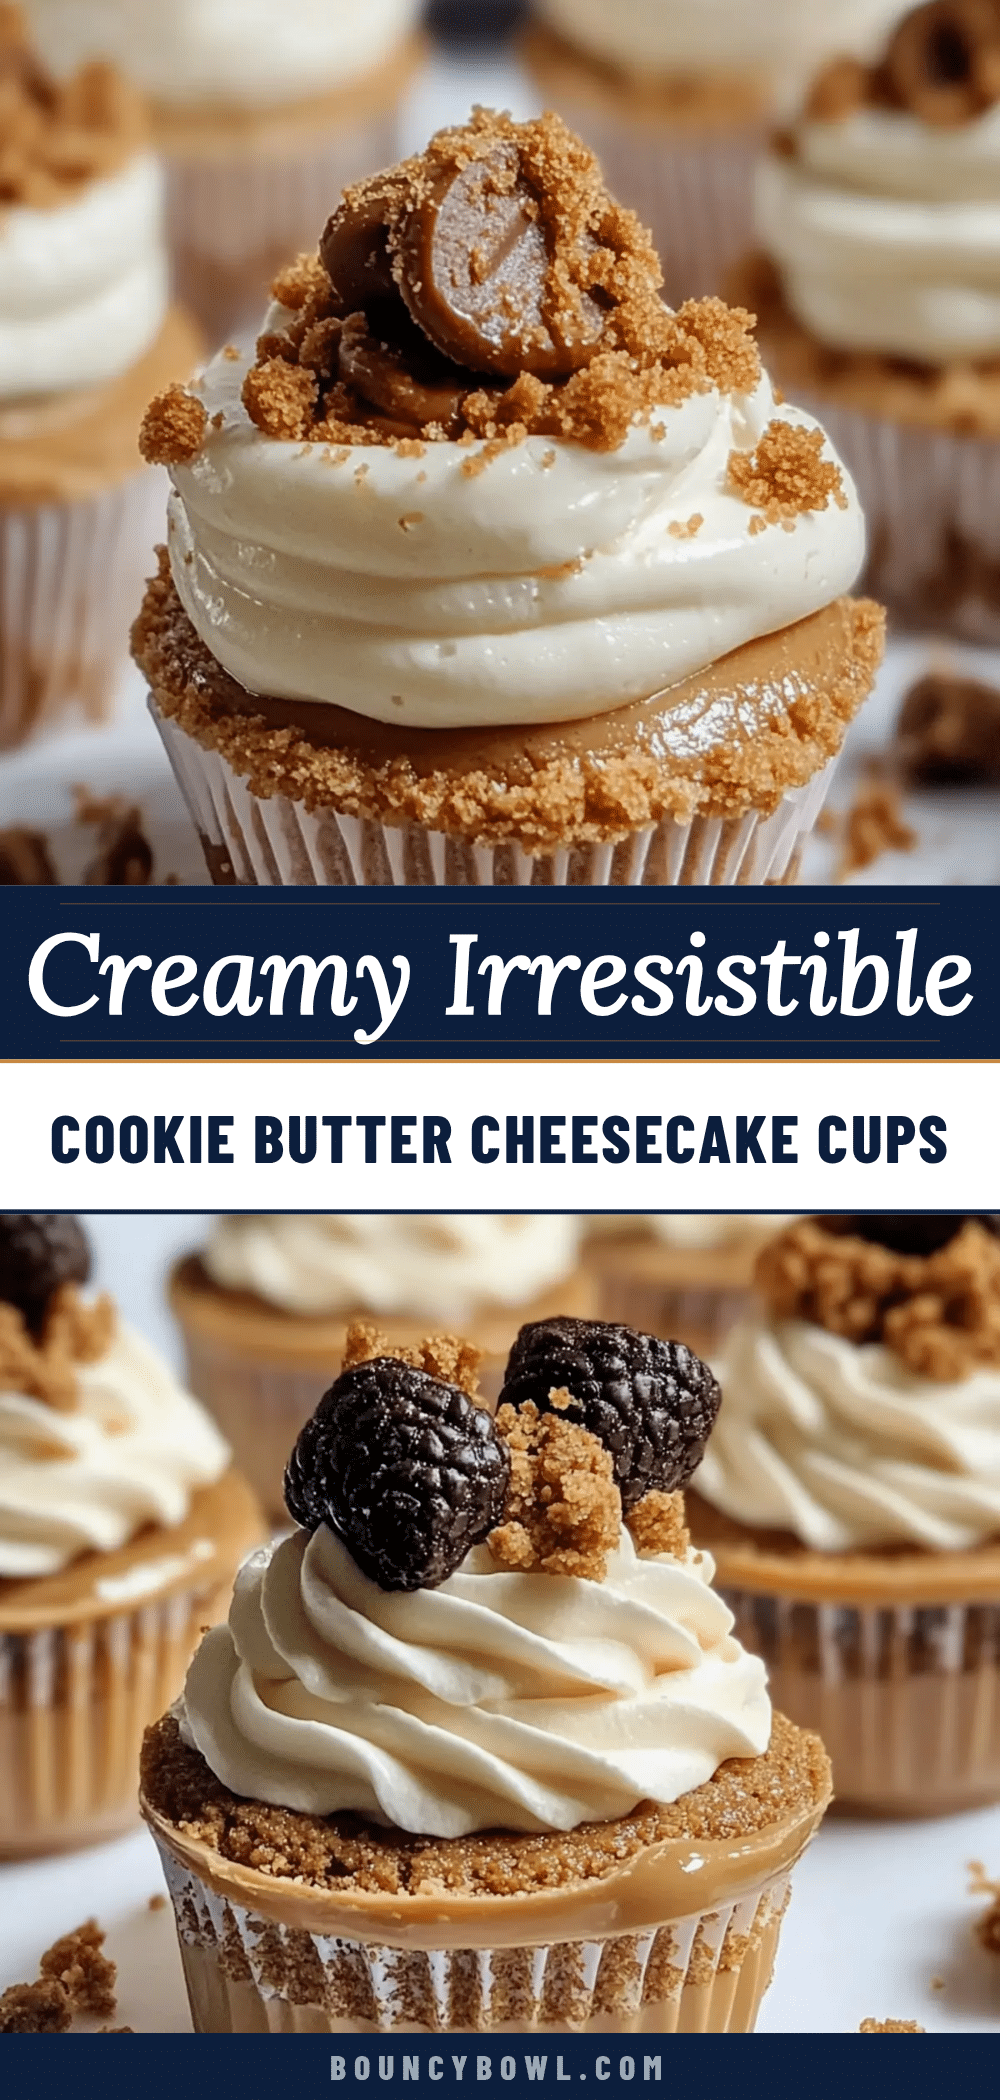
Cookie Butter Cheesecake Cups
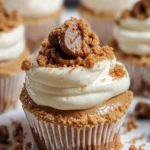
These Cookie Butter Cheesecake Cups are a quick and easy dessert with a creamy texture and rich cookie butter flavor, perfect for any occasion.
- Prep Time: 10 minutes
- Cook Time: 22 minutes
- Total Time: 3 hours 32 minutes
- Yield: 12 servings 1x
- Category: Dessert
- Cuisine: American
Ingredients
- 1 cup (240 ml) cookie butter (Lotus Biscoff preferred)
- 8 oz (225 g) cream cheese, softened
- 1/3 cup (67 g) granulated sugar
- 1 large egg
- 1/2 teaspoon vanilla extract
- 1/4 teaspoon ground cinnamon (optional)
- 1 cup (100 g) crushed speculoos cookies or graham crackers
- 3 tablespoons (42 g) unsalted butter, melted
- Whipped cream or a dollop of cookie butter (optional topping)
- Chopped nuts like pecans or walnuts (optional topping)
Instructions
- Preheat your oven to 325°F (160°C). Line a muffin tin with silicone cups or paper liners.
- Prepare the crust: In a small bowl, combine crushed speculoos cookies with melted butter. Stir until crumbs are evenly coated. Press about a tablespoon of this mixture firmly into the bottom of each muffin cup. Set aside.
- Make the cheesecake filling: In a large mixing bowl, beat softened cream cheese until smooth and creamy (2-3 minutes). Add cookie butter and granulated sugar. Beat until combined and silky.
- Add the egg, vanilla extract, and cinnamon (if using). Mix gently to combine, avoiding over-mixing. The mixture should be thick but pourable with a glossy finish.
- Spoon the cheesecake batter evenly over the crust in each muffin cup, filling almost to the top. Tap the pan lightly to release air bubbles and level the batter.
- Bake on the middle rack for 18-22 minutes until edges are set but center still jiggles slightly.
- Remove from oven and let cool to room temperature (about 30 minutes). Refrigerate for at least 3 hours or overnight to firm up and develop flavor.
- Serve chilled, topped with whipped cream, a drizzle of cookie butter, or chopped nuts if desired.
Notes
Use room temperature cream cheese and egg for smooth mixing. Avoid overmixing after adding the egg to prevent cracks. Press crust firmly to avoid crumbling. Chill thoroughly for best creamy texture. Silicone cups ease removal and cleanup. Variations include chocolate swirl, fruit toppings, nutty crunch, and vegan/dairy-free options.
Nutrition
- Serving Size: 1 cheesecake cup
- Calories: 280
- Sugar: 15
- Fat: 18
- Carbohydrates: 22
- Protein: 4
Keywords: cookie butter, cheesecake cups, creamy dessert, easy cheesecake, individual servings, quick dessert, spiced cheesecake