Love this? Save it for later!
Share the inspiration with your friends
“Wait, these are gluten-free?” my friend blurted out with genuine surprise during our last game night. Honestly, I was half-expecting skepticism when I whipped up these easy irresistible gluten-free Oreo balls, but the way they vanished off the plate told a different story. It all started one chaotic evening when I realized I had forgotten to pick up dessert for a small get-together. With nothing but a pack of gluten-free Oreos and some cream cheese in the fridge, I threw together this simple treat on a whim—no fancy equipment, no complicated steps.
The smell of crushed cookies mixing with creamy sweetness filled the kitchen, and I remember thinking, “Well, this might work.” Turns out, it did more than just work. These Oreo balls became the star of the night, with even gluten-eaters asking for seconds. Since then, they’ve slipped into my regular rotation, especially when I want a fuss-free sweet bite that’s both indulgent and safe for gluten-sensitive friends.
What’s funny is how this recipe, born out of a last-minute scramble, has stuck with me—not just because it’s easy but because it perfectly balances that nostalgic Oreo crunch with a smooth, melt-in-your-mouth texture. If you’re after a quick, crowd-pleasing dessert that doesn’t feel like a compromise, this recipe might just be the quiet winner you didn’t see coming.
Why You’ll Love This Recipe
After testing many versions and tweaking the balance, I’m confident this easy irresistible gluten-free Oreo balls recipe hits the spot every time. Here’s why it stands out:
- Quick & Easy: Ready in about 20 minutes, no baking required—ideal for those last-minute dessert emergencies or spontaneous cravings.
- Simple Ingredients: Just a handful of pantry staples like gluten-free Oreos and cream cheese, so no special trips or confusing substitutions.
- Perfect for Any Occasion: Whether it’s a game night, holiday gathering, or a casual after-dinner treat, these bite-sized delights fit right in.
- Crowd-Pleaser: They vanish fast! Kids, adults, gluten-sensitive guests—everyone seems to love these little gems.
- Unbelievably Delicious: The Oreo crumbs provide just the right crunch, while the cream cheese adds that irresistible creamy bite you can’t stop savoring.
What makes this recipe different from others? It’s all about the texture and balance. Instead of overloading with too much cream cheese or using heavy coatings, this recipe keeps it light, letting the Oreo flavor shine through without being too sweet or dense. Plus, the method is forgiving—mix, chill, roll, and dip. I’ve found that chilling the mixture overnight really helps the flavors meld, making each bite feel like a mini celebration.
Honestly, this recipe isn’t just a dessert—it’s the kind of treat that makes you pause, smile, and maybe even sneak a second one when no one’s watching.
What Ingredients You Will Need
This recipe uses simple, wholesome ingredients to deliver bold flavor and satisfying texture without the fuss. Most are pantry staples, and substitutions are easy if needed.
- Gluten-free Oreo cookies: About 24 cookies (around 9 ounces or 255 grams), crushed finely. I recommend Enjoy Life brand for their consistent texture and true Oreo taste.
- Cream cheese: 8 ounces (225 grams), softened at room temperature. This adds the creamy richness that binds the crumbs together perfectly.
- Powdered sugar: 1/4 cup (30 grams), to add a touch of sweetness and smooth texture.
- Vanilla extract: 1 teaspoon (5 ml), optional but highly recommended for depth of flavor.
- Chocolate for coating: 8 ounces (225 grams) of semi-sweet or dark chocolate chips or baking chocolate, melted. Use dairy-free chocolate if you want a vegan version.
- Optional toppings: Crushed gluten-free Oreos, sprinkles, or shredded coconut for decoration.
Ingredient tips: For the best texture, crush the Oreos finely but not to powder—you want a little bit of crunch for that authentic Oreo feel. If you’re short on time, a food processor works wonders here. Also, softened cream cheese is key; cold cream cheese won’t mix well and leads to lumps.
For a dairy-free twist, you can substitute the cream cheese with vegan cream cheese alternatives, and swap the chocolate coating accordingly. In summer, these balls are fantastic chilled straight from the fridge, but in cooler seasons, you might enjoy them at room temperature for a slightly softer bite.
Equipment Needed
Luckily, this recipe keeps things simple and requires minimal equipment:
- Mixing bowl: A medium-sized bowl to combine the crushed Oreos and cream cheese.
- Food processor or rolling pin: For crushing the Oreos. A food processor speeds things up, but a rolling pin and zip-top bag work just as well.
- Baking sheet: Lined with parchment or wax paper for setting the balls.
- Microwave-safe bowl or double boiler: To melt chocolate smoothly without burning.
- Spoon or fork: For dipping the balls into melted chocolate.
If you don’t have a food processor, no worries—just seal those cookies in a sturdy plastic bag and bash away with a rolling pin or even a heavy pan. For chocolate melting, a microwave in short bursts is my go-to, but using a double boiler prevents overheating if you prefer that method.
Keeping your cream cheese at room temperature is easier if you use a small mixing bowl; it warms faster and mixes more evenly. For rolling, wet your hands lightly—this helps prevent the mixture from sticking and saves a lot of cleanup.
Preparation Method
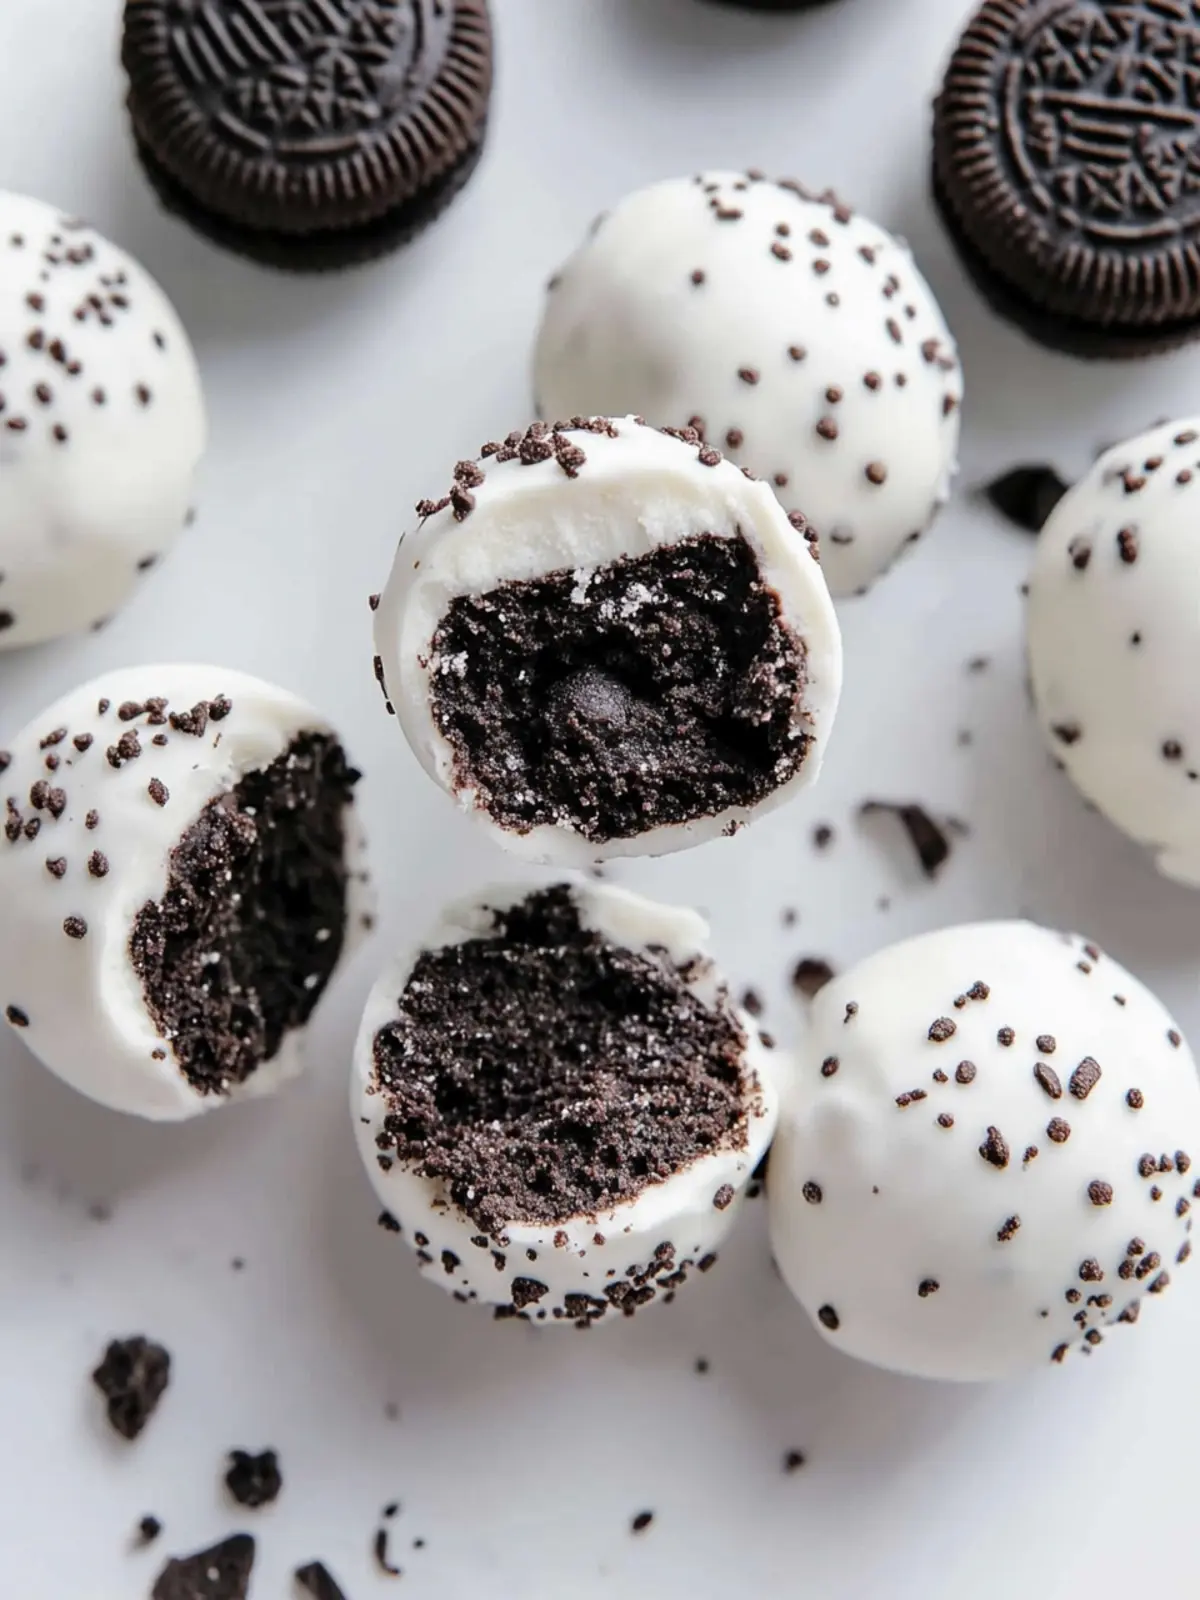
- Crush the Oreos: Place about 24 gluten-free Oreos (9 ounces/255 grams) in a food processor and pulse until finely crushed but still a bit textured. If using a rolling pin, seal cookies in a large zip-top bag and gently crush until similar texture is achieved. This should take about 5 minutes.
- Mix with cream cheese: Transfer crushed Oreos to a mixing bowl. Add 8 ounces (225 grams) softened cream cheese and 1/4 cup (30 grams) powdered sugar. Add 1 teaspoon (5 ml) vanilla extract if using. Stir everything together with a spoon or spatula until well combined and uniform. This step usually takes 3-5 minutes. The mixture should be sticky but firm enough to shape. If too soft, pop it in the fridge for 10-15 minutes.
- Form the balls: Wet your hands slightly to prevent sticking. Scoop about 1 tablespoon (15 grams) of mixture and roll into a tight ball. Place each ball on a parchment-lined baking sheet. You should get around 20-24 balls. Chill the tray in the fridge for at least 30 minutes to firm up (overnight chilling improves flavor melding and texture, if you have time).
- Melt the chocolate: In a microwave-safe bowl, melt 8 ounces (225 grams) chocolate chips in 30-second bursts, stirring between each until smooth. Alternatively, use a double boiler for gentle melting. Make sure the chocolate is fluid but not too hot to prevent cracking when dipped.
- Dip and decorate: Using a fork or dipping tool, coat each Oreo ball fully in melted chocolate. Allow excess chocolate to drip back into the bowl, then place the coated ball back on the parchment. Sprinkle crushed Oreo crumbs, sprinkles, or shredded coconut on top while the chocolate is still wet for extra flair. Let the balls set at room temperature or in the fridge until the chocolate hardens, about 20-30 minutes.
Pro tip: If your chocolate thickens while dipping, gently reheat it in short bursts to keep it smooth. Also, don’t skip chilling the balls before dipping—it prevents them from falling apart in the chocolate bath. I find that letting them rest overnight gives the best taste and texture, which is why I often prep these a day ahead for get-togethers.
Cooking Tips & Techniques
Making these gluten-free Oreo balls is pretty straightforward, but a few tricks from my kitchen mishaps can save you stress:
- Softened cream cheese is crucial: Cold cream cheese won’t mix well, leading to lumps and crumbly balls. I usually leave mine on the counter for 30 minutes before starting.
- Don’t over-crush the Oreos: Too fine and you end up with a paste; too coarse and the balls won’t hold together well. Just aim for fine crumbs with a bit of texture.
- Chill before dipping: This step is non-negotiable. Cold balls dipped in warm chocolate help keep their shape and ensure a smooth coat.
- Use a fork to dip: It helps you control the coating and makes it easier to let excess chocolate drip off.
- Multi-task with chilling: While the balls chill, melt your chocolate or prep toppings to save time.
I once rushed through chilling and ended up with a melted mess instead of neat little balls—lesson learned the hard way! Also, if your chocolate is too thick, add a teaspoon of coconut oil or butter to loosen it up. This makes for a glossy finish and smooth coating. Lastly, store these treats in an airtight container to keep them fresh and prevent the coating from sweating.
Variations & Adaptations
This easy irresistible gluten-free Oreo balls recipe is a great base to customize and make your own:
- Peanut Butter Oreo Balls: Mix in 3 tablespoons of creamy peanut butter with the cream cheese for a nutty twist.
- Mint Oreo Balls: Use mint-flavored gluten-free Oreos or add 1/2 teaspoon peppermint extract to the mix for a refreshing flavor.
- Vegan Version: Swap cream cheese for a plant-based cream cheese and use dairy-free chocolate chips for coating.
- White Chocolate Coating: Use melted white chocolate instead of dark or semi-sweet for a sweeter, creamier finish. Add a sprinkle of crushed nuts for texture.
- Seasonal Twist: In fall, add a pinch of cinnamon or pumpkin pie spice to the mixture to give it a cozy vibe.
I personally tried adding a splash of espresso powder once, which gave these Oreo balls a subtle mocha flavor—totally unexpected but delicious. Also, if you want to skip the chocolate coating, simply roll the balls in cocoa powder or crushed nuts for a no-fuss finish.
Serving & Storage Suggestions
These gluten-free Oreo balls are best served chilled or at room temperature, depending on your preference. I usually take them out of the fridge about 10 minutes before serving to soften slightly—they’re easier to bite into that way.
They make a perfect sweet snack on their own or paired with a cup of coffee, tea, or even a cold glass of milk. For parties, arrange them on a pretty platter with some fresh berries or alongside other bite-sized treats like these gooey cinnamon roll-ups on a stick for a fun dessert spread.
Store leftover Oreo balls in an airtight container in the refrigerator for up to one week. They also freeze well—just place them in a single layer on a tray, freeze until firm, then transfer to a freezer bag. To thaw, leave them in the fridge overnight or let them sit at room temperature for 20-30 minutes.
Over time, the flavors get even better as the cream cheese and Oreo crumbs meld, making these treats a great make-ahead dessert option for busy days.
Nutritional Information & Benefits
Per serving (1 Oreo ball, about 20 grams):
| Calories | 90-100 kcal |
|---|---|
| Fat | 6 g |
| Carbohydrates | 9 g |
| Sugar | 7 g |
| Protein | 1 g |
These treats bring a little indulgence without overloading on sugar or fat, especially when using quality dark chocolate. The gluten-free Oreos make this recipe accessible for those with gluten intolerance, and cream cheese offers a creamy texture with some protein and calcium.
If you opt for dairy-free cream cheese and chocolate, they become suitable for vegan diets as well. Just note that they do contain dairy and gluten-free processed ingredients, so always check labels if allergies are a concern.
From a wellness perspective, these Oreo balls are best enjoyed as an occasional treat—perfect for satisfying sweet cravings while keeping things simple and homemade.
Conclusion
This easy irresistible gluten-free Oreo balls recipe truly hits that sweet spot between fuss-free and indulgent. Whether you’re scrambling for a last-minute dessert or planning ahead for a party, these little bites deliver big on flavor and texture without any gluten worries. I’ve loved how these treats bring people together, from casual game nights to cozy family dinners.
Feel free to tweak the ingredients or toppings to suit your taste—there’s something wonderfully flexible about this recipe that lets you make it your own. And honestly, it’s hard not to smile when you pop one of these into your mouth.
If you try them out, I’d love to hear how you customized the recipe or what moments you shared them at. Sharing food stories is my favorite part, after all. Here’s to many sweet bites ahead!
FAQs About Easy Irresistible Gluten-Free Oreo Balls
Can I make these Oreo balls ahead of time?
Absolutely! They taste even better after chilling overnight. Just store them in an airtight container in the fridge until ready to serve.
What’s the best way to crush the gluten-free Oreos?
A food processor is quickest, but sealing them in a bag and crushing with a rolling pin works perfectly well too.
Can I use regular Oreos instead of gluten-free?
Yes, regular Oreos will work fine if gluten isn’t a concern. The texture and flavor remain just as delicious.
How do I prevent the Oreo balls from falling apart while dipping?
Chilling the formed balls for at least 30 minutes before dipping is key. Also, use softened cream cheese and ensure the mixture is well combined.
Are there any allergy-friendly alternatives?
You can swap cream cheese for vegan cream cheese and use dairy-free chocolate for a vegan and dairy-free version. Just check all ingredient labels for allergens.
Pin This Recipe!

Easy Irresistible Gluten-Free Oreo Balls

A quick and easy no-bake dessert featuring gluten-free Oreo cookies and cream cheese, coated in melted chocolate. Perfect for last-minute treats and gluten-sensitive guests.
- Prep Time: 10 minutes
- Cook Time: 10 minutes
- Total Time: 20 minutes
- Yield: 20-24 balls 1x
- Category: Dessert
- Cuisine: American
Ingredients
- 24 gluten-free Oreo cookies (about 9 ounces or 255 grams), crushed finely
- 8 ounces (225 grams) cream cheese, softened at room temperature
- 1/4 cup (30 grams) powdered sugar
- 1 teaspoon (5 ml) vanilla extract (optional)
- 8 ounces (225 grams) semi-sweet or dark chocolate chips or baking chocolate, melted (use dairy-free chocolate for vegan version)
- Optional toppings: crushed gluten-free Oreos, sprinkles, or shredded coconut
Instructions
- Crush the Oreos: Place about 24 gluten-free Oreos (9 ounces/255 grams) in a food processor and pulse until finely crushed but still a bit textured. If using a rolling pin, seal cookies in a large zip-top bag and gently crush until similar texture is achieved. This should take about 5 minutes.
- Mix with cream cheese: Transfer crushed Oreos to a mixing bowl. Add 8 ounces (225 grams) softened cream cheese and 1/4 cup (30 grams) powdered sugar. Add 1 teaspoon (5 ml) vanilla extract if using. Stir everything together with a spoon or spatula until well combined and uniform. This step usually takes 3-5 minutes. The mixture should be sticky but firm enough to shape. If too soft, pop it in the fridge for 10-15 minutes.
- Form the balls: Wet your hands slightly to prevent sticking. Scoop about 1 tablespoon (15 grams) of mixture and roll into a tight ball. Place each ball on a parchment-lined baking sheet. You should get around 20-24 balls. Chill the tray in the fridge for at least 30 minutes to firm up (overnight chilling improves flavor melding and texture, if you have time).
- Melt the chocolate: In a microwave-safe bowl, melt 8 ounces (225 grams) chocolate chips in 30-second bursts, stirring between each until smooth. Alternatively, use a double boiler for gentle melting. Make sure the chocolate is fluid but not too hot to prevent cracking when dipped.
- Dip and decorate: Using a fork or dipping tool, coat each Oreo ball fully in melted chocolate. Allow excess chocolate to drip back into the bowl, then place the coated ball back on the parchment. Sprinkle crushed Oreo crumbs, sprinkles, or shredded coconut on top while the chocolate is still wet for extra flair. Let the balls set at room temperature or in the fridge until the chocolate hardens, about 20-30 minutes.
Notes
Use softened cream cheese to avoid lumps. Chill balls before dipping to prevent falling apart. If chocolate thickens, gently reheat. For vegan version, substitute cream cheese and chocolate with dairy-free alternatives. Store in airtight container in fridge up to one week or freeze for longer storage.
Nutrition
- Serving Size: 1 Oreo ball (about 2
- Calories: 90100
- Sugar: 7
- Fat: 6
- Carbohydrates: 9
- Protein: 1
Keywords: gluten-free, Oreo balls, no-bake dessert, easy dessert, gluten-free treats, chocolate coated, cream cheese dessert


