Love this? Save it for later!
Share the inspiration with your friends
I pulled the last slice from the bag, and it was barely holding together. Three days old, edges curling, and definitely not going to survive a dunk in soup. I stood there, butter knife in hand, staring at this sad, sad piece of store-bought bread. And honestly? I just couldn’t do it anymore. Not to that slice, and not to myself. So I did what any reasonable person would do at eight o’clock on a Tuesday night—I pulled my sourdough starter out of the fridge and decided to make a loaf right then and there (yes, I know, the timing was questionable).
That first loaf of sourdough sandwich bread came out of the oven around midnight, and I let it cool on the counter while I hovered nearby like some kind of bread guardian. By the time I finally cut into it the next morning, the crust made that perfect crackling sound, and the inside was soft enough to bend without breaking. I made toast that day, and honestly, it changed everything. The butter melted into every nook and cranny, and the edges got golden and crispy while the middle stayed pillowy. That’s when I knew: this was the only sandwich bread I’d ever need. No more store-bought disappointment. Just perfect sourdough sandwich bread, made exactly how I like it.
This recipe is my go-to for everyday toasting, lunchbox sandwiches, and even French toast on lazy weekends. It’s a naturally leavened loaf that doesn’t require complicated folding or a baking stone. Just a simple, straightforward method that yields a soft crumb with just enough tang to keep things interesting. If you’ve been intimidated by sourdough before, this is the recipe that will change your mind. Trust me on this one.
Why You’ll Love This Recipe
Let me tell you why this sourdough sandwich bread has earned a permanent spot in my weekly baking rotation. After testing countless recipes (and failing through many, many loaves), I landed on this version, and it’s been consistent every single time.
- Soft, Tender Crumb: Unlike crusty artisan loaves, this bread is designed for sandwiches. It’s soft enough to squish without falling apart, and it holds up beautifully against spreads and fillings.
- Just the Right Tang: The sourdough flavor is present but not overpowering. It adds a subtle complexity that pairs perfectly with both sweet and savory toppings.
- Simple Ingredients: You only need flour, water, sourdough starter, salt, and a bit of butter or oil. No commercial yeast required (though I’ll show you a trick if you want a quicker rise).
- Perfect for Toasting: This bread was practically born to be toasted. It gets gorgeously golden and crispy on the outside while staying soft inside.
- Freezer-Friendly: Bake a couple of loaves and freeze one for later. It thaws beautifully and tastes just as fresh as the day it was baked.
- Family-Approved: Even my picky eaters who usually turn their noses up at “sourdough anything” devour this bread without complaint.
What makes this recipe different from all the others I’ve tried is the hydration level and the addition of a small amount of fat. The butter (or olive oil, if you prefer) keeps the crumb tender and extends the shelf life. Plus, I’ve fine-tuned the fermentation time so you get that signature sourdough tang without having to wait two days. It’s the kind of bread that makes you close your eyes after the first bite—simple, satisfying, and honestly, better than anything you can buy at the store.
What Ingredients You Will Need
This recipe uses simple, wholesome ingredients to deliver that perfect balance of tangy flavor and soft texture. Most of these are probably already in your pantry, which is exactly how I like it.
- Bread Flour (500g / about 4 cups): I highly recommend using bread flour for this recipe. It has a higher protein content than all-purpose flour, which gives the bread better structure and a chewier crumb. If you only have all-purpose flour, it will still work—the bread will just be a little softer and less structured. I personally use King Arthur Bread Flour for the most consistent results.
- Active Sourdough Starter (150g / about ¾ cup): Make sure your starter is bubbly, active, and has been fed within the last 4-8 hours. A hungry, sluggish starter won’t give you the rise you need. I like to feed mine the night before and let it peak overnight at room temperature. If your starter is new or weak, you can add ¼ teaspoon of commercial yeast to help things along—no shame in that game.
- Warm Water (300g / about 1¼ cups): Use filtered or non-chlorinated water if possible. Chlorine can inhibit fermentation and affect the flavor of your sourdough. The water should be lukewarm (around 90-95°F), not hot—you don’t want to kill the good bacteria in your starter.
- Unsalted Butter (28g / 2 tablespoons), softened: This is my secret ingredient for a tender sandwich loaf. The fat coats the gluten strands slightly, making the crumb softer and keeping the bread fresh for longer. You can substitute olive oil or coconut oil if you prefer, but butter gives the best flavor in my opinion.
- Salt (10g / about 1½ teaspoons): Fine sea salt is ideal. Salt not only seasons the bread but also controls fermentation and strengthens the gluten structure. Don’t skip it or reduce it too much—your bread will taste flat and rise poorly.
- Optional: Honey or Sugar (12g / 1 tablespoon): A small amount of sweetener isn’t strictly necessary for sourdough, but it does help with browning and gives the crust a beautiful golden color. It also balances the tanginess slightly. I usually add a tablespoon of honey, but you can skip it if you prefer a more traditional sourdough flavor.
Ingredient Selection Tips: Look for unbleached bread flour if possible—it has a better flavor and structure than bleached flour. For the best results, weigh your ingredients using a kitchen scale rather than measuring cups. Flour can vary wildly in density depending on how it’s scooped, and baking by weight is much more accurate. If you’re new to sourdough, trust me on this one—it makes a huge difference.
Equipment Needed
You don’t need a lot of fancy equipment to make this bread, which is part of what I love about this recipe. Here’s what you’ll need:
- 9×5-inch Loaf Pan: A standard loaf pan is perfect for this recipe. I prefer a light-colored metal pan because it conducts heat evenly. Dark pans can cause the crust to brown too quickly, so if that’s what you have, just keep an eye on it during baking.
- Digital Kitchen Scale: Honestly, this is non-negotiable for consistent sourdough baking. A good scale costs about $15 and will save you from endless frustration. I use mine for everything now—even measuring water.
- Large Mixing Bowl: Any bowl that’s big enough to hold the dough and allow for mixing without flour flying everywhere will work. I use a ceramic bowl that retains heat well.
- Bench Scraper or Dough Scraper: This little tool is invaluable for handling sticky dough and cleaning your work surface. I have a plastic one that cost me $5 and it’s one of my most-used kitchen tools.
- Plastic Wrap or a Clean Kitchen Towel: For covering the dough during bulk fermentation and proofing. A damp towel works great if you live in a dry climate.
- Cooling Rack: Essential for cooling the bread properly. If you leave the loaf in the pan, the steam will make the crust soggy. A wire rack allows air to circulate and keeps the crust crisp.
If you don’t have a loaf pan, you can shape the dough into a free-form boule and bake it on a parchment-lined baking sheet. The baking time will be slightly shorter, so start checking for doneness around 35 minutes. I’ve done this in a pinch, and it works just fine—though you won’t get those perfect sandwich slices.
Preparation Method
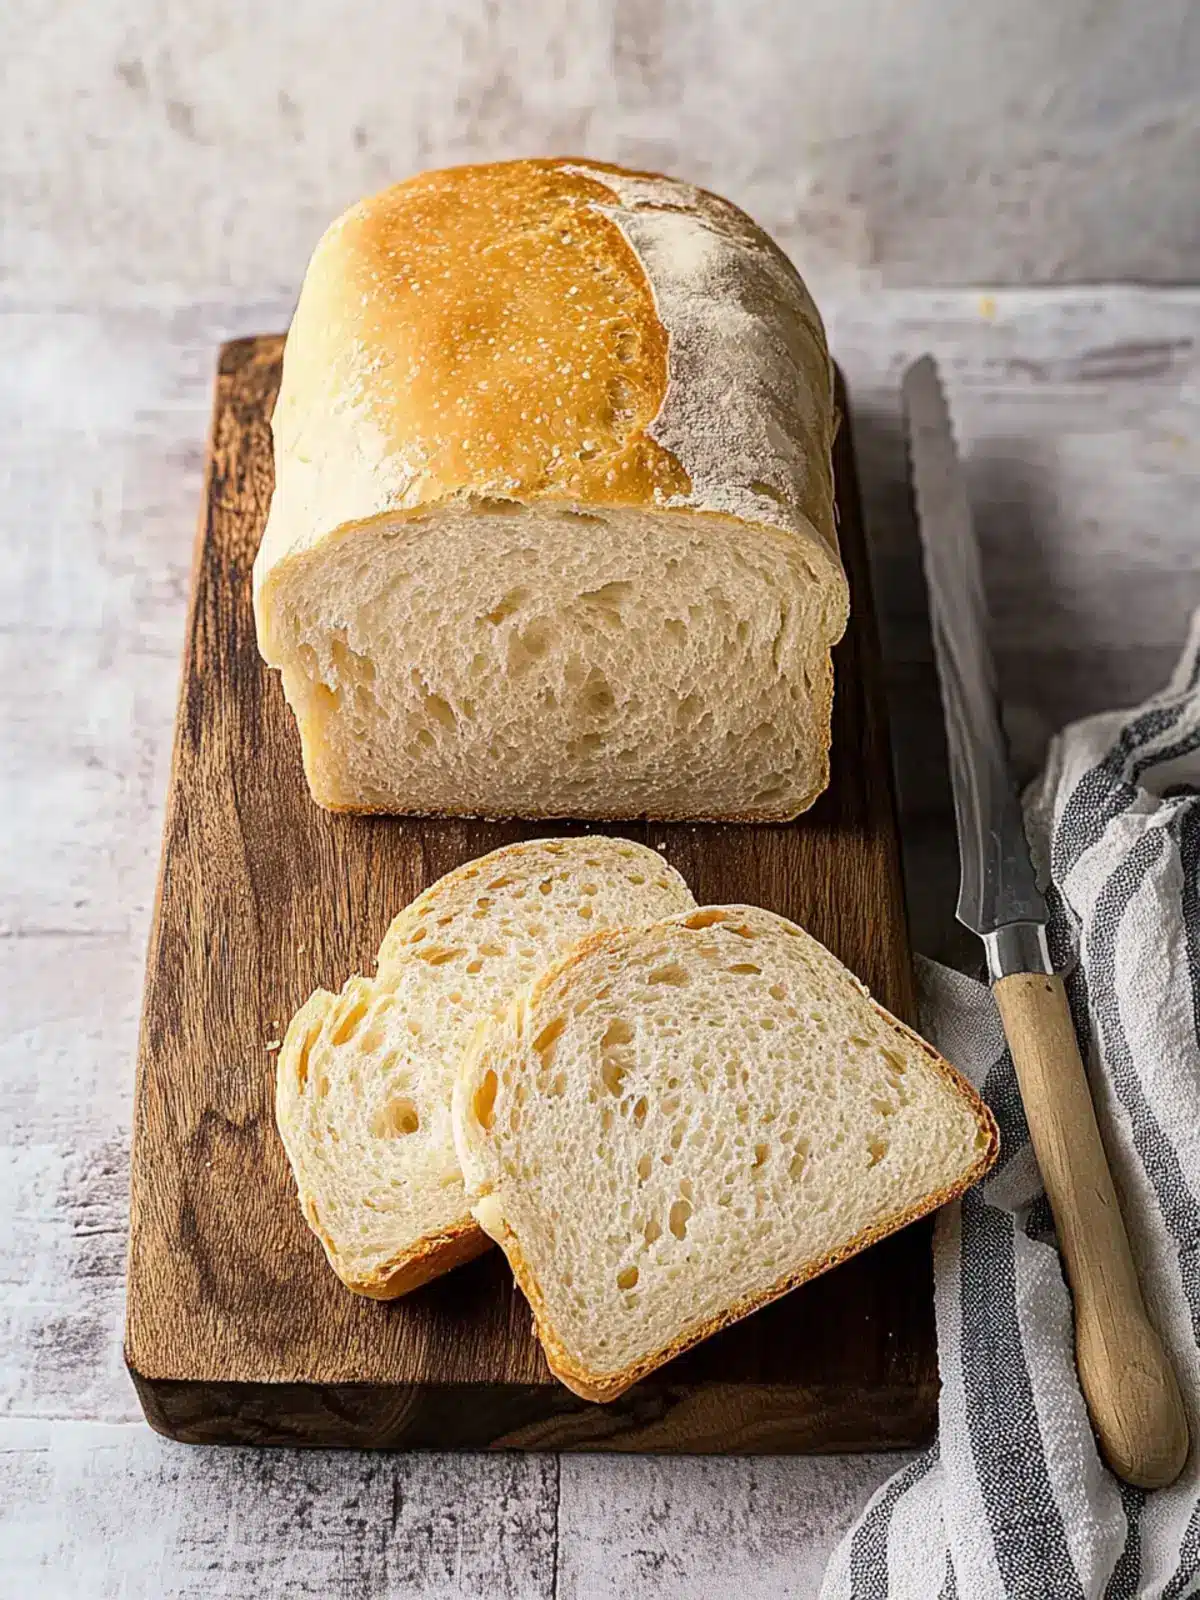
Let’s get to the fun part—actually making the bread. I’ll walk you through each step with the little details that make the difference between a good loaf and a great one.
Step 1: Mix the Dough (10 minutes)
In a large mixing bowl, combine 150g of active sourdough starter and 300g of warm water. Stir until the starter is mostly dissolved into the water—it doesn’t have to be perfect, just well distributed. Add 500g of bread flour, 10g of salt, 28g of softened butter, and 12g of honey (if using). Mix everything together with your hands or a dough whisk until no dry flour remains. The dough will look shaggy and rough at this point, and that’s exactly what we want. Cover the bowl with plastic wrap or a damp towel and let it rest for 30 minutes. This autolyse step allows the flour to fully hydrate and starts developing gluten without any effort on your part.
Step 2: Stretch and Fold (2 minutes per fold, 3 rounds)
After the rest, it’s time for some gentle manipulation. With wet hands (trust me, this helps with sticking), grab one side of the dough, stretch it up, and fold it over the top. Rotate the bowl a quarter turn and repeat, doing this about 4 times total. Cover the bowl and let it rest for 30 minutes. Repeat this stretch-and-fold process two more times, waiting 30 minutes between each round. By the third round, you’ll notice the dough becoming smoother, stronger, and more elastic. It should feel alive and responsive, not sticky and slack.
Step 3: Bulk Fermentation (4-6 hours at room temperature)
Now comes the waiting game. Cover the bowl and let the dough rise at room temperature (around 70-75°F) until it has increased in volume by about 50-75%. This usually takes 4-6 hours, depending on the temperature of your kitchen and the strength of your starter. The dough should look puffy, have a few bubbles on the surface, and feel airy when you poke it. If it’s cold in your house, it might take longer—be patient. If it’s hot, check it earlier. You’re looking for the dough to have visibly expanded and feel lighter, not necessarily doubled in size.
Step 4: Shape the Dough (5 minutes)
Lightly flour your work surface and turn the dough out gently. Try not to deflate it too much—you want to preserve those lovely air bubbles. Pat the dough into a rough rectangle, about 8 inches wide and 10 inches long. Fold the top third down toward the center, then fold the bottom third up like a letter. Starting from the top, roll the dough tightly toward you, pinching the seam closed as you go. Place the shaped loaf seam-side down into your greased 9×5-inch loaf pan. It should fill the pan about halfway.
Step 5: Final Proof (2-4 hours)
Cover the pan with a lightly oiled piece of plastic wrap or a damp towel. Let the dough rise until it crests about 1 inch above the rim of the pan. This can take anywhere from 2 to 4 hours, depending on temperature. The dough should feel pillowy and spring back slowly when you poke it gently. If it springs back immediately, it needs more time. If it doesn’t spring back at all, it might be over-proofed. You want that sweet spot where it holds a slight indent.
Step 6: Bake the Bread (40-45 minutes)
Preheat your oven to 375°F about 30 minutes before you plan to bake. When the dough is ready, you can optionally brush the top with an egg wash (1 egg beaten with 1 tablespoon of water) for a shiny, golden crust. I usually skip this and just spritz the top with a little water from a spray bottle—it creates steam in the oven and gives a nice, crackly crust. Bake the loaf for 40-45 minutes, until the top is deep golden brown and the internal temperature reaches 200-205°F on an instant-read thermometer. If the top is browning too quickly, tent it loosely with aluminum foil for the last 10-15 minutes.
Step 7: Cool Completely (1-2 hours)
This is the hardest part, I know. Remove the loaf from the pan immediately and transfer it to a wire rack. Let it cool completely before slicing—at least 1 to 2 hours. If you cut into it while it’s still warm, the crumb will be gummy and the bread will compress instead of slicing cleanly. I’ve learned this the hard way more times than I care to admit. The bread continues to set as it cools, and the flavor develops further. Trust the process.
Cooking Tips & Techniques
After making this sourdough sandwich bread more times than I can count, I’ve picked up a few tricks that make the process smoother and the results more consistent. Here are the ones that matter most:
Temperature Matters More Than You Think
Sourdough is a living thing, and it responds to temperature. If your kitchen is cold (below 68°F), fermentation will slow way down. I’ve had loaves take 12 hours to bulk ferment in the winter. If you’re in a hurry, try putting the dough in your oven with just the light on—it creates a warm, draft-free environment that speeds things up nicely. On the flip side, if it’s hot (above 80°F), fermentation can race ahead, and you risk over-proofing. In summer, I use cooler water and check the dough more frequently.
Don’t Over-Flour Your Work Surface
When shaping the dough, use just enough flour to prevent sticking—too much flour will dry out the dough and create streaks of raw flour in the finished bread. I use a light dusting and keep a bench scraper handy to help with any stubborn sticky spots. Wet hands work better than floured hands for handling sourdough, so keep a small bowl of water nearby.
The Poke Test Never Lies
Instead of relying solely on time, use the poke test to check if your dough is proofed. Dust your finger with flour and gently poke the dough about half an inch deep. If the indent slowly springs back and leaves a slight mark, it’s ready. If it springs back immediately, it needs more time. If it doesn’t spring back at all, it’s over-proofed and might collapse in the oven. This test takes practice, but it’s the most reliable way to judge doneness.
Steam Is Your Friend
For a crispier crust, create steam in the oven during the first 15 minutes of baking. I do this by placing a small metal pan filled with hot water on the bottom rack of the oven, or by spritzing the loaf with water right before closing the door. The steam keeps the crust soft long enough for the bread to fully expand, then evaporates to allow browning. It’s a small step that makes a noticeable difference.
My Biggest Failure
I once forgot to add the salt to a batch of dough. The bread rose beautifully during bulk fermentation—almost too beautifully—but when I baked it, the loaf spread out like a pancake and had absolutely no flavor. Salt isn’t just for taste; it strengthens the gluten and controls fermentation. Don’t skip it, and don’t forget it like I did. That loaf went straight to the compost bin, and I still think about it sometimes.
Variations & Adaptations
One of the best things about this sourdough sandwich bread recipe is how adaptable it is. Here are some of my favorite variations:
Whole Wheat Version
Swap 200g of the bread flour with whole wheat flour. You’ll need to add an extra 25-30g of water since whole wheat absorbs more liquid. The loaf will be denser and nuttier, with a more pronounced sourdough tang. I love this version for hearty sandwiches or avocado toast. It pairs beautifully with a bowl of cozy creamy vegan butter bean soup for a filling meal.
Seeded Sandwich Bread
Add ¼ cup of your favorite seeds (sesame, poppy, sunflower, or pumpkin) to the dough during the initial mixing. You can also press additional seeds onto the top of the loaf before baking for a beautiful, crunchy crust. I love a combination of sesame and poppy seeds—it reminds me of the everything bagels I can’t stop buying.
Herb and Garlic Bread
Mix in 2 tablespoons of finely chopped fresh rosemary or thyme, along with 3 cloves of minced garlic (sautéed briefly in a little olive oil to mellow the flavor). This makes an incredible bread for serving alongside pasta or soup. Try it with quick creamy spinach pasta for a dinner that comes together in no time.
Gluten-Free Adaptation
I won’t lie—this is tricky with sourdough, but it’s possible. Use a gluten-free flour blend that contains xanthan gum, and increase the water by about 20%. The texture won’t be identical, but you can still get a decent sandwich loaf. I’ve had better luck with sorghum flour blends than rice flour blends for a more bread-like crumb.
Dairy-Free Option
Replace the butter with an equal amount of olive oil or coconut oil. Olive oil adds a lovely fruity note that works wonderfully in savory sandwiches. Coconut oil keeps the crumb tender without adding any noticeable coconut flavor (especially if you use refined coconut oil).
Serving & Storage Suggestions
This sourdough sandwich bread is incredibly versatile, and I find myself reaching for it for almost every meal. Here’s how I like to serve and store it:
Serving Ideas
- Classic Toast: Slice thick (about ¾ inch), toast until golden, and slather with salted butter. It’s simple, but honestly, it’s perfection.
- Sandwiches: This bread holds up beautifully to hearty fillings. Try it with roasted turkey, avocado, and sprouts, or go classic with ham and cheese. It’s also amazing for chicken alfredo garlic bread if you want to switch things up.
- French Toast: Day-old slices are ideal for French toast. The tangy sourdough flavor pairs beautifully with maple syrup and fresh berries. I make this for Sunday brunch and it’s always a hit.
- Bread Bowls: Hollow out a small round loaf and fill it with soup or chili. The crust is sturdy enough to hold up without getting soggy.
Storage Instructions
- Room Temperature: Store the bread cut-side down on a cutting board, wrapped in a clean kitchen towel. It will stay fresh for 3-4 days. Avoid storing it in plastic bags—the crust will become soft and the bread will mold faster.
- Refrigerator: I don’t recommend refrigerating sourdough bread. The cold temperature actually speeds up staling. If you can’t finish it in time, freeze it instead.
- Freezer: Slice the cooled loaf, place the slices in a freezer-safe bag, and freeze for up to 3 months. Toast the slices directly from frozen—no need to thaw first. This is my favorite method for always having fresh bread on hand without baking every few days.
Reheating Tips
To refresh a loaf that’s a day or two old, wrap it in aluminum foil and warm it in a 350°F oven for 10 minutes. The crust will crisp up again, and the inside will be soft and warm. It’s almost like having fresh-baked bread all over again.
Nutritional Information & Benefits
While I wouldn’t call sourdough bread a health food, it does have some nutritional advantages over commercially yeasted breads. Here’s a rough breakdown per slice (based on 16 slices per loaf):
- Calories: Approximately 150-170 per slice
- Protein: 5-6 grams
- Carbohydrates: 30-35 grams
- Fiber: 1-2 grams
- Fat: 2-3 grams (with butter)
Health Benefits
- Easier to Digest: The long fermentation process breaks down some of the gluten and phytic acid, making the bread easier on your digestive system. Many people who have mild gluten sensitivities find they can tolerate sourdough better than regular bread.
- Lower Glycemic Index: The lactic acid produced during fermentation helps slow down the absorption of carbohydrates, leading to a more gradual rise in blood sugar. This makes it a better choice for blood sugar management compared to white bread.
- Gut Health: While most of the beneficial bacteria are killed during baking, the prebiotic fibers in sourdough can still support a healthy gut microbiome.
- Nutrient Availability: Fermentation increases the bioavailability of minerals like iron, zinc, and magnesium, meaning your body can actually use them more effectively.
Dietary Considerations
This bread contains gluten and dairy (if using butter). For a dairy-free version, simply swap the butter for olive oil. For a lower-carb option, this isn’t the recipe for you—but it’s perfect for anyone looking for wholesome, real-food bread without preservatives or additives.
Conclusion
This perfect sourdough sandwich bread has become a staple in my kitchen, and I have a feeling it will become one in yours too. It’s the kind of recipe that rewards patience with a loaf that’s far greater than the sum of its parts—simple flour, water, starter, and salt transformed into something genuinely satisfying. Whether you’re making toast for a quiet morning, building the ultimate sandwich for lunch, or serving it alongside a cozy dinner, this bread delivers every single time.
I love that this recipe gives you control over what goes into your bread—no preservatives, no dough conditioners, just real ingredients and a little bit of time. And honestly, there’s something deeply satisfying about pulling a golden loaf out of your own oven, knowing you made it from scratch. It never gets old.
I’d love to hear how your loaf turns out! Did you try any of the variations? Did you discover a new favorite way to serve it? Drop a comment below and share your experience—I read every single one, and your feedback helps me create better recipes for all of us. And if you know someone who’s been intimidated by sourdough, send them this recipe. Let’s get more people baking bread at home, one loaf at a time.
Frequently Asked Questions
Can I use all-purpose flour instead of bread flour?
Yes, you can. The bread will be slightly softer and less structured, but it will still taste great. If you’re using all-purpose flour, you might want to reduce the water by about 10-15 grams since it absorbs less liquid than bread flour.
My dough isn’t rising. What am I doing wrong?
This is usually a sign that your sourdough starter isn’t active enough. Make sure your starter is bubbly and passes the float test (a spoonful should float in water) before using it. Also check the temperature of your kitchen—if it’s below 70°F, fermentation will be very slow. Try placing the bowl in a warm spot or using slightly warmer water next time.
How do I get a softer crust?
If you prefer a softer crust, brush the hot loaf with melted butter as soon as it comes out of the oven. You can also store the bread in a paper bag or wrap it in a clean kitchen towel, which traps some moisture and softens the crust slightly.
Can I speed up the process with commercial yeast?
Absolutely. If you’re short on time, you can add ¼ teaspoon of instant yeast along with the starter. The bread will still have some sourdough flavor (from the starter) but will rise much faster. Just keep an eye on it—it can over-proof in a hurry with the added yeast.
Why is my bread dense and gummy?
Dense, gummy bread is usually a sign of under-proofing or cutting into the loaf too early. Make sure the dough has fully risen during both bulk fermentation and final proofing. And I know it’s hard, but let the bread cool completely before slicing—at least 1 to 2 hours. The crumb needs time to set properly.
Pin This Recipe!
Perfect Sourdough Sandwich Bread – Easy Homemade Recipe

This naturally leavened sourdough sandwich bread has a soft, tender crumb with just the right amount of tang. Perfect for toasting, sandwiches, and French toast, this simple recipe yields a consistently delicious loaf that’s better than store-bought.
- Prep Time: 30 minutes
- Cook Time: 45 minutes
- Total Time: 8-12 hours (including fermentation and proofing)
- Yield: 16 servings 1x
- Category: Bread
- Cuisine: American
Ingredients
- 500g bread flour (about 4 cups)
- 150g active sourdough starter (about ¾ cup)
- 300g warm water (about 1¼ cups), 90-95°F
- 28g unsalted butter, softened (2 tablespoons)
- 10g fine sea salt (about 1½ teaspoons)
- 12g honey or sugar, optional (1 tablespoon)
Instructions
- Mix the Dough: In a large mixing bowl, combine 150g active sourdough starter and 300g warm water. Stir until the starter is mostly dissolved. Add 500g bread flour, 10g salt, 28g softened butter, and 12g honey (if using). Mix with your hands or a dough whisk until no dry flour remains. Cover and let rest for 30 minutes.
- Stretch and Fold: With wet hands, grab one side of the dough, stretch it up, and fold it over the top. Rotate the bowl a quarter turn and repeat, doing this about 4 times total. Cover and rest for 30 minutes. Repeat this stretch-and-fold process two more times, waiting 30 minutes between each round.
- Bulk Fermentation: Cover the bowl and let the dough rise at room temperature (70-75°F) until it has increased in volume by about 50-75%, usually 4-6 hours. The dough should look puffy, have a few bubbles on the surface, and feel airy when poked.
- Shape the Dough: Lightly flour your work surface and turn the dough out gently. Pat into a rough rectangle about 8 inches wide and 10 inches long. Fold the top third down toward the center, then fold the bottom third up like a letter. Starting from the top, roll the dough tightly toward you, pinching the seam closed. Place seam-side down into a greased 9×5-inch loaf pan.
- Final Proof: Cover the pan with lightly oiled plastic wrap or a damp towel. Let the dough rise until it crests about 1 inch above the rim of the pan, about 2-4 hours. The dough should feel pillowy and spring back slowly when poked gently.
- Bake: Preheat oven to 375°F about 30 minutes before baking. Optionally brush the top with an egg wash (1 egg beaten with 1 tablespoon water) or spritz with water. Bake for 40-45 minutes until deep golden brown and internal temperature reaches 200-205°F. If browning too quickly, tent with foil for the last 10-15 minutes.
- Cool: Remove the loaf from the pan immediately and transfer to a wire rack. Cool completely before slicing, at least 1-2 hours.
Notes
For best results, weigh ingredients using a kitchen scale. Use filtered or non-chlorinated water. If your starter is weak, add ¼ teaspoon instant yeast. For a softer crust, brush hot loaf with melted butter. Store at room temperature cut-side down in a kitchen towel for 3-4 days, or freeze sliced for up to 3 months.
Nutrition
- Serving Size: 1 slice (based on 16
- Calories: 160
- Sugar: 1
- Sodium: 220
- Fat: 2.5
- Saturated Fat: 1.5
- Carbohydrates: 32
- Fiber: 1.5
- Protein: 5.5
Keywords: sourdough sandwich bread, homemade sourdough bread, soft sourdough loaf, easy sourdough recipe, sandwich bread from scratch


