Love this? Save it for later!
Share the inspiration with your friends
The butter was already sizzling in the pan when I realized I had no idea what I was doing. I had three bags of frozen garlic bread in the freezer and a family that was starting to look at me with that “please not again” expression. So there I was, staring at a bowl of flour and warm milk, wondering if I was about to waste a perfectly good Friday evening on something that would probably end up dense as a hockey puck. Honestly, I almost gave up and ordered pizza.
But I didn’t. And what came out of that oven was so ridiculously good that my husband actually asked if I’d bought them from a bakery. That moment of disbelief is exactly why I need to share these fluffy garlic-swirl dinner rolls with you. They’re not just bread—they’re the kind of warm, buttery, pull-apart goodness that makes people close their eyes while they chew. The garlic isn’t just sprinkled on top; it’s swirled right through the dough, so every single bite has that savory punch. I’ve made them four times in the last two weeks, and each time they disappear faster than I can say “pass the butter.”
These rolls have become my secret weapon for turning an ordinary dinner into something that feels special. They’re the reason my kids now argue over who gets the last one, and the reason I’ve stopped buying store-bought garlic bread entirely. Trust me—once you smell these baking in your kitchen, you’ll understand why I couldn’t keep the recipe to myself.
Why You’ll Love This Recipe
I’ve tested this recipe more times than I’d like to admit. The first batch was too dense. The second was too garlicky (if that’s even possible). But by the third try, I hit that perfect sweet spot—soft, pillowy rolls with just the right amount of garlic butter woven through every layer. Here’s why I think you’re going to love this version:
- Quick & Easy: From start to finish, these rolls come together in under two hours. Most of that time is hands-off while the dough rises. You can prep them while your main dish simmers.
- Simple Ingredients: You probably already have everything in your pantry. No specialty flours or hard-to-find ingredients—just butter, garlic, flour, milk, and a few pantry staples.
- Perfect for Any Occasion: These rolls shine alongside a cozy bowl of soup, a hearty pasta dish, or even just a simple salad. They’re also the star of holiday dinners and potlucks.
- Crowd-Pleaser: I’ve served these to picky kids, garlic-loving adults, and everyone in between. The verdict is always the same—total silence followed by requests for the recipe.
- Unbelievably Delicious: The texture is what gets me every time. Soft, fluffy, with a slight chew on the outside and a tender, airy interior. And that garlic swirl? It’s pure magic.
What makes these rolls different from every other garlic bread recipe out there is the technique. Instead of just brushing garlic butter on top, I roll the garlic butter right into the dough. This means every single bite—not just the top—gets that savory, buttery goodness. It’s a small change that makes a huge difference. Plus, the dough itself is enriched with a little sugar and egg, giving it that soft, brioche-like texture that’s impossible to resist.
These rolls aren’t just good—they’re the kind of bread that makes you wonder why you ever bought the frozen stuff. They’re comfort food at its finest, made from scratch with love and a whole lot of garlic.
What Ingredients You Will Need
This recipe uses simple, everyday ingredients to create something truly special. The star of the show is, of course, the garlic, but every component plays a role in building that soft, fluffy texture and rich flavor. Here’s what you’ll need:
For the Dough
- 3 ½ cups (440g) all-purpose flour – I use King Arthur Flour for consistent results, but any good brand works. Spoon and level your flour for the most accurate measurement.
- 1 cup (240ml) warm milk – Whole milk gives the softest rolls, but 2% works too. The milk should be warm to the touch—about 110°F—not hot enough to kill the yeast.
- 2 ¼ teaspoons (7g) active dry yeast – One standard packet. Make sure it’s fresh and not expired, or your rolls won’t rise properly.
- 2 tablespoons (25g) granulated sugar – Just enough to feed the yeast and add a hint of sweetness that balances the garlic.
- 1 large egg – Room temperature is best. It adds richness and helps create that tender crumb.
- 3 tablespoons (42g) unsalted butter, softened – For the dough itself. Salted butter works too, just reduce the added salt slightly.
- 1 teaspoon salt – Fine sea salt or table salt. Don’t skip it—salt controls yeast activity and enhances flavor.
For the Garlic Swirl
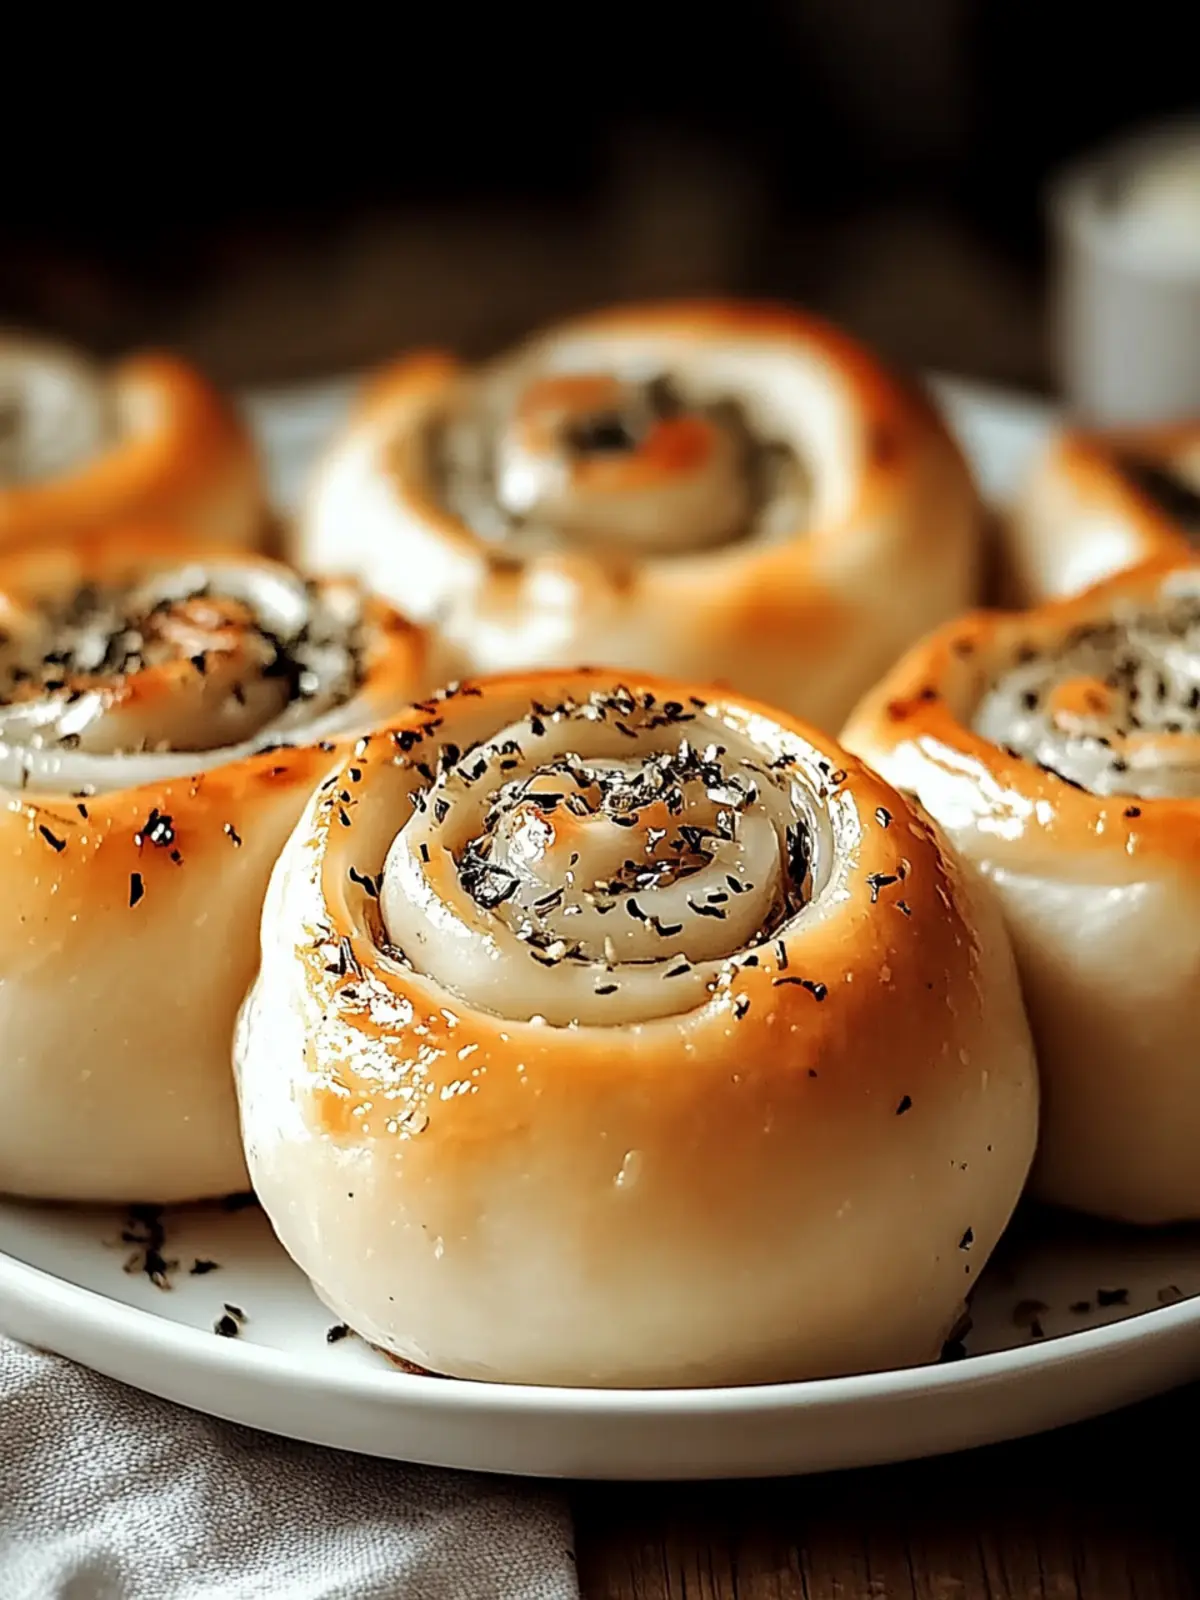
- 4 tablespoons (56g) unsalted butter, softened – The base of our garlic swirl. Make sure it’s really soft so it spreads easily.
- 4-5 cloves garlic, minced – Fresh garlic is non-negotiable here. I’ve tried jarred minced garlic, and it just doesn’t have the same punch. Use a microplane for the finest mince.
- ¼ teaspoon salt – To season the garlic butter.
- 1 tablespoon fresh parsley, finely chopped – Optional but highly recommended. It adds freshness and a pop of color.
For the Topping
- 2 tablespoons (28g) unsalted butter, melted – For brushing on top right out of the oven. This gives them that gorgeous golden sheen.
- Flaky sea salt (optional) – A sprinkle of Maldon salt right before serving takes these over the top.
Substitution Notes: If you’re dairy-free, you can use plant-based butter and unsweetened oat milk. The texture will be slightly different but still delicious. For a vegan version, swap the egg with a flax egg (1 tablespoon ground flaxseed mixed with 3 tablespoons water). Fresh garlic is key here—don’t substitute garlic powder, or you’ll lose that beautiful swirl effect.
Equipment Needed
You don’t need a fancy kitchen to make these rolls, but a few key tools will make the process smoother. Here’s what I use:
- Stand mixer with dough hook – This is my favorite way to knead dough. It saves your arms and gives you consistent results. If you don’t have one, you can absolutely knead by hand—it’ll just take about 10 minutes of elbow grease.
- Large mixing bowl – For proofing the dough. Glass or ceramic works best because they hold warmth better than metal.
- 9×13-inch baking dish – I use a metal or ceramic dish. Glass works too, but you may need to increase the baking time by a few minutes.
- Rolling pin – For rolling out the dough into that rectangle. A standard rolling pin does the job perfectly.
- Pastry brush – For brushing the garlic butter onto the dough and for the final butter wash. Silicone bristles are easiest to clean.
- Kitchen scale – I highly recommend weighing your flour for accuracy, but measuring cups work if you spoon and level properly.
- Clean kitchen towel – For covering the dough while it rises. A lightweight cotton towel works great.
If you don’t have a stand mixer, don’t worry. I’ve made these rolls by hand plenty of times, and they turn out just as good. The key is to knead until the dough is smooth and elastic—about 8-10 minutes by hand. Your arms might get a workout, but the results are worth it.
Preparation Method
Let’s get baking. I’ll walk you through every step, including the little details that make all the difference. Take your time with the dough—good bread is patient bread.
- Activate the yeast: In a small bowl, combine the warm milk (110°F) with the sugar. Sprinkle the yeast on top and let it sit for 5-7 minutes until it becomes foamy. If it doesn’t foam, your milk was too hot or your yeast is dead. Start over with fresh yeast.
- Mix the dough: In the bowl of your stand mixer, combine the flour and salt. Add the yeast mixture, the egg, and the softened butter. Mix on low speed with the dough hook until everything comes together into a shaggy dough. Increase to medium speed and knead for 6-7 minutes. The dough should be smooth, slightly tacky, and pull away from the sides of the bowl. If it’s too sticky, add a tablespoon of flour at a time—but don’t overdo it.
- First rise: Shape the dough into a ball and place it in a lightly greased bowl. Cover with a clean kitchen towel and let it rise in a warm, draft-free spot for about 1 hour, or until doubled in size. I usually set my oven to the “proof” setting or just place the bowl near a sunny window.
- Make the garlic swirl: While the dough rises, combine the softened butter, minced garlic, salt, and parsley in a small bowl. Mix until smooth and well combined. Set aside at room temperature—don’t refrigerate it, or it’ll be too hard to spread.
- Roll out the dough: Once the dough has doubled, punch it down gently to release the air. Turn it out onto a lightly floured surface. Roll it into a rectangle about 12×18 inches. Don’t stress about perfect edges—rough is fine. The rectangle should be about ¼-inch thick.
- Spread the garlic butter: Using an offset spatula or the back of a spoon, spread the garlic butter mixture evenly over the entire surface of the dough. Go all the way to the edges. This is where the magic happens—every swirl will carry that garlic goodness.
- Roll and cut: Starting from the long side, roll the dough up tightly like a jelly roll. Pinch the seam to seal. Using a sharp knife or bench scraper, cut the log into 12 equal pieces—each about 1 ½ inches wide. Place the rolls cut-side up in a greased 9×13-inch baking dish, arranging them in 4 rows of 3.
- Second rise: Cover the dish with the towel again and let the rolls rise for another 30-40 minutes. They should puff up and fill the dish, touching each other. This is what gives them that pull-apart texture.
- Bake: Preheat your oven to 375°F (190°C). Bake the rolls for 20-25 minutes, until the tops are golden brown and the internal temperature reaches 190°F. If the tops are browning too quickly, tent loosely with foil after 15 minutes.
- Finish with butter: As soon as the rolls come out of the oven, brush the tops with the melted butter. Sprinkle with flaky sea salt if you’re using it. Let them cool in the dish for 5-10 minutes before serving. The smell alone will have everyone hovering in the kitchen.
Pro tip: For extra soft tops, cover the baked rolls with a clean towel for the first 5 minutes of cooling. The steam will soften the crust beautifully.
Cooking Tips & Techniques
I’ve learned a few things the hard way so you don’t have to. Here are my best tips for perfect garlic-swirl rolls every single time:
Temperature matters more than you think. I ruined my first batch by using milk that was too hot—it killed the yeast and I ended up with hockey pucks. Use a thermometer if you have one. If you don’t, the milk should feel like warm bath water, not hot coffee. Same goes for your rising environment—too cold and the dough takes forever, too hot and the yeast dies. Aim for a cozy 75-80°F spot.
Don’t skimp on the kneading. I know it’s tempting to stop when the dough looks “okay,” but under-kneaded dough leads to dense rolls. The dough should be smooth, elastic, and slightly tacky—not sticky. If it tears when you stretch it, keep kneading. The windowpane test is your friend: stretch a small piece of dough thin enough to see light through. If it doesn’t tear, you’re good.
Garlic is a diva. Fresh garlic is essential here. I tried using garlic powder once (because I was lazy), and the swirl was barely noticeable. Also, mince your garlic really fine—large chunks can burn in the oven and turn bitter. A microplane grater is my secret weapon for this.
Roll tight, but not too tight. When you roll the dough up, aim for a snug but not tight roll. Too tight and the centers won’t cook through. Too loose and you’ll get gaps between the swirls. Think of it like rolling a yoga mat—firm but gentle.
Timing is everything. I like to start these rolls about 2 hours before I want to serve dinner. The first rise takes an hour, the second rise takes 30-40 minutes, and baking takes 20-25 minutes. That gives you a 10-minute buffer for unexpected delays. And if you’re serving them with a soup or stew, like my cozy creamy chicken pot pie soup, time the baking so the rolls come out right when you’re ready to eat.
Variations & Adaptations
Once you’ve mastered the basic recipe, the possibilities are endless. Here are a few variations I’ve tried and loved:
Cheesy Garlic Rolls: After spreading the garlic butter, sprinkle ½ cup of shredded mozzarella or Parmesan over the dough before rolling. The cheese melts into the swirls and creates these incredible gooey pockets. My kids beg for these every time.
Herb & Garlic Rolls: Add 1 tablespoon of dried Italian seasoning or fresh rosemary to the garlic butter. The herbs complement the garlic beautifully and make the rolls smell even more amazing. These are perfect alongside a big bowl of creamy chicken alfredo garlic bread.
Spicy Garlic Rolls: Stir ½ teaspoon of red pepper flakes or a pinch of cayenne into the garlic butter. The heat builds slowly and pairs surprisingly well with the buttery richness. Great for serving with a hearty effortless crock pot beef bites.
Whole Wheat Version: Replace half the all-purpose flour with whole wheat flour. The rolls will be a bit denser and nuttier, but still delicious. Add an extra tablespoon of milk to compensate for the whole wheat’s thirstiness.
Make-Ahead Option: You can assemble the rolls up to the second rise, then cover and refrigerate overnight. The next day, let them come to room temperature (about 30 minutes) before baking. This is a lifesaver for holiday dinners when you’re juggling a million dishes.
Serving & Storage Suggestions
These rolls are best served warm, straight from the oven, with a generous pat of butter melting into the swirls. But they’re still delicious at room temperature—if they last that long.
Serving ideas: These rolls are incredibly versatile. Serve them alongside a cozy chicken pot pie hand pies for a double-carb comfort meal that’s pure heaven. They’re also perfect for sopping up the sauce from a creamy pasta dish or a hearty soup. For breakfast, try them split and toasted with a little extra butter—trust me on this.
Storage: Store leftover rolls in an airtight container at room temperature for up to 2 days. After that, they start to dry out. To refresh them, wrap in foil and warm in a 300°F oven for 5-7 minutes. The microwave works in a pinch, but it makes the rolls chewy.
Freezing: These rolls freeze beautifully. Bake them completely, let them cool, then wrap tightly in plastic wrap and foil. Freeze for up to 3 months. To reheat, thaw at room temperature, then warm in a 350°F oven for 10 minutes. You can also freeze the unbaked rolls after the second rise—just pop the frozen rolls directly into the oven and add 5-7 minutes to the baking time.
Flavor development: Honestly, these rolls are best the day they’re made. The garlic flavor is at its peak, and the texture is perfectly soft. Day-old rolls are still good for making garlic breadcrumbs or croutons, though.
Nutritional Information & Benefits
Let’s be real—these are indulgent rolls, not health food. But they’re made from scratch with real ingredients, which already puts them ahead of anything from a box. Here’s the estimated nutrition per roll (based on 12 servings):
- Calories: 245
- Fat: 10g
- Carbohydrates: 34g
- Protein: 6g
- Fiber: 1g
- Sugar: 4g
Health highlights: Garlic isn’t just for flavor—it’s been used for centuries for its potential health benefits. It contains allicin, a compound that may support immune function and heart health. Plus, making bread from scratch means you control the quality of ingredients—no preservatives, no artificial flavors, just real butter and fresh garlic.
Dietary considerations: This recipe contains gluten, dairy, and eggs. For a dairy-free version, use plant-based butter and milk. For a vegan version, use a flax egg. Unfortunately, these rolls are not gluten-free, but you could try a gluten-free all-purpose flour blend with added xanthan gum—just expect a denser texture.
Conclusion
These fluffy garlic-swirl dinner rolls have become a staple in my kitchen for a reason. They’re simple enough for a weeknight but special enough for a holiday table. The garlic swirl technique transforms ordinary dinner rolls into something extraordinary—every bite has that perfect balance of soft bread and savory garlic butter. I’ve made them for family dinners, potlucks, and even just because I had a craving, and they never disappoint.
I’d love to hear how yours turn out. Did you try any of the variations? Did you serve them with something amazing? Drop a comment below and let me know—I read every single one. And if you share a photo on Pinterest, tag me so I can see your beautiful rolls. Happy baking, friend!
Frequently Asked Questions
Can I use instant yeast instead of active dry yeast?
Yes, absolutely. If using instant yeast, you can skip the activation step. Just mix it directly with the flour and salt, then add the warm milk and other ingredients. The rising times may be slightly shorter, so keep an eye on the dough.
Why didn’t my rolls rise properly?
Several things could be at play. The most common culprit is old or expired yeast. Always check the expiration date. Another possibility is that your milk was too hot and killed the yeast—aim for 110°F. Finally, make sure your kitchen isn’t too cold. A drafty room can slow down rising significantly.
Can I make these rolls without a stand mixer?
Definitely. You can knead the dough by hand on a lightly floured surface. It’ll take about 8-10 minutes of kneading until the dough is smooth and elastic. It’s a great arm workout, and honestly, there’s something therapeutic about working dough with your hands.
How do I get the garlic swirl to show clearly?
The key is rolling the dough tightly and cutting cleanly. Use a sharp knife or a bench scraper—dull blades will squish the dough and blur the swirl. Also, make sure your garlic butter is soft but not melted, so it spreads evenly without soaking into the dough.
Can I double this recipe?
Yes, this recipe doubles beautifully. Use two 9×13-inch dishes or one large half-sheet pan. You may need to increase the rising times slightly since there’s more dough. Just look for the visual cues—doubled in size and puffy—rather than sticking strictly to the clock.
Pin This Recipe!
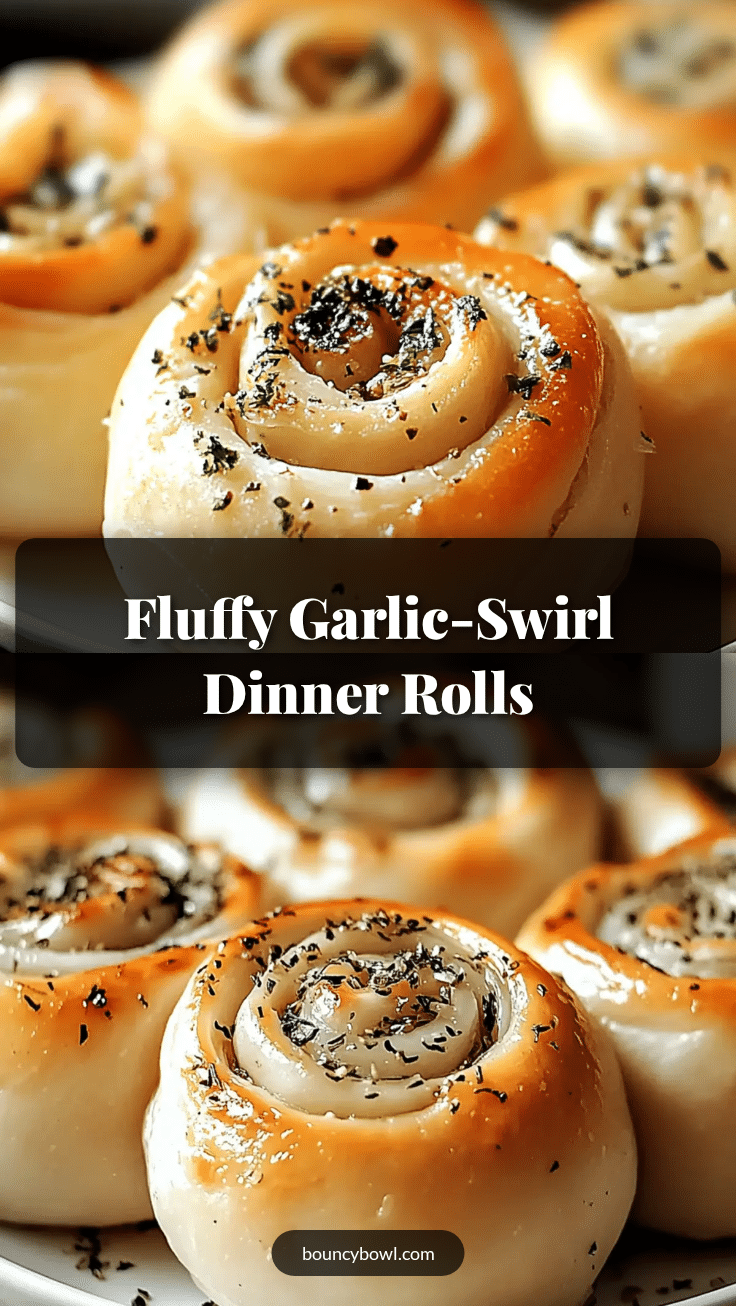
Fluffy Garlic-Swirl Dinner Rolls: The Best Homemade Recipe
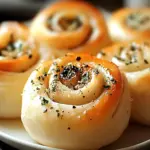
These fluffy garlic-swirl dinner rolls are soft, buttery, and packed with savory garlic in every bite. The garlic butter is swirled right into the dough, making them irresistible for any occasion.
- Prep Time: 20 minutes
- Cook Time: 25 minutes
- Total Time: 1 hour 45 minutes
- Yield: 12 rolls 1x
- Category: Bread
- Cuisine: American
Ingredients
- 3 ½ cups (440g) all-purpose flour
- 1 cup (240ml) warm milk (about 110°F)
- 2 ¼ teaspoons (7g) active dry yeast
- 2 tablespoons (25g) granulated sugar
- 1 large egg, room temperature
- 3 tablespoons (42g) unsalted butter, softened
- 1 teaspoon salt
- 4 tablespoons (56g) unsalted butter, softened (for garlic swirl)
- 4–5 cloves garlic, minced
- ¼ teaspoon salt (for garlic swirl)
- 1 tablespoon fresh parsley, finely chopped (optional)
- 2 tablespoons (28g) unsalted butter, melted (for topping)
- Flaky sea salt (optional, for topping)
Instructions
- Activate the yeast: In a small bowl, combine the warm milk (110°F) with the sugar. Sprinkle the yeast on top and let it sit for 5-7 minutes until foamy.
- Mix the dough: In a stand mixer bowl, combine flour and salt. Add the yeast mixture, egg, and softened butter. Mix on low speed with the dough hook until a shaggy dough forms. Increase to medium speed and knead for 6-7 minutes until smooth and slightly tacky.
- First rise: Shape the dough into a ball and place in a lightly greased bowl. Cover with a clean kitchen towel and let rise in a warm, draft-free spot for about 1 hour, or until doubled in size.
- Make the garlic swirl: In a small bowl, combine the softened butter, minced garlic, salt, and parsley. Mix until smooth. Set aside at room temperature.
- Roll out the dough: Punch down the dough and turn it out onto a lightly floured surface. Roll into a 12×18-inch rectangle, about ¼-inch thick.
- Spread the garlic butter: Using an offset spatula or spoon, spread the garlic butter mixture evenly over the entire surface of the dough.
- Roll and cut: Starting from the long side, roll the dough up tightly like a jelly roll. Pinch the seam to seal. Cut the log into 12 equal pieces (about 1 ½ inches wide). Place rolls cut-side up in a greased 9×13-inch baking dish, arranging in 4 rows of 3.
- Second rise: Cover the dish with the towel and let the rolls rise for 30-40 minutes until puffed and touching each other.
- Bake: Preheat oven to 375°F (190°C). Bake for 20-25 minutes until golden brown and internal temperature reaches 190°F. Tent with foil after 15 minutes if browning too quickly.
- Finish with butter: As soon as the rolls come out of the oven, brush the tops with melted butter. Sprinkle with flaky sea salt if desired. Let cool in the dish for 5-10 minutes before serving.
Notes
For extra soft tops, cover the baked rolls with a clean towel for the first 5 minutes of cooling. The steam will soften the crust beautifully. If you don’t have a stand mixer, knead by hand for 8-10 minutes.
Nutrition
- Serving Size: 1 roll
- Calories: 245
- Sugar: 4
- Sodium: 280
- Fat: 10
- Saturated Fat: 6
- Carbohydrates: 34
- Fiber: 1
- Protein: 6
Keywords: garlic rolls, dinner rolls, homemade bread, garlic bread, fluffy rolls, pull-apart rolls