Love this? Save it for later!
Share the inspiration with your friends
“You’ve got to try these,” my friend texted me late one Friday night. I was already knee-deep in a kitchen mess, wrestling with a stubborn loaf of bread for the umpteenth time. Honestly, I wasn’t feeling like starting another complicated snack, but the promise of something crispy, tangy, and cheesy eventually lured me over. So, there I was, slicing pickles and shredding cheese under the dim kitchen light, curious if these Crispy Pickle Cheese Bites could really live up to the hype.
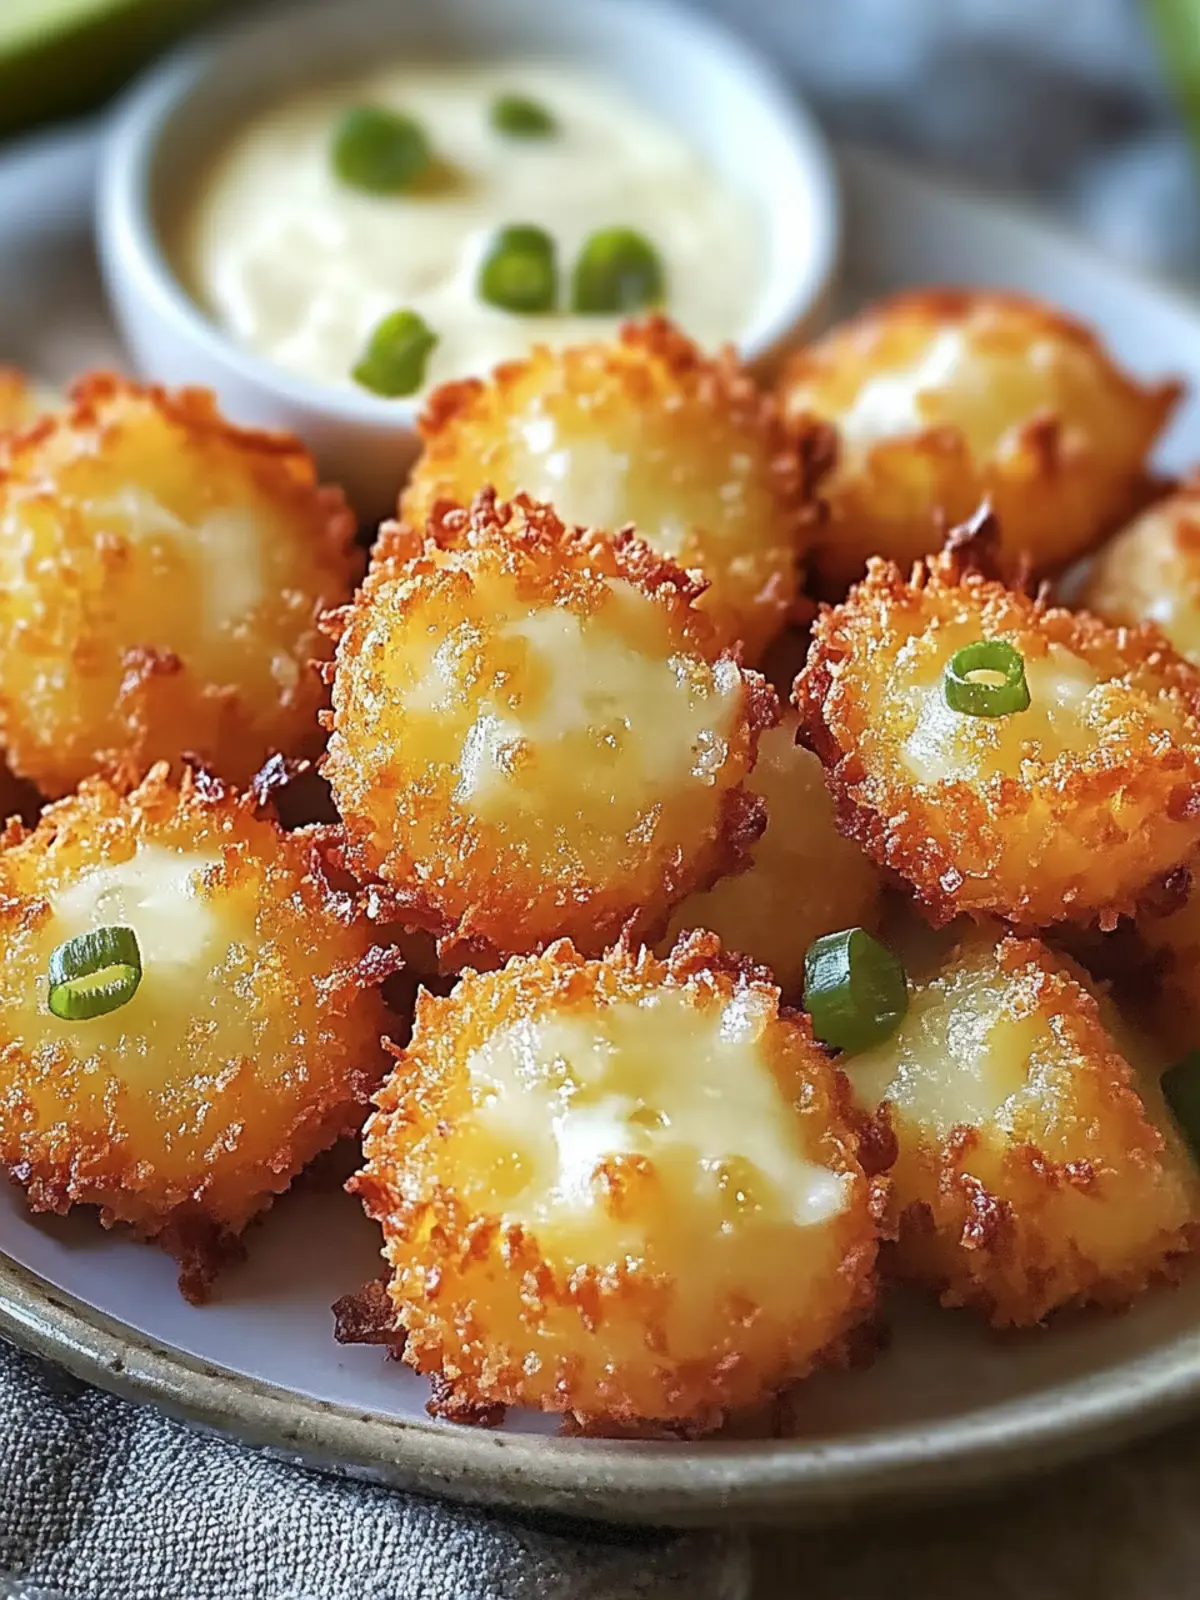
The first bite was a surprise — the crunch was perfectly golden, the cheese melty and gooey, and that pickle tang cut right through with a zing I didn’t expect. It was like a mini party in my mouth. I kept thinking, “Why haven’t I made these before?” The recipe stuck with me because it’s one of those rare snacks that feels a bit indulgent but comes together in a snap, no fancy ingredients or fuss required. Plus, it’s endlessly shareable and perfect for those unplanned get-togethers or when you just want to impress without stress.
Since then, I’ve made these Crispy Pickle Cheese Bites more times than I’d like to admit — sometimes as a late-night treat, other times as the star appetizer at casual hangouts. Every time, they vanish fast, and people ask for the recipe (which I happily share, of course). If you love snacks that balance crunch, tang, and cheesy goodness, these bites might just become your new obsession too. The best part? You don’t need to be a pro cook to nail this recipe — just a bit of patience and a craving for something seriously tasty.
It’s funny how a simple text message nudged me into discovering this gem. Now, I’m quietly confident this recipe will sneak onto your favorite snack list just like it did mine.
Why You’ll Love This Recipe
This Crispy Pickle Cheese Bites recipe has quickly become a staple in my kitchen, and I’m pretty sure it’ll win over your taste buds too. After testing and tweaking it multiple times (yes, I admit, I made it three times in one week), I can vouch for how approachable and delicious it is. Here’s what sets it apart:
- Quick & Easy: Ready in under 30 minutes, these bites fit perfectly into busy nights or spontaneous snack cravings.
- Simple Ingredients: No obscure items needed — just pickles, cheese, and a few pantry staples.
- Perfect for Parties: Whether it’s a casual hangout or game day, these crispy bites disappear fast and make a great conversation starter.
- Crowd-Pleaser: Kids and adults alike love the mix of crunchy and cheesy, with that little tangy twist.
- Unbelievably Delicious: The balance of crispy coating with melty cheese inside and pickle zing is something different from your usual snack lineup.
What really makes this recipe stand out is the crispy crust that holds the cheese and pickle together without getting soggy—thanks to a simple breading technique I picked up from making crispy spicy chickpea patties. Also, I like using sharp cheddar for that punchy flavor, but you can switch it up with pepper jack or mozzarella depending on your mood.
Honestly, it’s the kind of snack you can whip up when guests pop in unexpectedly or when you want to impress without breaking a sweat. The texture and flavor combo hit that perfect spot between comfort and excitement. And because the recipe is forgiving, you can feel confident even if you’re not a seasoned cook.
What Ingredients You Will Need
This recipe uses simple, wholesome ingredients to deliver bold flavor and satisfying texture without the fuss. Most of these items are pantry staples or fridge regulars, making it super easy to pull together on a whim.
- Pickles: About 12 medium dill pickles, sliced into bite-sized rounds (I prefer crunchy, firm pickles; Claussen works great here).
- Cheese: 2 cups shredded sharp cheddar cheese (you can mix in Monterey Jack or pepper jack for a little spice).
- All-purpose flour: 1 cup (125g) – helps the coating stick.
- Eggs: 2 large, beaten (room temperature works best for even coating).
- Panko breadcrumbs: 1 ½ cups (about 150g) – gives that amazing crunch. I recommend Japanese-style panko for the best texture.
- Garlic powder: 1 teaspoon (adds subtle savory depth).
- Onion powder: 1 teaspoon (balances the garlic and brings out flavor).
- Smoked paprika: ½ teaspoon (optional, but it adds a hint of warmth and color).
- Salt and pepper: To taste (go easy on salt since pickles are already salty).
- Oil for frying: About 2 cups vegetable or canola oil (enough for shallow frying; use peanut oil if you want a higher smoke point).
If you want to try gluten-free, swapping all-purpose flour and panko for almond flour or gluten-free breadcrumbs works well. For dairy-free options, using vegan cheese shreds and egg replacer can work, but honestly, the classic version is hard to beat.
Pro tip: If you want to add a little zing, toss in a pinch of cayenne pepper to the breadcrumb mix. It’s a small twist that livens up the flavor without overpowering the pickle-cheese harmony.
Equipment Needed
- Mixing bowls: At least three for the flour, eggs, and breadcrumb mixtures.
- Deep skillet or frying pan: A heavy-bottomed pan works best for even heat distribution when frying. I’ve often used my 10-inch cast iron skillet for perfect results.
- Tongs or slotted spoon: For safely flipping and removing the bites from hot oil.
- Cooling rack: To drain excess oil and keep your bites crispy (if you don’t have one, paper towels work, but the texture won’t be quite as crisp).
- Grater: For shredding cheese (freshly grated melts better than pre-shredded).
If you don’t have a deep skillet, a heavy saucepan with about 2 inches of oil works fine too. Just be mindful of the oil depth and temperature. A kitchen thermometer can be a great investment to keep the oil between 350-375°F (175-190°C), but I’ve done well by testing with a cube of bread — it should brown in about 60 seconds.
Maintenance tip: After frying, if you’re using cast iron, don’t forget to re-season your pan lightly to keep it in tip-top shape. It’s a small step that pays off for crispy snacks like these.
Preparation Method
- Prep the pickles and cheese: Slice the pickles into rounds about ¼-inch thick. Shred your cheese finely and set aside. You want the cheese to melt quickly inside the crispy shell.
- Set up your breading station: Place the flour in one bowl, beaten eggs in another, and mix panko breadcrumbs with garlic powder, onion powder, smoked paprika, salt, and pepper in a third bowl.
- Assemble the bites: Take a pickle slice, place a small pinch (about 1 teaspoon) of shredded cheese on top, then sandwich it with another pickle slice. Press gently to seal but don’t squeeze too hard or cheese will leak out during frying.
- Coat the bites: Roll each pickle-cheese sandwich first in flour, making sure to dust off any excess. Dip into beaten eggs, then coat thoroughly in the seasoned panko breadcrumbs. For extra crunch, repeat the egg and breadcrumb step once more.
- Chill the bites: Place the coated bites on a tray and refrigerate for 15-20 minutes. This step helps the coating set and reduces cheese oozing during frying.
- Heat the oil: In your skillet or pan, heat oil to about 350°F (175°C). If you don’t have a thermometer, test by dropping a breadcrumb in the oil — it should sizzle and brown in 1 minute.
- Fry the bites: Fry the pickle cheese bites in batches, about 3-4 at a time. Cook for 2-3 minutes per side or until golden brown and crispy. Avoid overcrowding to keep the oil temperature steady.
- Drain and rest: Remove bites with tongs and place on a cooling rack. Let them rest for a few minutes to firm up and let excess oil drip off.
- Serve warm: These are best enjoyed fresh and warm, when the cheese is melty and the crust crunches delightfully.
If you notice cheese leaking during frying, the chilling step might need a little longer next time, or try using a firmer cheese like aged cheddar. Also, keep an eye on the oil temperature — too hot and the coating burns; too cool and the bites get greasy.
Cooking Tips & Techniques
One trick I learned the hard way is that double breading is a game changer. The first time I made these, the coating barely stuck, and cheese oozed out everywhere. After adding a second egg and breadcrumb dip, the bites held together much better and came out extra crunchy.
Also, don’t skip chilling before frying. It’s tempting to dive right in, but that 20-minute wait makes a huge difference. The coating firms up and the cheese inside doesn’t escape as easily.
Temperature control is key. I’ve fried batches at too high heat and ended up with burnt outsides and cold insides. Medium-high heat around 350°F (175°C) gives the best golden color and cooks the cheese through evenly.
Multitasking tip: While your bites chill, you can prep a quick dipping sauce (ranch or spicy mayo pairs wonderfully). This is also a great moment to clean up or set the table. It’s all about pacing so that snack time feels effortless, not frantic.
Lastly, keep your oil fresh. Reusing oil too many times can affect flavor and crispiness. I usually save my frying oil for 2-3 uses max, then swap it out. It’s worth it for that perfect bite every time.
Variations & Adaptations
- Spicy Kick: Add cayenne pepper or chili powder to your breadcrumb mix for a smoky heat. Pair with a cool ranch dip to balance the spice.
- Different Cheeses: Try mozzarella for a gooey stretch or pepper jack for a bit of heat. For a tangier bite, feta crumbles inside work surprisingly well.
- Baking Option: If frying isn’t your thing, bake the bites at 400°F (200°C) on a greased baking sheet for 15-20 minutes, flipping halfway through. The texture won’t be quite as crispy, but still tasty.
- Gluten-Free: Use almond flour and gluten-free panko substitutes. The bites will still have great texture but slightly different flavor.
- Herb Infusion: Toss in dried dill or parsley into the breadcrumb mix to complement the pickle flavor with fresh herbal notes.
One personal twist I tried was making mini slider versions by using thick pickle slices and stacking a small slice of smoked ham with the cheese inside the bite. It felt like a party snack on steroids and worked great for game day gatherings.
Serving & Storage Suggestions
Serve your Crispy Pickle Cheese Bites warm, straight from the pan or oven, ideally with a dipping sauce like classic ranch, honey mustard, or a spicy sriracha mayo. The contrast between the creamy dip and the crispy bites just hits right every time.
They pair well with light sides like a fresh summer salad or even alongside a batch of pink Cadillac pasta salad for a refreshing balance.
To store leftovers, place them in an airtight container in the fridge for up to 2 days. Reheat in a toaster oven or air fryer at 350°F (175°C) for 5-7 minutes to bring back the crispiness. Avoid microwaving if you can—it softens the coating and makes the bites soggy.
Flavors deepen and meld if you let them rest slightly, but too long and the crunch fades. So, for best results, enjoy within a few hours of cooking.
Nutritional Information & Benefits
Each serving (about 6-8 bites) contains roughly:
| Nutrient | Amount |
|---|---|
| Calories | 320-350 kcal |
| Protein | 12g |
| Fat | 22g |
| Carbohydrates | 15g |
| Fiber | 1-2g |
| Sodium | 600mg (mostly from pickles and cheese) |
Pickles add probiotics and antioxidants, while cheese provides a good dose of calcium and protein. This snack isn’t low-calorie, but it’s satisfying and can be part of a balanced diet when enjoyed in moderation.
For those watching gluten intake, swapping ingredients as suggested makes this snack approachable without compromising flavor. Just remember the sodium content—if you’re sensitive, choose low-sodium pickles and cheese.
Conclusion
Crispy Pickle Cheese Bites are a unique, fun snack that has quickly earned a spot in my snack rotation. The combination of crunchy coating, melty cheese, and tangy pickle is downright addictive and perfect for sharing. What I love most is how easy it is to customize and make your own with simple swaps or additions.
Whether you’re throwing together a last-minute party appetizer or just craving something different after scrolling through quick breakfast ideas or comfort food recipes, these bites are a winner. I’d love to hear how you tweak them or what dips you pair them with — leave a comment below and share your snack story!
Here’s to many crispy, cheesy, tangy bites ahead.
FAQs
Can I bake Crispy Pickle Cheese Bites instead of frying?
Yes! Bake them at 400°F (200°C) for 15-20 minutes, flipping halfway through. They won’t be quite as crunchy but still delicious and less oily.
What’s the best cheese to use for these bites?
Sharp cheddar is my favorite for flavor and meltiness, but mozzarella or pepper jack work well too. Avoid super soft cheeses that melt too quickly and leak out.
Can I prepare these bites ahead of time?
You can assemble and bread them a few hours before frying. Keep them refrigerated and fry just before serving for best texture.
How do I keep the bites from getting soggy?
Chilling the bites before frying helps the coating set. Also, fry in batches without crowding the pan and drain on a cooling rack to keep them crispy.
Are these bites gluten-free?
The classic recipe uses wheat flour and panko, but you can swap in almond flour and gluten-free breadcrumbs for a gluten-free version.
Pin This Recipe!

Crispy Pickle Cheese Bites

These Crispy Pickle Cheese Bites are a quick and easy homemade snack featuring a crunchy coating, melty cheese, and tangy pickles, perfect for parties and casual get-togethers.
- Prep Time: 15 minutes
- Cook Time: 10 minutes
- Total Time: 25 minutes
- Yield: 6-8 servings 1x
- Category: Snack
- Cuisine: American
Ingredients
- 12 medium dill pickles, sliced into 1/4-inch rounds
- 2 cups shredded sharp cheddar cheese
- 1 cup all-purpose flour (125g)
- 2 large eggs, beaten
- 1 1/2 cups panko breadcrumbs (about 150g)
- 1 teaspoon garlic powder
- 1 teaspoon onion powder
- 1/2 teaspoon smoked paprika (optional)
- Salt and pepper to taste
- About 2 cups vegetable or canola oil for frying
Instructions
- Slice the pickles into 1/4-inch thick rounds and shred the cheese finely.
- Set up three bowls: one with flour, one with beaten eggs, and one with panko breadcrumbs mixed with garlic powder, onion powder, smoked paprika, salt, and pepper.
- Take a pickle slice, place about 1 teaspoon of shredded cheese on top, then sandwich with another pickle slice. Press gently to seal.
- Coat each pickle-cheese sandwich first in flour, dusting off excess, then dip into beaten eggs, and coat thoroughly in the seasoned panko breadcrumbs. Repeat the egg and breadcrumb coating for extra crunch.
- Place the coated bites on a tray and refrigerate for 15-20 minutes to help the coating set.
- Heat oil in a deep skillet or frying pan to about 350°F (175°C).
- Fry the bites in batches of 3-4 for 2-3 minutes per side until golden brown and crispy. Avoid overcrowding the pan.
- Remove bites with tongs and drain on a cooling rack to remove excess oil.
- Serve warm for best taste and texture.
Notes
Double breading the bites and chilling them before frying helps prevent cheese leakage and ensures a crispy coating. Maintain oil temperature around 350°F for best results. Reuse frying oil no more than 2-3 times for optimal flavor and crispiness. Baking option available at 400°F for 15-20 minutes, flipping halfway through.
Nutrition
- Serving Size: About 6-8 bites per
- Calories: 320350
- Sodium: 600
- Fat: 22
- Carbohydrates: 15
- Fiber: 12
- Protein: 12
Keywords: crispy pickle cheese bites, snack recipe, party appetizer, fried snacks, cheesy bites, pickle snacks


