Love this? Save it for later!
Share the inspiration with your friends
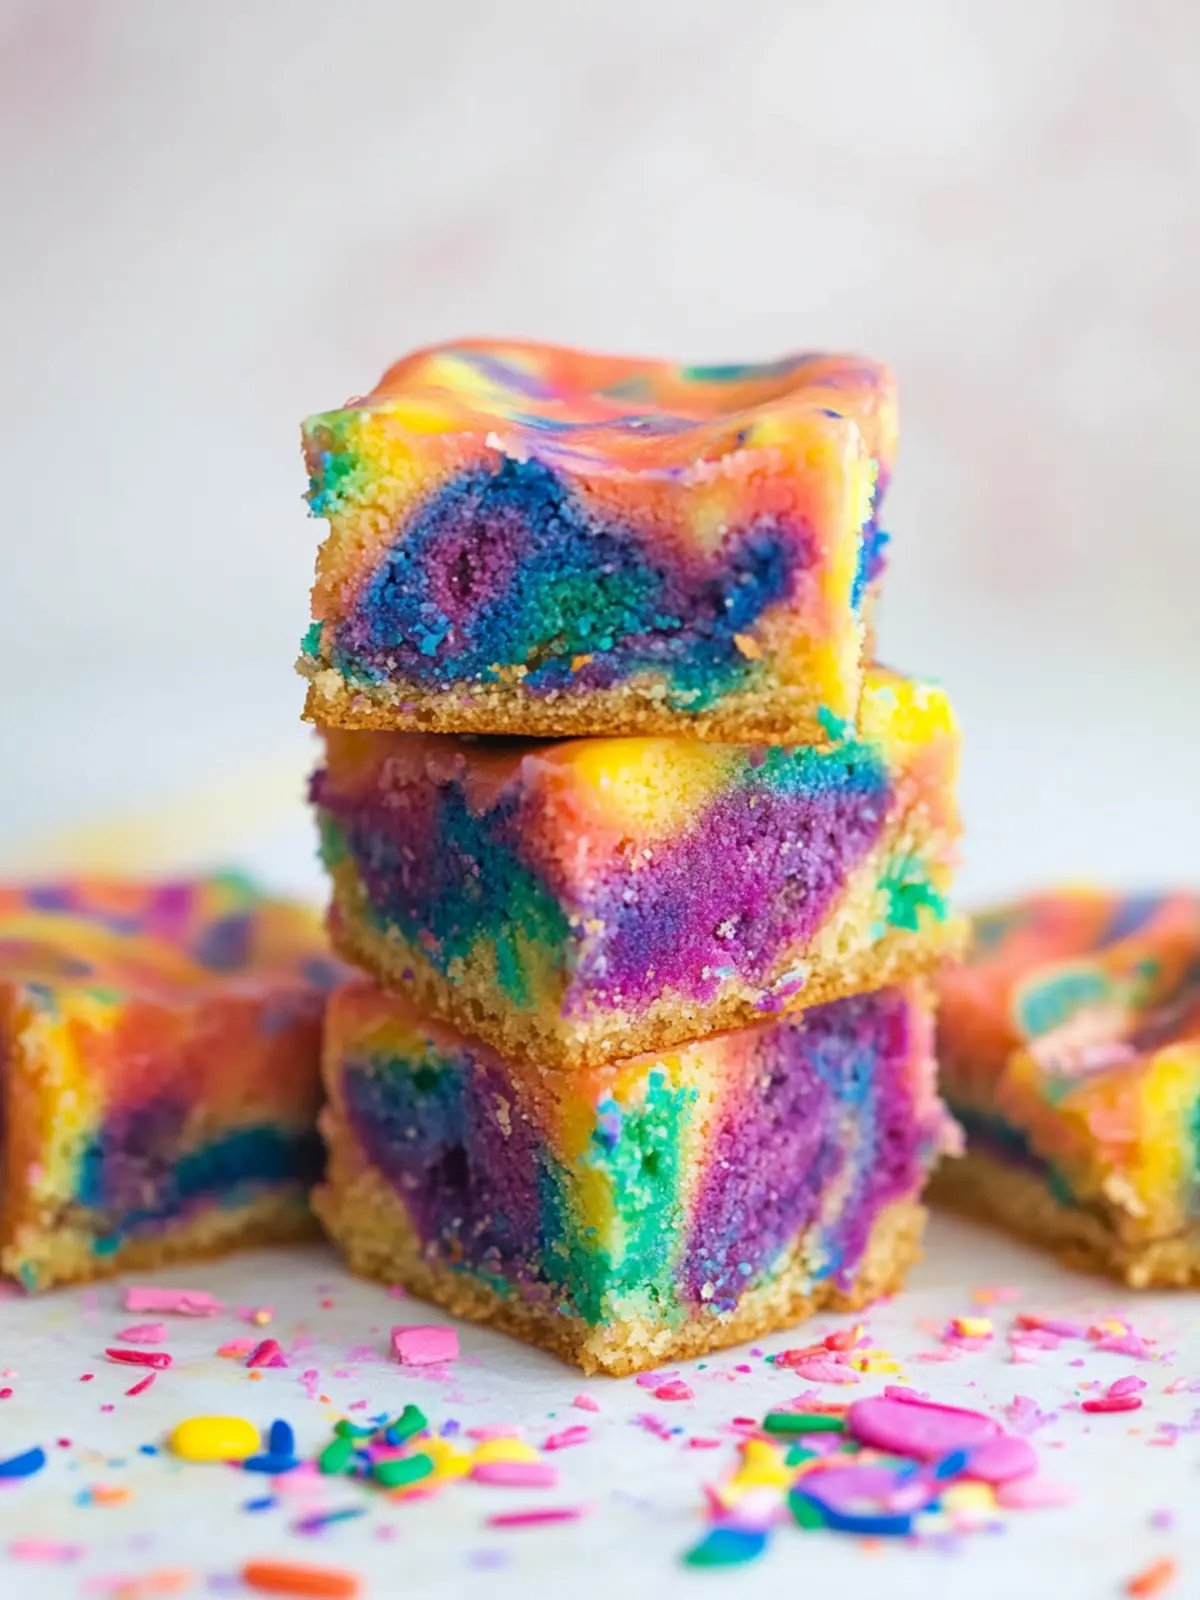
“You’ve got to see this!” my niece shouted from the kitchen, waving a pan covered in swirling colors that looked like a miniature festival on a baking sheet. It was late afternoon, and honestly, I was just trying to keep up with the chaos of a house full of kids after school. But those Rainbow Tie Dye Blondies stopped me in my tracks. The colors were wild, joyful, and honestly, a little unexpected on something that’s usually just golden brown and sweet. I was skeptical at first—could a simple blondie batter really handle this kind of colorful makeover without turning into a gloopy mess?
Turns out, it could. And not only that, but the whole process felt like a playful experiment, almost like finger painting but edible (and way tastier). Over the next week, I found myself making these blondies more than once, tweaking the swirls and colors, and sharing bites with anyone who wandered by. It became a little ritual, a fun escape from the usual. The way the colors blend while baking, the smell of buttery sweetness filling the kitchen, and that first bite—soft, chewy, with a subtle vanilla warmth punctuated by the rainbow swirls—made this recipe more than just a treat. It’s a reminder that sometimes, the best desserts come from a bit of whimsy and a dash of happy accidents.
That’s why this recipe stuck with me, not just because it’s a feast for the eyes or an easy crowd-pleaser, but because it brings a quiet little moment of joy to any day. If you’re looking for a dessert that feels like a celebration without all the fuss, these blondies might just become your new favorite.
Why You’ll Love This Recipe
After baking these Rainbow Tie Dye Blondies several times, I can honestly say they have a charm all their own. Here’s why they’ll quickly earn a spot in your recipe box:
- Quick & Easy: You can whip up the batter in about 15 minutes, and they bake in just 25 minutes—perfect for last-minute dessert cravings or fun weekend projects.
- Simple Ingredients: No complicated or hard-to-find items here. Most of what you need is probably already in your pantry or fridge.
- Perfect for Celebrations: Whether it’s a birthday, a kids’ party, or just a colorful pick-me-up, these blondies bring smiles and a splash of fun to the table.
- Crowd-Pleaser: I’ve taken these to potlucks and family gatherings, and everyone—from the picky eaters to the adults—keeps asking for the recipe.
- Unbelievably Delicious: The tender crumb, buttery flavor, and that hint of vanilla make these blondies a treat you’ll savor bite after bite.
What sets this version apart? The tie dye effect isn’t just about looks. The trick is in carefully folding the colored batters so the flavors don’t get muddled but instead create a beautiful swirl. Plus, I’ve found that using a high-quality vanilla extract really brings out the subtle sweetness that balances the vibrant colors.
If you enjoy other colorful desserts like the Perfect Rainbow Pride Cake or the Fun Rainbow Muddy Buddies, these blondies will fit right in with your lineup of joyful, colorful treats. Honestly, they bring a little magic to the everyday.
What Ingredients You Will Need
This recipe uses simple, wholesome ingredients to deliver bold flavor and a satisfying texture without any fuss. Most are pantry staples, and you’ll find handy substitution tips if you need them.
- Unsalted butter, 1 cup (227 g), melted – adds richness and moisture
- Brown sugar, 1 cup (200 g), packed – for that deep, caramel-like sweetness
- Granulated sugar, 1/4 cup (50 g) – balances sweetness and texture
- Large eggs, 2, room temperature – for structure and binding
- Pure vanilla extract, 2 teaspoons – the flavor backbone; I recommend Nielsen-Massey for the best aroma
- All-purpose flour, 1 1/2 cups (190 g) – provides the base; swap with gluten-free flour blend for gluten-free option
- Baking powder, 1/2 teaspoon – a gentle lift for lightness
- Salt, 1/4 teaspoon – balances sweetness and enhances flavor
- Food coloring gels, assorted colors (red, orange, yellow, green, blue, purple) – use gel for vibrant, concentrated colors without thinning the batter
Optional:
- White chocolate chips, 1/2 cup (90 g) – for extra pockets of sweetness
- Edible glitter or sprinkles – to add sparkle on top before baking
For the food coloring, I usually reach for AmeriColor gels because they provide bright, true colors with minimal amounts. If you prefer natural options, beet juice powder or turmeric can tint the batter, but expect softer hues.
Pro tip: let your butter cool slightly before mixing with sugars so the eggs don’t cook when adding.
Equipment Needed
- 9×9 inch baking pan (or equivalent 23×23 cm) – metal pans give crisper edges, glass for softer ones
- Mixing bowls – at least two for separating and tinting the batter
- Whisk and spatula – whisk for mixing sugars and eggs, spatula for folding flour gently
- Measuring cups and spoons – for precise ingredient amounts
- Electric mixer (optional) – speeds up creaming, but whisking by hand works fine here
- Toothpick or skewer – great for swirling the colors together to make the tie dye effect
If you don’t have a 9×9 pan, a similarly sized square or round pan works fine; just adjust baking time slightly. For budget-friendly options, a silicone baking pan is easy to clean and flexible, although it may bake a bit differently.
Keep your mixing bowls clean and dry before combining ingredients to prevent clumps or uneven texture. I like to have a damp cloth nearby to wipe off any stray batter from the rim while swirling in colors.
Preparation Method
- Preheat your oven to 350°F (175°C). Grease your 9×9 inch pan or line it with parchment paper for easy removal. This takes about 10 minutes while you prep.
- Melt the butter in a microwave-safe bowl or on the stove. Let it cool slightly but stay liquid—about 5 minutes.
- Mix sugars and butter: In a large bowl, combine the melted butter, brown sugar, and granulated sugar. Whisk well until smooth and slightly glossy.
- Add eggs and vanilla: Beat in the eggs one at a time, then stir in the vanilla extract. The batter should look creamy and thick.
- Combine dry ingredients: In a separate bowl, whisk together the flour, baking powder, and salt.
- Fold dry into wet: Gradually fold the flour mixture into the wet batter with a spatula, careful not to overmix. Stop as soon as you see no streaks of flour. The batter will be thick and soft.
- Divide the batter: Split the batter evenly into 6 small bowls. Add a different gel food coloring to each bowl—red, orange, yellow, green, blue, and purple. Stir gently to incorporate the color fully.
- Create the tie dye effect: Drop spoonfuls of each colored batter randomly into the prepared pan. Use a toothpick or skewer to swirl the colors lightly in a figure-eight or circular motion—don’t overmix or you’ll lose the bright colors.
- Optional add-ins: If using white chocolate chips or sprinkles, sprinkle them on top before baking for extra texture and sparkle.
- Bake: Place the pan in the oven for 22–25 minutes. The blondies should be set around the edges but still slightly soft in the center. Use a toothpick inserted in the middle to check—some moist crumbs are okay.
- Cool: Let the blondies cool completely in the pan on a wire rack before cutting into squares. This helps the colors set and prevents crumbling.
A quick note: if your batter feels too thick to swirl easily, add a teaspoon of milk to loosen it slightly. Also, remember that the colors will darken a bit during baking, so don’t worry if they look intense in the raw batter.
Cooking Tips & Techniques
When making these Rainbow Tie Dye Blondies, a few tricks can make all the difference between an Instagram-worthy dessert and a disappointing mess.
- Use gel food coloring: Liquid food coloring can make the batter runny, which dulls the colors and texture. Gels give you vivid hues without changing the consistency.
- Don’t over-swirl: The magic of tie dye is in the gentle, loose swirls. Too much mixing and you’ll end up with muddy colors instead of distinct swirls.
- Watch your oven temperature: Baking too hot can cause the edges to brown too quickly while the center stays undercooked. If your oven runs hot, reduce temp by 10°F (5°C).
- Room temperature eggs: Cold eggs can curdle the batter and affect texture. Let them sit out for 15 minutes before mixing.
- Let the blondies cool fully: Cutting too soon makes the colors smear and the squares crumble. Patience pays off here.
- Try different swirling patterns: I’ve found figure eights and gentle spirals work best. Sometimes I just drop dots and let baking do the blending.
I once accidentally mixed the colors too much and ended up with a very pastel, muddy batter that baked into a bland brown. It was a good reminder that restraint is key! Also, multitasking helps—while the blondies bake, I prep a quick snack like homemade strawberry fruit roll-ups to keep the kids busy and happy.
Variations & Adaptations
This recipe is pretty flexible, so feel free to tweak it to your needs or occasion:
- Dietary swaps: Use almond or oat flour for gluten-free options. Swap butter for coconut oil or vegan margarine to make it dairy-free.
- Flavor twists: Add a teaspoon of almond or orange extract for a unique aroma. Toss in mini chocolate chips or chopped nuts for texture.
- Seasonal spins: For fall, swap the rainbow colors for autumn-inspired tones like burnt orange, deep red, and golden yellow. You can even stir in pumpkin puree for a moist blondie base.
- Cooking methods: Try baking these in muffin tins for colorful blondie bites, perfect for parties or lunchboxes.
- Personal favorite: I once made a batch using natural food colors from beet juice, spirulina, and turmeric—it gave a softer, earthy palette and a fun twist on the usual neon shades.
Serving & Storage Suggestions
Serve these blondies at room temperature to really enjoy the tender crumb and the colorful patterns. They’re perfect as a sweet snack alongside a glass of milk or a cup of tea.
For parties, cut into small squares and arrange on a platter for a stunning rainbow display. They also pair nicely with fresh fruit or a dollop of whipped cream.
Store leftovers in an airtight container at room temperature for up to 3 days. For longer storage, refrigerate for up to a week or freeze for up to 3 months. To freeze, wrap individual squares in plastic wrap and place in a freezer-safe bag.
When reheating, warm gently in the microwave for 10-15 seconds or in a 300°F (150°C) oven for 5-7 minutes to bring back softness. The flavors mellow and the colors stay bright even after chilling, so these blondies keep their charm over time.
Nutritional Information & Benefits
One serving (about a 2×2 inch square) of Rainbow Tie Dye Blondies contains approximately:
| Calories | 180–200 |
|---|---|
| Fat | 9g |
| Carbohydrates | 25g |
| Sugar | 18g |
| Protein | 2g |
Made with butter and sugar, these blondies are definitely a treat, but they also provide a quick energy boost. The eggs add protein, and the vanilla extract contains antioxidants.
For those with dietary needs, this recipe can be adapted to gluten-free or vegan diets with simple substitutions, making it accessible to many.
From a wellness perspective, I like that this dessert is homemade—no preservatives or artificial additives, and you control the ingredients. Plus, the fun colors bring smiles, which is an underrated kind of nourishment!
Conclusion
The Rainbow Tie Dye Blondies recipe brings together a colorful surprise and classic comfort in every bite. It’s the kind of baking that feels joyful to make and even better to share, whether you’re brightening a casual afternoon or celebrating a special moment.
Feel free to personalize the colors, flavors, or add-ins to match your vibe. For me, these blondies are a little reminder that baking can be playful and simple, with a dash of magic in every swirl.
If you give this recipe a try, I’d love to hear which colors or twists you went with—drop a comment or share your photos! Remember, the kitchen is your canvas, and these blondies are just the beginning of colorful dessert adventures.
FAQs
Can I make Rainbow Tie Dye Blondies without food coloring?
You can skip the food coloring for classic blondies, but the tie dye effect depends on the vibrant colors. Natural colorants like beet powder or turmeric can give softer hues if you prefer a natural approach.
How do I store leftover blondies?
Store in an airtight container at room temperature for up to 3 days, refrigerate up to a week, or freeze for up to 3 months. Reheat gently before serving for best texture.
Can I use this recipe to make brownies instead?
This recipe is designed for blondies with a vanilla base. For brownies, you’d want a cocoa-rich batter. However, you can add cocoa powder to this base and adjust sugar slightly to experiment.
Are gel food colorings safe to eat?
Yes, gel food colorings are formulated for baking and are safe in typical amounts. Choose trusted brands like AmeriColor or Wilton for quality and vibrant colors.
What if my blondies come out too dry or crumbly?
Make sure not to overbake—check at 22 minutes and remove when a toothpick has moist crumbs. Also, don’t overmix the batter, which can lead to dryness. Using room temperature ingredients helps, too.
Pin This Recipe!
Rainbow Tie Dye Blondies
These Rainbow Tie Dye Blondies are a colorful, easy-to-make dessert with a tender, chewy texture and a subtle vanilla warmth. Perfect for celebrations or a fun treat that brings joy with every bite.
- Prep Time: 15 minutes
- Cook Time: 25 minutes
- Total Time: 40 minutes
- Yield: 16 servings 1x
- Category: Dessert
- Cuisine: American
Ingredients
- 1 cup (2 sticks) unsalted butter, melted
- 1 cup packed brown sugar
- 1/4 cup granulated sugar
- 2 large eggs, room temperature
- 2 teaspoons pure vanilla extract
- 1 1/2 cups all-purpose flour
- 1/2 teaspoon baking powder
- 1/4 teaspoon salt
- Gel food coloring gels in assorted colors (red, orange, yellow, green, blue, purple)
- Optional: 1/2 cup white chocolate chips
- Optional: edible glitter or sprinkles
Instructions
- Preheat oven to 350°F (175°C). Grease a 9×9 inch baking pan or line with parchment paper.
- Melt the butter and let it cool slightly but remain liquid, about 5 minutes.
- In a large bowl, whisk together melted butter, brown sugar, and granulated sugar until smooth and glossy.
- Beat in eggs one at a time, then stir in vanilla extract until creamy and thick.
- In a separate bowl, whisk together flour, baking powder, and salt.
- Gradually fold dry ingredients into wet batter with a spatula until no streaks remain; do not overmix.
- Divide batter evenly into 6 small bowls. Add a different gel food coloring to each bowl and stir gently to incorporate.
- Drop spoonfuls of each colored batter randomly into the prepared pan. Use a toothpick or skewer to swirl the colors lightly in figure-eight or circular motions without overmixing.
- If desired, sprinkle white chocolate chips or edible glitter on top before baking.
- Bake for 22–25 minutes until edges are set and center is slightly soft. Test with a toothpick; some moist crumbs are okay.
- Cool completely in the pan on a wire rack before cutting into squares.
Notes
Use gel food coloring for vibrant colors without thinning the batter. Avoid over-swirl to keep distinct colors. Let blondies cool fully before cutting to prevent crumbling. Room temperature eggs improve texture. If batter is too thick to swirl, add 1 teaspoon milk to loosen.
Nutrition
- Serving Size: 1 piece (about 2x2 i
- Calories: 190
- Sugar: 18
- Fat: 9
- Carbohydrates: 25
- Protein: 2
Keywords: rainbow blondies, tie dye blondies, colorful dessert, easy blondies, homemade blondies, kids dessert, party dessert


