Love this? Save it for later!
Share the inspiration with your friends
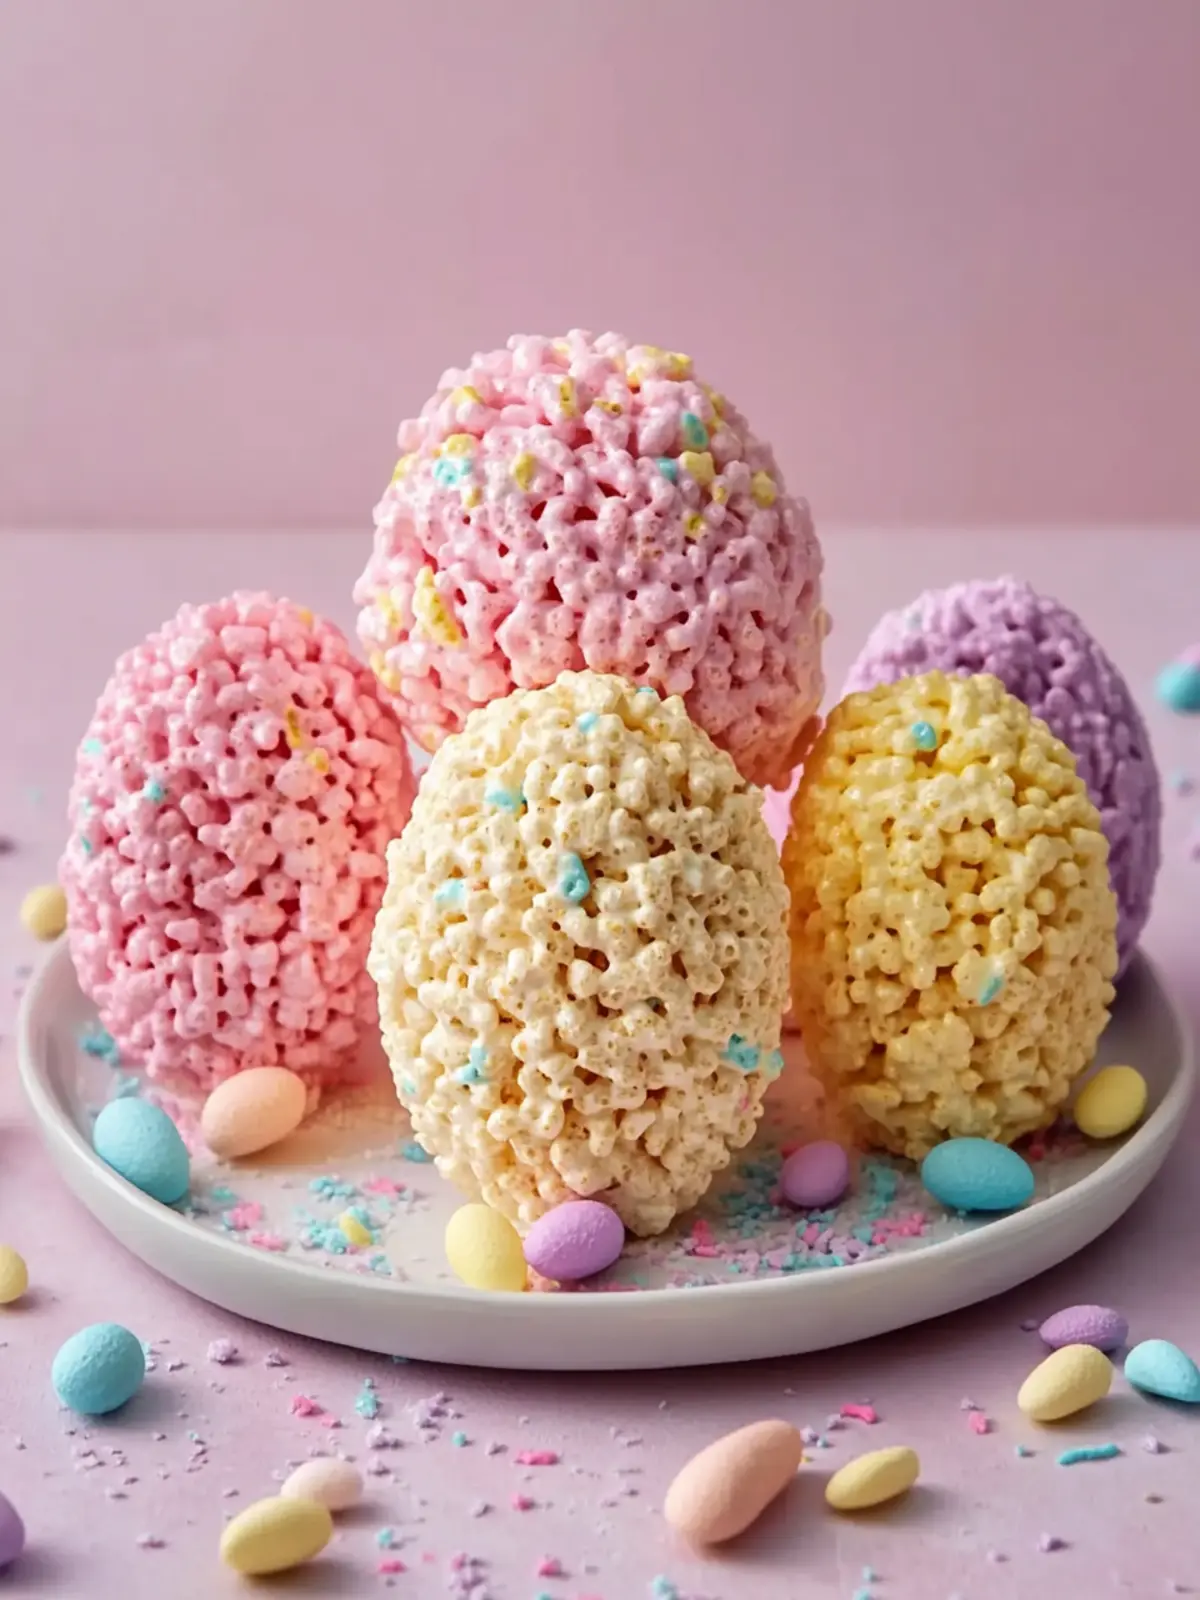
“Are you sure these are just Rice Krispies treats?” my niece asked, eyes wide as she held up a pastel-colored egg-shaped delight. Honestly, I wasn’t expecting much when I first tossed together this batch. The original plan was just to whip up a quick snack for a last-minute Easter gathering, something simple and kid-friendly. But somehow, this easy recipe turned into a hit that had adults sneaking bites when no one was looking. The soft marshmallow coating, the subtle crunch of the cereal, and the festive egg shapes made it impossible to resist. It’s funny how an offhand comment about “making Easter treats easier for busy parents” led me to experiment with molds and a handful of fun add-ins. I didn’t expect to find a recipe that was both playful and utterly delicious, perfect for those chaotic holiday moments when you want something sweet but fuss-free.
What really sealed the deal? When a friend texted me the next day, asking for the recipe because her kids couldn’t stop talking about the “egg treats that tasted like a hug.” That’s when I realized this simple twist on classic Rice Krispies treats had quietly become a staple in my springtime celebrations. It’s not just about the nostalgic crunch; it’s about a little burst of joy shaped like Easter eggs — perfect for sharing, gifting, or just sneaking away for a quiet, sugary moment. So, here’s the story behind these easy irresistible Rice Krispies Easter egg treats and why they might just become your go-to holiday snack too.
Why You’ll Love This Recipe
I’ve made Rice Krispies treats more times than I can count, but this Easter egg version stands out for a few special reasons—and I’d like to think it’s the kind of recipe you’ll want to turn to every spring.
- Quick & Easy: Ready in under 20 minutes, this recipe fits perfectly into busy holiday prep or when you need a last-minute treat that still wows.
- Simple Ingredients: No fancy or hard-to-find items here—just pantry staples like marshmallows, butter, and classic Rice Krispies cereal. I always keep marshmallows from the trusted Campfire brand on hand for the best melt and flavor.
- Perfect for Easter & Spring Celebrations: Shaped like colorful eggs, these treats are festive without any complicated decorating. Great for egg hunts, classroom parties, or casual brunches.
- Crowd-Pleaser: Whether you’re serving kids or adults, these treats get rave reviews. They’re chewy, sweet, and the perfect bite-sized snack for any crowd.
- Deliciously Nostalgic: It’s the familiar Rice Krispies treats flavor with a fun seasonal twist, but what makes it different is the use of pastel food coloring and silicone egg molds that give them a playful, festive shape and texture.
From personal experience, the secret to irresistibility isn’t just the shape but the balance of buttery marshmallow mix and that classic crispy snap. Honestly, it’s the kind of treat that makes you close your eyes after the first bite and smile, thinking “Yep, this is spring.” Plus, if you’re also in the mood for other easy holiday sweets, you might enjoy the Easy Colorful Earth Day Sugar Cookies or the creamy delight of Cookie Butter Cheesecake Cups for your next gathering.
What Ingredients You Will Need
This recipe uses simple, wholesome ingredients to deliver bold flavor and that signature crunch, all without complicated steps or hard-to-find items. Most of these are pantry staples, which is great because you can usually whip this up with what’s already in your kitchen.
- Unsalted Butter (3 tablespoons) – Using unsalted lets you control the saltiness. I like Land O’Lakes for its creamy melt.
- Mini Marshmallows (1 ½ cups) – Mini size melts quicker and creates that smooth, sticky base. Campfire brand melts perfectly for that gooey texture.
- Rice Krispies Cereal (4 cups / 120g) – The classic crispy texture. Puffier cereals won’t give the same crunch.
- Vanilla Extract (1 teaspoon) – Just a splash to add warmth and depth.
- Food Coloring (Pastel shades like pink, yellow, blue, green) – Gel food coloring works best for vibrant colors without watering down the mixture. You can find Wilton gels easily online or in craft stores.
- Optional: White Chocolate Chips (½ cup) – For drizzling or dipping, adding a creamy sweetness contrast.
Substitution Tips:
- If you want a gluten-free treat, opt for gluten-free Rice Krispies or substitute with a similar puffed rice cereal.
- Use dairy-free butter and marshmallows to make these vegan-friendly (though be sure the marshmallows are gelatin-free).
- For a fun twist, try mixing in mini pastel M&Ms or sprinkles right before pressing into the molds.
Equipment Needed
- Large Mixing Bowl: For combining the marshmallows and cereal.
- Microwave-Safe Bowl or Saucepan: To melt butter and marshmallows. I prefer the microwave for speed, but a double boiler method works well if you want more control.
- Silicone Easter Egg Molds: These flexible molds make shaping the treats easy and fun. I’ve tried plastic molds before, but silicone is far easier for releasing the finished eggs without breaking.
- Spatula or Wooden Spoon: For mixing the sticky ingredients.
- Measuring Cups and Spoons: Accurate measurements keep the texture perfect every time.
If you don’t have egg-shaped molds, a greased baking pan and a cookie cutter will work just fine. I remember once having to improvise with just a pan and a sharp knife—it was more rustic, but still tasty! Silicone molds are easy to clean and reusable, making them worth the investment for holiday baking.
Preparation Method
- Melt the Butter and Marshmallows (5 minutes): In a microwave-safe bowl, melt 3 tablespoons of unsalted butter on high for 30 seconds. Stir in 1 ½ cups mini marshmallows and microwave in 20-second bursts, stirring each time, until smooth and creamy. You want the marshmallows fully melted but not browned.
- Add Vanilla and Food Coloring (1-2 minutes): Stir in 1 teaspoon vanilla extract. Divide the marshmallow mixture evenly into small bowls for each pastel color you plan to use. Add a few drops of gel food coloring to each bowl and mix well until you get soft, even pastel shades.
- Mix in Rice Krispies (2 minutes): Quickly fold 4 cups (about 120g) of Rice Krispies cereal into each colored marshmallow mixture. You need to work fast before the marshmallows set, so have your molds ready.
- Press Mixture into Molds (5 minutes): Lightly grease your silicone egg molds with butter or non-stick spray to make removal easier. Press the Rice Krispies mixture firmly but gently into each cavity, filling to the top and smoothing the surface. Press firmly enough to hold shape but not so much that it becomes dense.
- Set and Chill (30 minutes): Let the treats cool and set at room temperature for 15 minutes before transferring to the refrigerator for about 15 minutes. This helps them firm up and pop out cleanly.
- Optional Decoration: Melt white chocolate chips in a microwave-safe bowl (30-second bursts, stirring between). Drizzle over the eggs or dip one side for an extra touch of sweetness.
- Remove from Molds and Serve: Gently pop each egg out of the molds. The pastel colors and egg shape make them perfect for displaying in a basket or plating for your Easter brunch.
Tip: If the mixture sticks to your hands, lightly grease your palms or use a piece of parchment paper to press the mixture. This keeps things less messy and helps maintain the texture.
Cooking Tips & Techniques
Making Rice Krispies treats is simple, but a few tricks can really make a difference in texture and ease.
- Don’t overcook the marshmallows. Melt them gently to avoid browning, which can change flavor and make the treats tougher.
- Use mini marshmallows. They melt faster and create a smoother mix. Regular marshmallows take longer and can leave lumps.
- Work quickly when mixing. Once marshmallows melt, they start to set fast. Have all your molds and ingredients ready before starting.
- Press gently but firmly. You want the treats to hold shape without becoming rock hard. If pressed too tight, they won’t have that classic light crunch.
- Grease your hands or tools. Marshmallow mixtures are sticky! Lightly butter your spatula or hands for easier shaping.
- Chill before unmolding. Allowing treats to firm up ensures they pop out cleanly and hold their shape well.
One time, I left the treats sitting too long before pressing into molds and they started sticking badly. Lesson learned: timing is key! Also, if you want to save time, you can skip the molds and press the mixture into a greased pan, then cut egg shapes out once set. It won’t look quite as festive, but the taste is just as good.
Variations & Adaptations
These Easter egg treats are super adaptable, which is part of why I keep coming back to this recipe for every spring.
- Dietary Swaps: For gluten-free versions, swap Rice Krispies for gluten-free puffed rice cereal. Vegan friends can use dairy-free butter and gelatin-free marshmallows.
- Flavor Twists: Add a teaspoon of almond extract or lemon zest to the melted marshmallow mixture for a subtle flavor change. I once made a batch with lavender extract, which was surprisingly delightful.
- Color & Decoration: Mix in pastel-colored mini chocolate candies for extra crunch and color inside the treats. Or drizzle melted dark chocolate for a richer contrast.
- Shape Alternatives: If you don’t have egg molds, try bunny shapes or simple squares for variety. These treats are forgiving!
Personally, I’ve made a batch using a combination of pastel green and yellow swirled together for a marbled effect — it was a hit with the kids. If you want a more indulgent twist, try dipping half the egg in melted white chocolate and sprinkling with edible glitter for a party-ready look.
Serving & Storage Suggestions
These treats are best served at room temperature, when that marshmallow chewiness is at its peak and the cereal retains its signature crisp.
- Presentation: Arrange the eggs in a festive basket lined with pastel tissue paper for an Easter table centerpiece or party favor.
- Pairings: They go wonderfully with a light fruit salad or a cup of spring-themed lemonade. For a brunch spread, consider pairing with the Creamy Easter Fruit Salad Delight for a fresh contrast.
- Storage: Store in an airtight container at room temperature for up to 3 days. Avoid the fridge unless you want a denser, chewier texture.
- Freezing: Wrapped tightly in plastic wrap and stored in a freezer bag, these treats freeze well for up to 2 months. Thaw at room temperature before serving.
- Reheating: If they get a bit hard, a few seconds in the microwave (10-15 seconds) soften them up nicely without melting the outer shape.
Flavors tend to mellow a bit over time, but the sweetness stays comforting. I find fresh is best, but these treats hold up well for gifting or prepping ahead for parties.
Nutritional Information & Benefits
While these treats lean into fun and indulgence, it’s nice to know what’s inside. Each egg-shaped Rice Krispies treat (about 2-inch size) typically contains roughly:
| Calories | 110-130 |
|---|---|
| Fat | 3-4g (mostly from butter) |
| Carbohydrates | 22-25g (mainly from marshmallows and cereal) |
| Protein | 1-2g |
| Sugar | 14-17g |
Key ingredients like butter and marshmallows provide energy, while the cereal adds a bit of iron and B vitamins from fortified grains. If you’re mindful of allergens, this recipe contains dairy and gluten unless you swap ingredients accordingly.
From a wellness perspective, this treat fits well as an occasional sweet, especially when shared with family or friends during festive moments. For a lighter twist, you can reduce butter slightly or add natural food colorings from beet or turmeric powders.
Conclusion
These easy irresistible Rice Krispies Easter egg treats have quietly become my go-to for quick holiday fun that tastes like a childhood favorite but looks a little more special. They’re simple to make, colorful, and perfectly festive without any stress or fancy decorating skills. Whether you’re feeding a crowd or just craving a sweet pick-me-up, this recipe is a reliable winner.
Feel free to tweak colors, flavors, or shapes to fit your style—there’s plenty of room for creativity. I personally love how they bring a little joy and nostalgia to our Easter celebrations, making the holiday a bit sweeter and brighter.
If you make these treats, I’d love to hear how you customized them or what moments they sweetened for you. Share your stories or tips in the comments below, and let’s keep the fun going! Here’s to simple recipes that bring smiles, one pastel egg at a time.
Frequently Asked Questions
Can I use regular-sized marshmallows instead of mini marshmallows?
You can, but mini marshmallows melt faster and create a smoother mixture. If using regular marshmallows, cut them into smaller pieces for more even melting.
How do I keep the treats from sticking to my hands while shaping?
Lightly grease your hands with butter or use a piece of parchment paper to press the mixture. This helps prevent sticking without affecting texture.
Can I make these treats ahead of time?
Yes! They store well in an airtight container for up to 3 days at room temperature. You can also freeze them wrapped tightly for up to 2 months.
What if I don’t have silicone egg molds?
No worries! Press the mixture into a greased baking pan and cut out egg shapes with a cookie cutter or simply slice into squares for a rustic look.
Are there any allergen-free alternatives for this recipe?
Yes! Use gluten-free puffed rice cereal, dairy-free butter, and gelatin-free marshmallows to make this recipe friendly for common allergies.
Pin This Recipe!
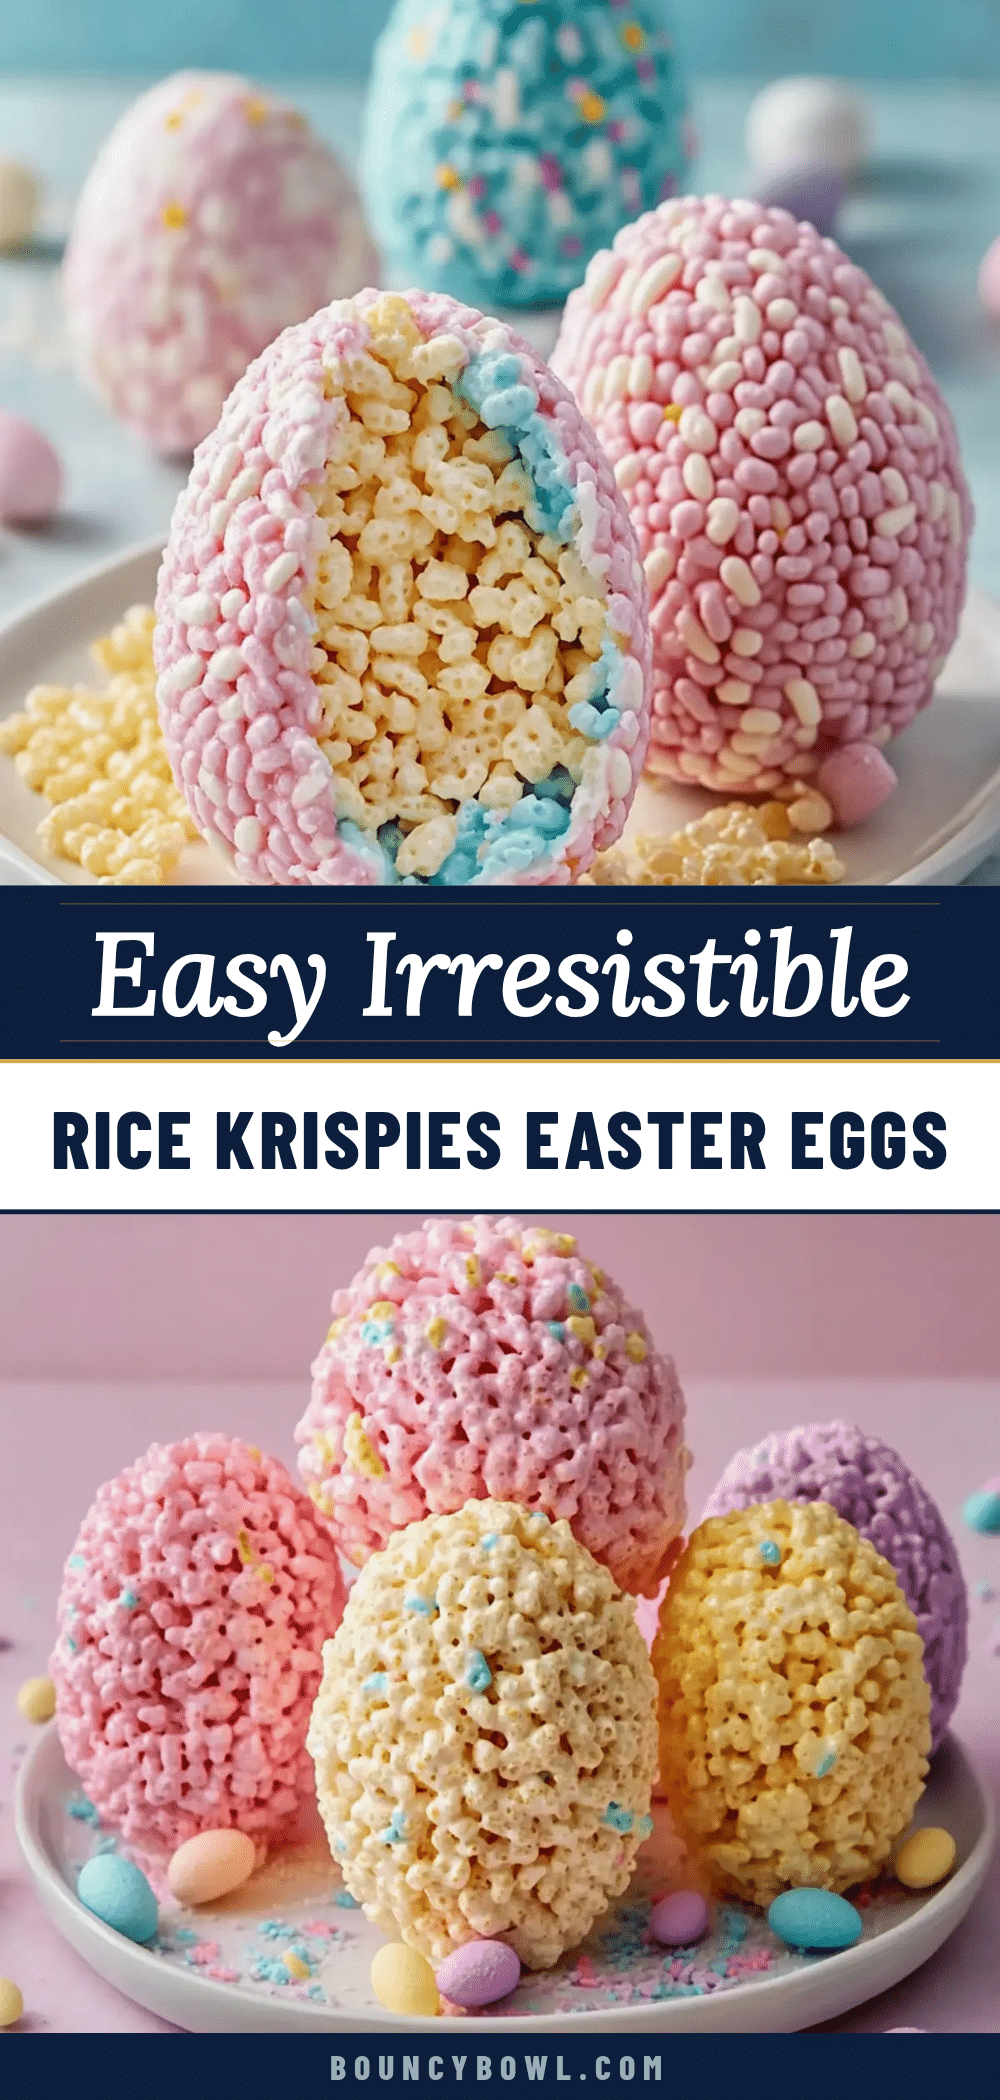
Easy Irresistible Rice Krispies Easter Egg Treats Recipe for Perfect Holiday Fun

A quick and festive twist on classic Rice Krispies treats, shaped like pastel Easter eggs with a soft marshmallow coating and subtle crunch. Perfect for spring celebrations, kid-friendly, and easy to make.
- Prep Time: 10 minutes
- Cook Time: 10 minutes
- Total Time: 20 minutes
- Yield: 24 servings 1x
- Category: Dessert
- Cuisine: American
Ingredients
- 3 tablespoons unsalted butter
- 1 ½ cups mini marshmallows
- 4 cups (about 120g) Rice Krispies cereal
- 1 teaspoon vanilla extract
- Gel food coloring in pastel shades (pink, yellow, blue, green)
- Optional: ½ cup white chocolate chips for drizzling or dipping
Instructions
- Melt 3 tablespoons of unsalted butter in a microwave-safe bowl on high for 30 seconds.
- Stir in 1 ½ cups mini marshmallows and microwave in 20-second bursts, stirring each time, until smooth and creamy without browning.
- Stir in 1 teaspoon vanilla extract.
- Divide the marshmallow mixture evenly into small bowls for each pastel color you plan to use.
- Add a few drops of gel food coloring to each bowl and mix well until soft, even pastel shades form.
- Quickly fold 4 cups of Rice Krispies cereal into each colored marshmallow mixture.
- Lightly grease silicone egg molds with butter or non-stick spray.
- Press the Rice Krispies mixture firmly but gently into each mold cavity, smoothing the surface.
- Let the treats cool and set at room temperature for 15 minutes, then transfer to the refrigerator for about 15 minutes to firm up.
- Optional: Melt ½ cup white chocolate chips in 30-second bursts in the microwave, stirring between, then drizzle or dip the treats.
- Gently pop each egg out of the molds and serve.
Notes
Use mini marshmallows for smoother melting. Work quickly when mixing to prevent marshmallows from setting. Lightly grease hands or tools to prevent sticking. Chill treats before unmolding for best shape retention. Optional white chocolate drizzle adds sweetness and decoration. Gluten-free and vegan substitutions available.
Nutrition
- Serving Size: One 2-inch egg-shape
- Calories: 120
- Sugar: 15
- Sodium: 90
- Fat: 3.5
- Saturated Fat: 2
- Carbohydrates: 24
- Protein: 1.5
Keywords: Rice Krispies treats, Easter treats, pastel treats, kid-friendly snacks, holiday snacks, easy dessert, marshmallow treats, spring recipes