Love this? Save it for later!
Share the inspiration with your friends
“I swear, it all started because I forgot to buy the usual birthday cake,” I told my friend as we peeled back the foil on this vibrant creation. That afternoon, a last-minute invitation to a neighborhood party had me scrambling. The grocery store shelves looked bare, and honestly, I was skeptical if I could pull off something impressive with what was left in my pantry. Then I spotted a few tubs of cream cheese, some basic baking staples, and a set of food colorings from a long-forgotten baking kit. With a shrug and a dash of hope, I tossed together what would become my Easy Magical Rainbow Pie.
The magic? It wasn’t just the swirl of colors — it was how the pie brought everyone to the table, kids and adults alike, and how it somehow turned a rushed afternoon into a warm memory. The colors were bright without being gaudy, and the flavors blended into a smooth, creamy delight that had my skeptical self coming back for seconds. Since then, I’ve made this pie for birthdays, potlucks, and even quiet Sunday afternoons when the kitchen felt like the coziest place in the world. It’s the kind of recipe that sneaks up on you — not flashy, but quietly unforgettable.
There’s something about the way the colors layer and the creamy texture melts that makes this recipe feel like a little celebration at any time. It’s simple enough that you don’t need to be a baking wizard, but the result? Honestly, it looks like you put in a lot more effort than you did. I think that’s why it sticks around in my recipe rotation — it’s kind, forgiving, and a little bit joyful, just like those festive moments it’s meant to brighten.
Why You’ll Love This Recipe
This Easy Magical Rainbow Pie isn’t just a feast for the eyes — it’s a treat born from real kitchen trials and happy accidents. I’ve tweaked it through several test runs, balancing flavors and colors until it felt just right. Here’s why it stands out:
- Quick & Easy: You can whip this up in under 45 minutes, making it perfect for those last-minute festive occasions or when you just want a colorful dessert without fuss.
- Simple Ingredients: No need for fancy or hard-to-find items. Most of these are pantry staples or easy buys, like cream cheese, sugar, and basic food coloring sets.
- Perfect for Celebrations: Whether it’s a birthday, holiday gathering, or just a cheerful weekend treat, this pie brings a splash of color and fun to any table.
- Crowd-Pleaser: Kids love the rainbow layers, and adults appreciate the creamy, not-too-sweet flavor. It’s a guaranteed conversation starter that ends with smiles.
- Unbelievably Delicious: The texture is silky smooth, thanks to a simple technique that blends cream cheese and whipped topping to create a dreamy filling.
What sets this recipe apart is the layering method — carefully spooning each colored mixture to keep the colors distinct but still swirling slightly for that magical effect. I also swap out traditional pie crust for a quick no-bake graham cracker base, which adds just the right crunch without the hassle of baking. This pie isn’t just colorful; it’s a balance of textures and flavors that feels like a gentle party in your mouth.
What Ingredients You Will Need
This recipe uses simple, wholesome ingredients to deliver bold color and a creamy, satisfying texture without the fuss. You likely have most of these on hand, and the ones you don’t are easy to find at any grocery store.
- For the Crust:
- 1 1/2 cups graham cracker crumbs (about 10 full sheets, crushed)
- 6 tablespoons unsalted butter, melted (adds richness and helps bind)
- 3 tablespoons granulated sugar (balances the buttery crust)
- For the Filling:
- 16 ounces cream cheese, softened (I prefer Philadelphia for smoothness)
- 1 cup powdered sugar, sifted (for that silky sweetness)
- 1 teaspoon pure vanilla extract (quality matters here for depth)
- 1 1/2 cups heavy whipping cream, chilled (whipped to soft peaks)
- For the Rainbow Colors:
- Food coloring gels in red, orange, yellow, green, blue, and purple (gel colors give the best vibrancy without thinning the filling)
Pro tip: If you want a dairy-free version, swap cream cheese with a vegan alternative and use coconut cream instead of heavy cream. For a gluten-free crust, try almond flour mixed with a bit of coconut oil. When I first tried this with coconut cream, the texture was a bit different but still tasty!
Equipment Needed
- 9-inch (23 cm) pie pan — glass or metal works fine; glass helps you see the crust thickness.
- Electric hand mixer or stand mixer — essential for whipping the cream and blending the filling smoothly.
- Mixing bowls — at least two, for the base filling and for dividing into colors.
- Rubber spatula — perfect for folding whipped cream into the cream cheese mixture without deflating it.
- Measuring cups and spoons — accuracy helps keep the sweetness balanced.
- Spoons for layering the colors carefully — I use small soup spoons for gentle layering.
If you don’t have a mixer, a sturdy whisk and some arm muscle can do the job, though it’ll take longer. For budget-friendly options, basic hand mixers from brands like Hamilton Beach have served me well over the years. Also, keeping your mixing bowls chilled makes whipping cream easier — I learned this the hard way after a few failed batches.
Preparation Method
- Make the Crust (10 minutes): Combine the graham cracker crumbs, melted butter, and sugar in a bowl. Mix until the crumbs are evenly coated and look like wet sand. Press the mixture firmly into the bottom and up the sides of your 9-inch pie pan. Use the bottom of a glass to smooth and compact the crust evenly. Place in the fridge to chill while you prepare the filling.
- Prepare the Cream Cheese Filling (15 minutes): In a large bowl, beat the softened cream cheese until smooth with an electric mixer. Gradually add powdered sugar and vanilla extract, continuing to beat until fully combined and creamy. In a separate chilled bowl, whip the heavy cream to soft peaks. Gently fold the whipped cream into the cream cheese mixture with a spatula, preserving the airy texture. The filling should be thick but fluffy.
- Divide and Color the Filling (10 minutes): Spoon the filling into six small bowls, dividing as evenly as possible. Add a few drops of each food coloring gel to each bowl — red, orange, yellow, green, blue, and purple. Stir gently to blend the colors without deflating the cream. Adjust the intensity by adding more or less color gel.
- Layer the Rainbow (10 minutes): Starting with red, spoon a dollop into the center of the chilled crust. Add the orange filling directly on top of the red, then continue with yellow, green, blue, and finish with purple. The filling will spread outward naturally, creating concentric colored rings. For a magical swirl effect, gently drag a toothpick or skewer through the layers in a spiral pattern, careful not to over-mix.
- Chill and Set (at least 4 hours): Cover the pie with plastic wrap and refrigerate for a minimum of 4 hours or overnight. This resting time helps the pie set firmly and the flavors meld. When ready, slice with a sharp knife dipped in hot water for clean, vibrant slices.
Note: If your cream cheese seems lumpy or not smooth, warming it slightly at room temperature helps prevent lumps. Also, be patient when folding the whipped cream — overmixing can make the pie dense, and that’s not the dreamy texture we want.
Cooking Tips & Techniques
One trick that really makes this pie shine is chilling everything — the bowl, the cream, the crust — before assembly. It helps the filling hold its shape and keeps the layers distinct. I learned this after a few early versions where the colors bled together like a rainbow gone rogue.
Whipping the cream to soft peaks rather than stiff is another key. Soft peaks blend more smoothly with the cream cheese, giving the filling that luscious, melt-in-your-mouth feel. If you whip it too much, the filling can become grainy or separate.
Layering the colors slowly and gently is honestly half the fun and challenge. Spoon each color carefully into the center of the pie, and it will naturally push outwards. Resist the urge to pour or stir too much, or the layers will muddy. Using gel food coloring rather than liquid keeps the filling from getting watery.
Lastly, slicing the pie can be tricky with all those colors. Running your knife under hot water and drying it before each cut helps get clean slices and keeps the rainbow intact — a tip I learned from making mini cheesecakes that needed neat presentation.
Variations & Adaptations
- Dairy-Free Rainbow Pie: Swap cream cheese for vegan cream cheese and use chilled coconut cream whipped to soft peaks. The texture shifts slightly but still tastes rich and creamy.
- Fruit-Infused Layers: Add a teaspoon of fruit puree or juice to each colored filling bowl — like strawberry for red or mango for yellow — to add subtle natural flavors and make it even more festive.
- Chocolate Rainbow Pie: Mix a tablespoon of cocoa powder into each bowl before coloring for a fun chocolate twist on the classic rainbow.
- Crust Alternatives: Try crushed Oreo cookies for a chocolate crust or gluten-free almond flour crust for dietary preferences.
- Personal Favorite: I once added tiny rainbow sprinkles between layers for extra texture and surprise — it was a hit at a kids’ party!
Serving & Storage Suggestions
This Easy Magical Rainbow Pie is best served chilled, straight from the fridge. The vibrant colors and creamy filling make it a stunning centerpiece for any festive occasion. Pair it with a light fruit salad or a simple glass of sparkling lemonade to balance the richness.
Store leftovers covered in the refrigerator for up to 3 days. The pie keeps its texture well, though the colors may soften slightly as it sits. If you want to prepare it a day ahead, that’s even better — the flavors meld beautifully overnight.
When reheating, avoid the microwave to keep the texture intact. If the filling feels too firm after refrigeration, let the pie sit at room temperature for 10-15 minutes before serving. This little patience pays off with a silky smooth bite every time.
Nutritional Information & Benefits
Each slice of this pie (assuming 8 servings) contains approximately 350 calories, with 22 grams of fat, 30 grams of carbohydrates, and 4 grams of protein. The cream cheese and heavy cream provide calcium and vitamin A, while the graham cracker crust contributes some fiber.
This recipe is gluten-friendly if you use traditional graham crackers; however, gluten-free alternatives work great too. It’s not a low-calorie dessert, but it’s a festive treat meant for sharing and savoring in small portions. For those watching sugar intake, reducing powdered sugar slightly or using powdered erythritol is an option, though it may affect texture.
Conclusion
There’s something quietly satisfying about pulling off a colorful dessert that looks impressive but is genuinely easy to make. This Easy Magical Rainbow Pie has become my go-to for festive occasions because it blends simplicity with a touch of whimsy. Whether you’re baking for a last-minute party or just want to brighten up a weeknight, this pie feels like a little celebration you can create in your own kitchen.
Feel free to play around with the colors, flavors, and crust to make it your own — that’s the real magic here. I love how it brings a bit of joy without the stress, turning ordinary moments into something memorable.
If you enjoy recipes with that perfect balance of comfort and fun, you might also appreciate the creamy texture and easy prep of creamy garlic salmon and broccoli pasta or the sweet pull-apart delight of the blueberry monkey bread. Those recipes share the same kind of cozy, crowd-pleasing vibe that makes this pie such a hit.
FAQs
Can I make the rainbow pie ahead of time?
Yes! The pie actually tastes better after chilling overnight, allowing the flavors to meld and the filling to set firmly.
What kind of food coloring should I use?
Gel food coloring is best since it provides vibrant colors without thinning the filling like liquid colors might.
Is this recipe suitable for gluten-free diets?
It can be! Just substitute the graham cracker crust with a gluten-free alternative like almond flour or gluten-free cookie crumbs.
Can I use flavored cream cheese?
For the best balance, stick with plain cream cheese. Flavored varieties might clash with the sweet, creamy filling and the rainbow colors.
How do I get clean slices with the layered colors?
Dip your knife in hot water and wipe it dry before each cut. This helps slice through the pie cleanly without dragging colors together.
Pin This Recipe!
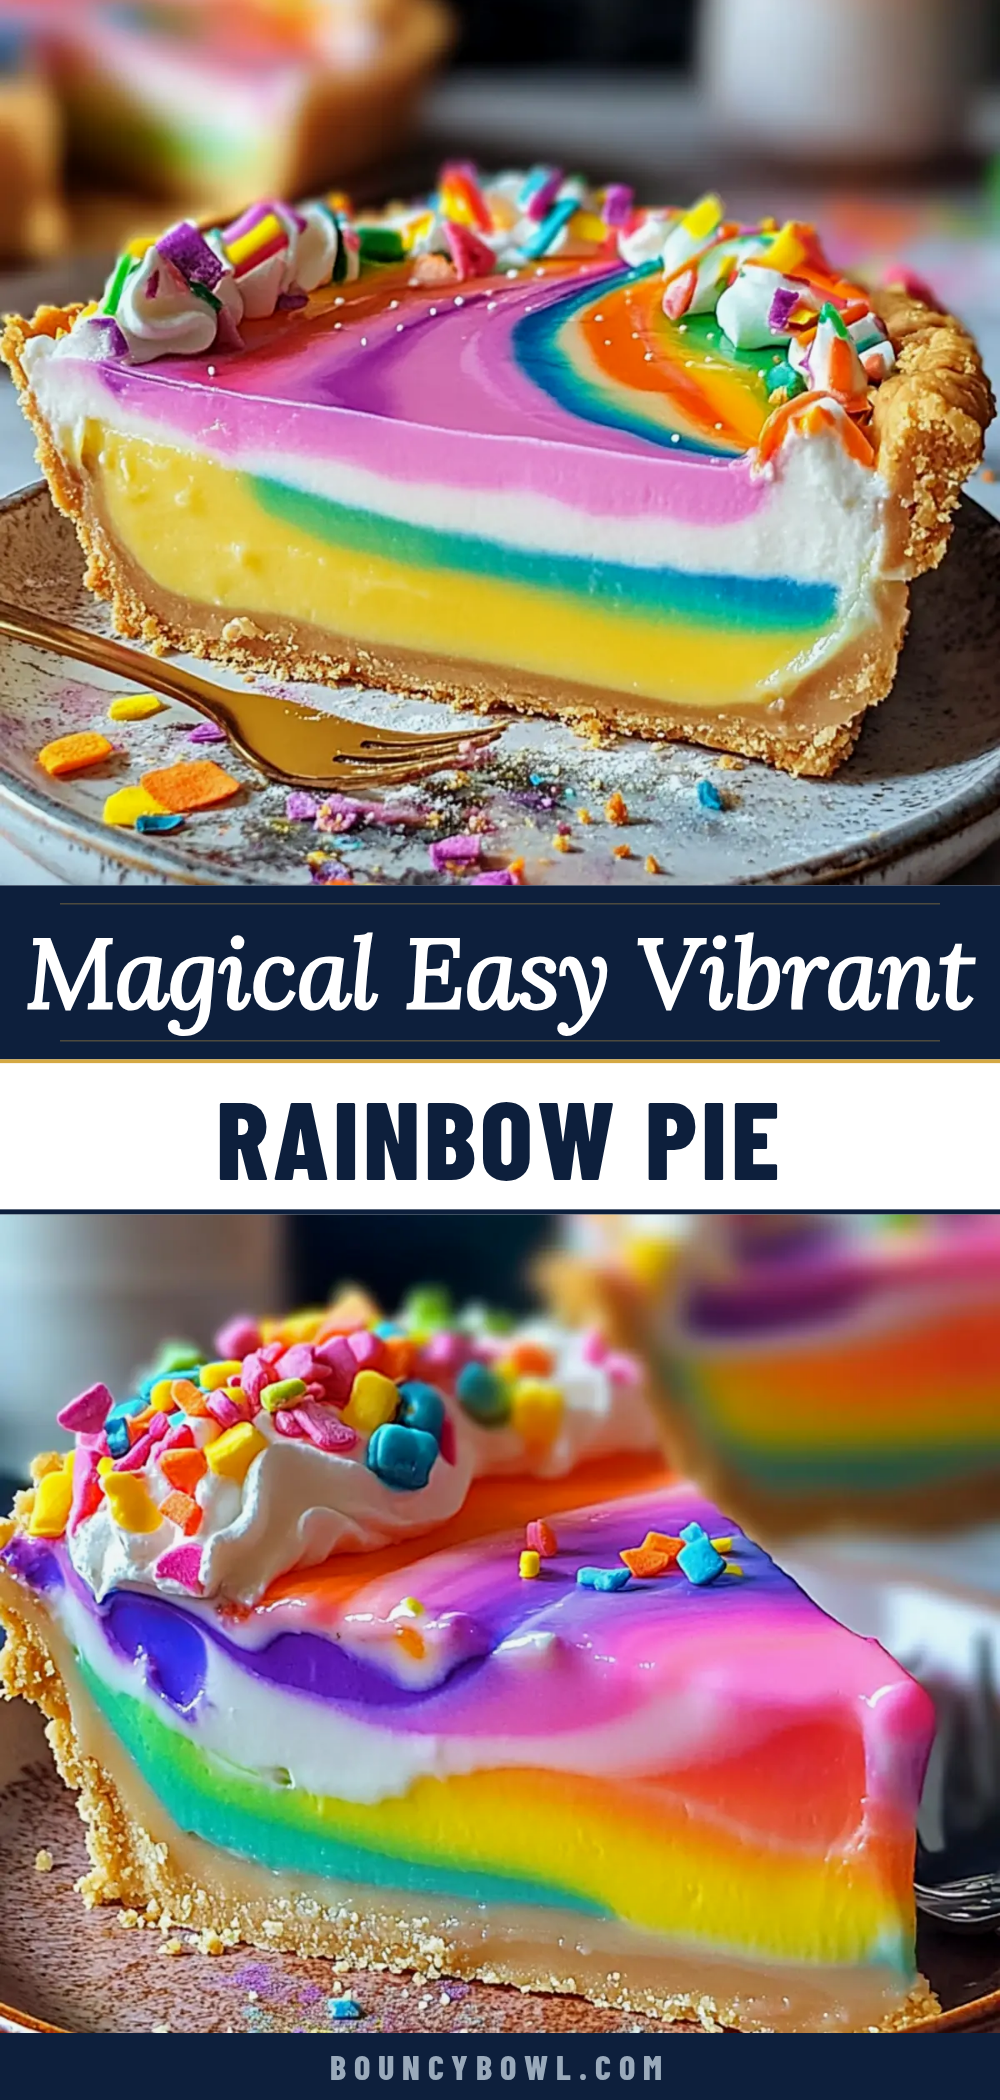
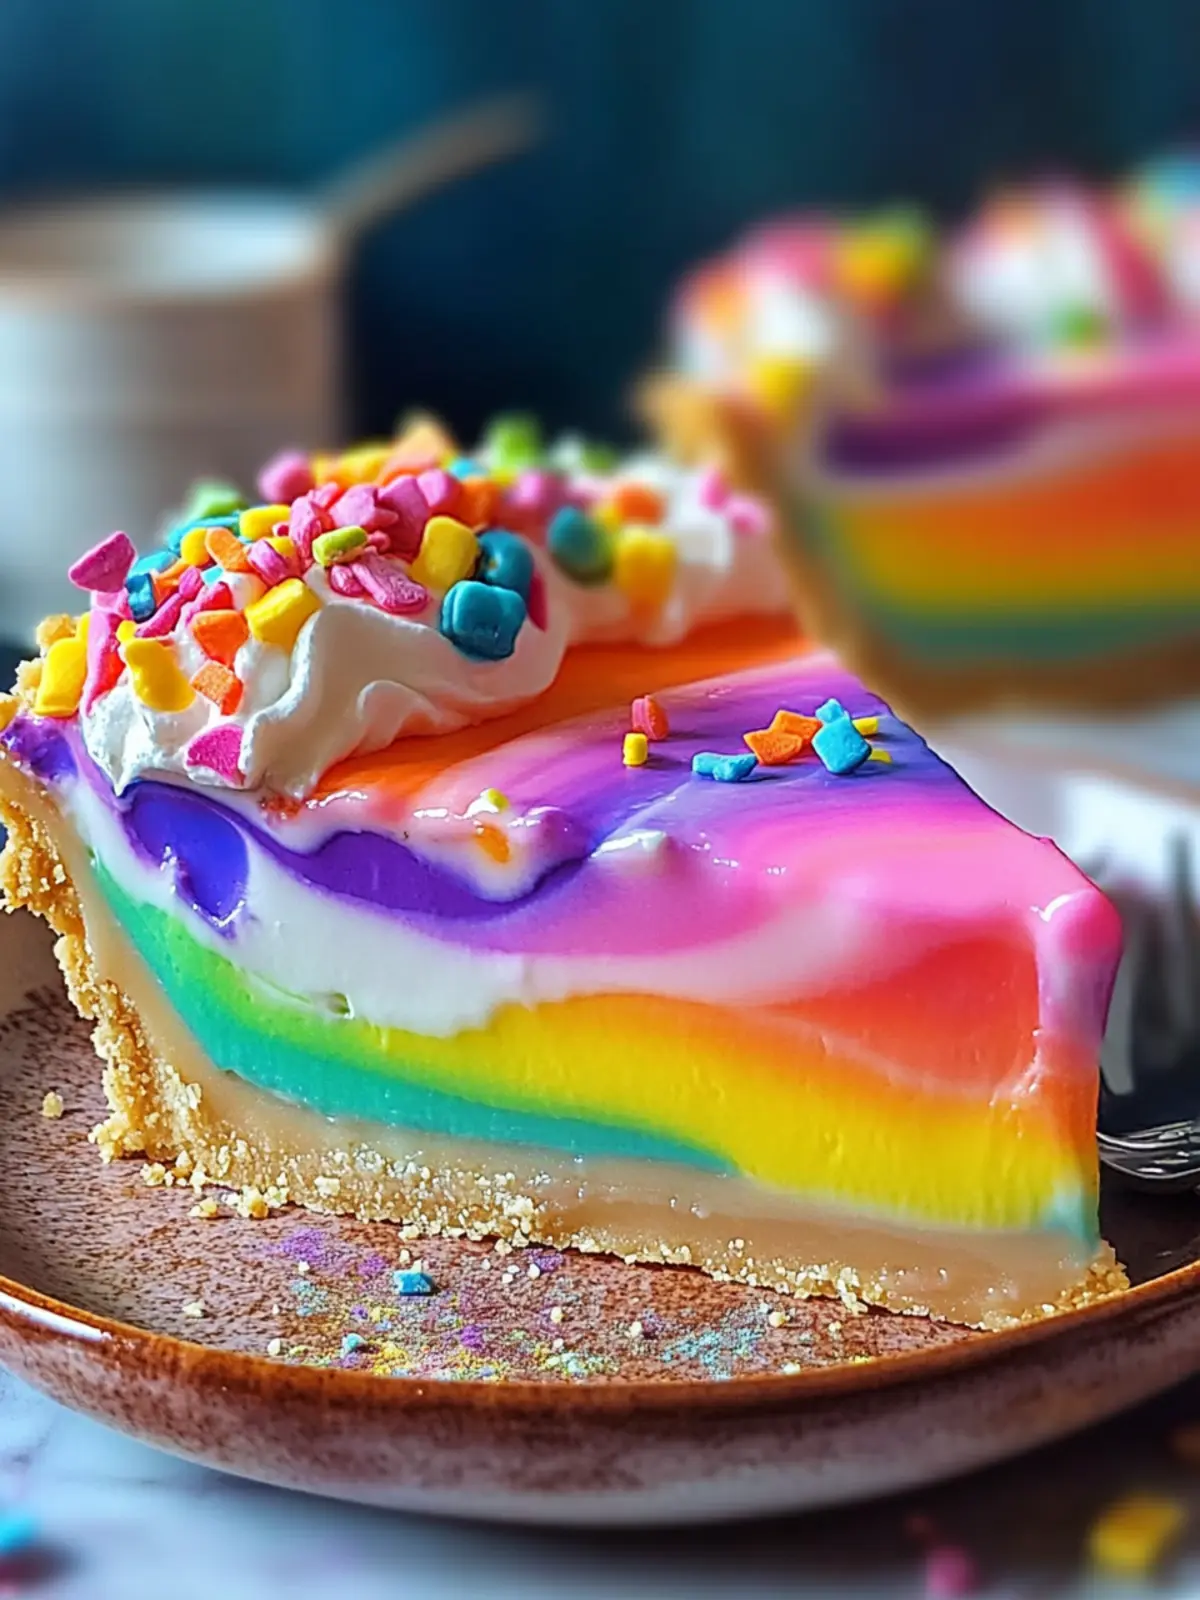
Easy Magical Rainbow Pie
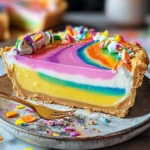
A vibrant, creamy no-bake rainbow pie with a graham cracker crust, perfect for festive occasions and last-minute celebrations. This pie features colorful layers of cream cheese filling that are silky smooth and visually stunning.
- Prep Time: 35 minutes
- Cook Time: 0 minutes
- Total Time: 4 hours 35 minutes
- Yield: 8 servings 1x
- Category: Dessert
- Cuisine: American
Ingredients
- 1 1/2 cups graham cracker crumbs (about 10 full sheets, crushed)
- 6 tablespoons unsalted butter, melted
- 3 tablespoons granulated sugar
- 16 ounces cream cheese, softened
- 1 cup powdered sugar, sifted
- 1 teaspoon pure vanilla extract
- 1 1/2 cups heavy whipping cream, chilled
- Food coloring gels in red, orange, yellow, green, blue, and purple
Instructions
- Make the Crust (10 minutes): Combine graham cracker crumbs, melted butter, and sugar in a bowl. Mix until crumbs are evenly coated and look like wet sand. Press mixture firmly into bottom and up sides of a 9-inch pie pan. Smooth and compact crust evenly. Chill in fridge while preparing filling.
- Prepare the Cream Cheese Filling (15 minutes): Beat softened cream cheese until smooth with an electric mixer. Gradually add powdered sugar and vanilla extract, beating until creamy. In a separate chilled bowl, whip heavy cream to soft peaks. Gently fold whipped cream into cream cheese mixture preserving airy texture.
- Divide and Color the Filling (10 minutes): Spoon filling into six small bowls evenly. Add a few drops of each food coloring gel to each bowl (red, orange, yellow, green, blue, purple). Stir gently to blend colors without deflating cream.
- Layer the Rainbow (10 minutes): Starting with red, spoon a dollop into center of chilled crust. Add orange filling on top of red, then yellow, green, blue, and finish with purple. Filling will spread outward creating concentric colored rings. For swirl effect, gently drag toothpick or skewer through layers in spiral pattern without over-mixing.
- Chill and Set (at least 4 hours): Cover pie with plastic wrap and refrigerate for minimum 4 hours or overnight. Slice with sharp knife dipped in hot water for clean, vibrant slices.
Notes
Chill bowls and cream before whipping to help the filling hold shape and keep layers distinct. Whip cream to soft peaks to maintain silky texture. Use gel food coloring for vibrant colors without thinning filling. Dip knife in hot water and dry before slicing for clean layers. For dairy-free version, substitute cream cheese with vegan alternative and heavy cream with coconut cream. For gluten-free crust, use almond flour with coconut oil.
Nutrition
- Serving Size: 1 slice (1/8 of pie)
- Calories: 350
- Fat: 22
- Carbohydrates: 30
- Protein: 4
Keywords: rainbow pie, no-bake pie, cream cheese pie, festive dessert, colorful dessert, easy pie recipe, party dessert, graham cracker crust