Love this? Save it for later!
Share the inspiration with your friends
I was staring at a bag of frozen mixed berries that had been taking up space in my freezer for weeks, feeling guilty every time I opened the door. It was ninety degrees outside, the last thing I wanted to do was turn on the oven, and my kids were asking for something sweet. Honestly, I almost just handed them popsicles again. But then I remembered a trick my grandmother used to do with graham crackers and pudding, and I wondered if I could swap in fresh summer flavors instead. That’s how this Easy No Bake Summer Berry Icebox Cake was born, right there in my too-warm kitchen, with a bag of berries and a carton of heavy cream that needed using up.
The first time I made it, I didn’t tell anyone what it was. I just layered the graham crackers, the creamy filling, and the berry sauce, then stuck it in the fridge and hoped for the best. When I pulled it out the next day, the slices were so clean and perfect, my husband asked if I’d bought it from a bakery. Nope, just a little patience and some clever stacking. The berries had softened into this jammy, tart-sweet sauce that soaked into the graham crackers just enough to make them tender but not mushy. And the cream? Light, stable, and not too sweet. It felt like a summer miracle.
This isn’t one of those fussy desserts that requires a pastry bag or a candy thermometer. It’s the kind of recipe you can make with kids, or while you’re half-watching a movie, or on a Wednesday when you just need something pretty to look forward to. And the best part? It actually gets better the longer it sits, so you can make it a day ahead and forget about it until company shows up. That’s my kind of dessert. So if you’ve been looking for a way to use up those berries without breaking a sweat, this is it.
Why You’ll Love This Easy No Bake Summer Berry Icebox Cake
I’ve tested this recipe six times now, tweaking the cream-to-berry ratio, trying different cracker brands, and even sneaking in a little lemon zest one afternoon. Here’s why I keep coming back to it, and why I think you will too.
- No Oven Required: It’s a true no-bake dessert. On hot summer days, this is a lifesaver. Your kitchen stays cool, and you don’t have to hover over a hot stove.
- Simple Ingredients: You probably have most of these in your kitchen right now. Graham crackers, heavy cream, powdered sugar, vanilla, and frozen or fresh mixed berries. Nothing fancy, nothing hard to find.
- Perfect for Entertaining: This cake looks incredibly impressive when you slice into it. The layers are beautiful, and guests always ask for the recipe. It’s great for potlucks, barbecues, or a fancy brunch.
- Crowd-Pleaser: Kids love the creamy, cookie-like texture, and adults appreciate that it’s not cloyingly sweet. The tart berries balance everything out perfectly.
- Make-Ahead Friendly: This cake needs at least 6 hours to set, but it’s even better after 24 hours. You can prep it the day before and relax while your dessert does all the work.
What makes this version different from other icebox cakes I’ve tried? It’s the berry sauce. Most recipes just use fresh berries or a quick jam, but I cook the berries down with a little sugar and lemon juice until they’re thick and concentrated. This prevents the cake from getting watery and gives every bite a punch of real fruit flavor. Trust me, it’s worth the extra five minutes.
This is the kind of dessert that makes you close your eyes after the first bite. It’s comfort food reimagined for summer—cool, creamy, and bursting with bright berry flavor. And honestly, it’s so simple that you’ll wonder why you haven’t been making it all along.
What Ingredients You Will Need
This recipe uses simple, wholesome ingredients to deliver bold flavor and satisfying texture without the fuss. Most of these are pantry staples or easy to find at any grocery store.
For the Berry Sauce:
- 4 cups mixed berries (fresh or frozen) – I use a mix of strawberries, blueberries, raspberries, and blackberries. Frozen works perfectly, just don’t thaw them first.
- 1/2 cup granulated sugar – Adjust based on how sweet your berries are. If they’re really ripe, you can use a little less.
- 2 tablespoons lemon juice – Fresh is best here. It brightens the berries and balances the sweetness.
- 1 tablespoon cornstarch – Mixed with 2 tablespoons cold water to make a slurry. This thickens the sauce so it doesn’t make the cake soggy.
For the Cream Filling:
- 2 cups heavy cream – Very cold. I like to chill the bowl and beaters too for the fluffiest results.
- 1/2 cup powdered sugar – Sifted if it’s lumpy. It dissolves faster than granulated sugar and keeps the cream smooth.
- 1 teaspoon vanilla extract – Pure vanilla, not imitation, if you can swing it. It makes a real difference.
- 8 ounces cream cheese – Softened to room temperature. This adds structure and a slight tang that pairs beautifully with the berries.
For the Layers:
- 1 box (about 14 ounces) graham crackers – You’ll need about 3 full sleeves. I prefer the classic Honey Maid brand for consistent texture, but any brand works.
For Garnish (Optional but Recommended):
- Fresh berries – A handful for the top.
- Mint sprigs – For color.
- Lemon zest – A little sprinkle right before serving adds a pop of freshness.
Ingredient Tips from My Kitchen:
I’ve made this with both fresh and frozen berries, and honestly, frozen works great—especially when fresh berries aren’t in season. Just don’t thaw them, or the sauce will be too watery. For the cream cheese, I always use full-fat for the best texture. Low-fat works but the filling won’t be as stable. If you need a dairy-free option, full-fat coconut cream in place of the heavy cream and a vegan cream cheese substitute can work, though the texture will be slightly softer.
I’ve also tried this with different cookies. Shortbread cookies make a delicious variation, and vanilla wafers work in a pinch, but graham crackers give that classic icebox cake texture that can’t be beat.
Equipment Needed
You don’t need much for this recipe, which is one of the reasons I love it. Here’s what you’ll want to have on hand.
- 9×13-inch baking dish – Glass or ceramic works best. You can see the layers, and it holds the cake nicely.
- Medium saucepan – For cooking the berry sauce.
- Large mixing bowl – For the cream filling.
- Hand mixer or stand mixer – A whisk and some elbow grease will work, but a mixer makes the cream filling light and fluffy in minutes.
- Rubber spatula – For folding and spreading.
- Measuring cups and spoons – Accuracy matters, especially with the cornstarch.
- Plastic wrap – To cover the cake while it chills.
If you don’t have a 9×13 dish, an 8×8 pan will work, but you’ll have fewer layers and a shorter cake. A springform pan is also a great option if you want to remove the sides for a cleaner presentation. I’ve done it both ways, and the springform pan makes slicing much easier.
One tip: make sure your mixing bowl is very cold for the whipped cream. I pop mine in the freezer for 10 minutes before I start. It helps the cream whip up faster and stay stable longer.
Preparation Method
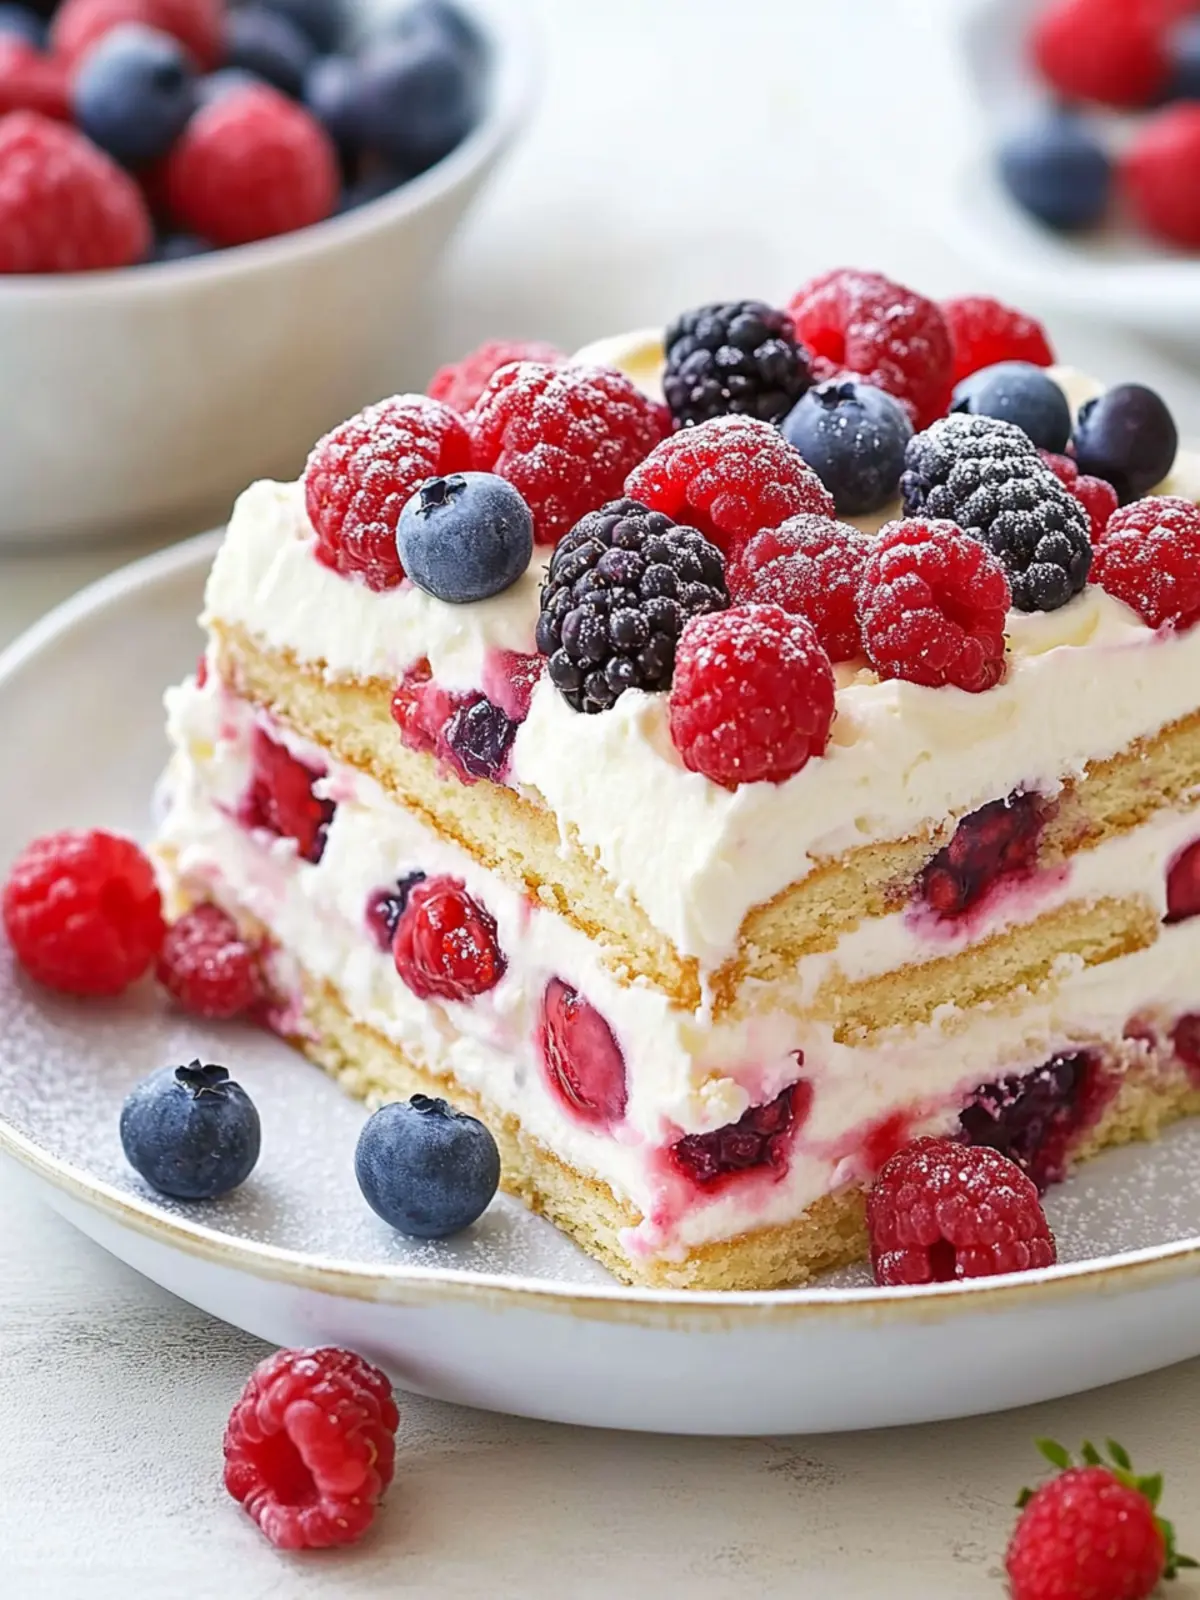
This Easy No Bake Summer Berry Icebox Cake comes together in about 30 minutes of active time. The hardest part is waiting for it to set!
Step 1: Make the Berry Sauce
In a medium saucepan, combine the mixed berries, granulated sugar, and lemon juice. Cook over medium heat, stirring occasionally, until the berries start to break down and release their juices—about 5 to 7 minutes. In a small bowl, whisk the cornstarch with 2 tablespoons of cold water until smooth. Pour the slurry into the simmering berry mixture and stir constantly. Cook for another 2 minutes, until the sauce thickens and coats the back of a spoon. Remove from heat and let it cool completely. You can speed this up by spreading it on a plate and popping it in the fridge for 15 minutes. The sauce should be room temperature or cooler before you assemble the cake.
Step 2: Whip the Cream Filling
In a large mixing bowl (chilled if possible), beat the softened cream cheese with an electric mixer until smooth and creamy, about 2 minutes. Add the powdered sugar and vanilla, and beat until combined. In a separate bowl, whip the cold heavy cream until stiff peaks form—this takes about 3 to 4 minutes with a hand mixer. Be careful not to overwhip, or you’ll end up with butter. Gently fold the whipped cream into the cream cheese mixture using a rubber spatula. Fold until no white streaks remain. The filling should be light, fluffy, and hold its shape.
Step 3: Assemble the Layers
Spread a thin layer of the cream filling (about 1/2 cup) on the bottom of your 9×13 dish. This helps the first layer of graham crackers stick. Arrange a single layer of graham crackers over the cream, breaking them as needed to fit. I usually fit about 8 full crackers per layer. Spread about 1 cup of the cream filling evenly over the crackers. Drizzle about 1/2 cup of the cooled berry sauce over the cream and gently spread it. Repeat the layers: graham crackers, cream filling, berry sauce. You should get 3 to 4 full layers, depending on how thick you spread everything. End with a final layer of cream filling on top. This seals the cake and makes a beautiful white surface for garnishing.
Step 4: Chill and Set
Cover the dish tightly with plastic wrap and refrigerate for at least 6 hours, but overnight is best. The graham crackers need time to soften and absorb the cream and berry juices. After about 8 hours, the cake will slice cleanly and have that perfect icebox cake texture—soft, creamy, and almost mousse-like.
Step 5: Garnish and Serve
Before serving, top with fresh berries, a few mint sprigs, and a light sprinkle of lemon zest. Slice into squares and serve cold. The cake will keep in the fridge for up to 3 days, though it’s best within the first 48 hours.
Cooking Tips & Techniques
After making this cake half a dozen times, I’ve picked up a few tricks that make a real difference. Here’s what I’ve learned.
Don’t Skip Cooling the Berry Sauce
I made this mistake once when I was in a hurry. I poured warm berry sauce over the cream filling, and it melted into a soupy mess. The layers didn’t set properly, and the cake was more of a berry pudding. Let the sauce cool completely—room temperature or cooler—before you start layering.
Whip the Cream to Stiff Peaks
Soft peaks won’t hold up the layers. When you lift the beaters, the cream should stand up straight without drooping. If it’s still a little soft, keep whipping for another 30 seconds. Just watch closely so you don’t go too far.
Use Full-Fat Cream Cheese
I tried a low-fat version once, and the filling was runny and didn’t set well. Full-fat cream cheese gives the filling structure and a richer flavor. Let it soften completely before beating, or you’ll end up with lumps.
Be Patient with the Chilling Time
I know it’s tempting to cut into it after a few hours, but 6 hours is the minimum. At 4 hours, the crackers are still crunchy in the middle. At 8 hours, it’s perfect. Overnight is ideal. This is a make-ahead dessert, so plan for it.
Layer Evenly
Use a spatula to spread the cream and berry sauce all the way to the edges of the crackers. If you leave gaps, those crackers won’t soften properly, and you’ll have dry spots in your cake.
One More Thing
If you’re taking this to a party, assemble it in a disposable aluminum pan. It travels well, and you don’t have to worry about getting your dish back. I’ve done this for several potlucks, and it’s always a hit.
Variations & Adaptations
This recipe is incredibly flexible. Here are some of my favorite variations.
Berry Swap
Use whatever berries you have on hand. Strawberries alone work great, as do raspberries or blackberries. A mix of all three is my personal favorite. In the summer, I use fresh berries from the farmer’s market. In winter, frozen berries are perfectly fine.
Citrus Twist
Add the zest of one lemon or orange to the cream filling. It brightens the whole cake and pairs beautifully with the berries. I tried this on a whim one afternoon, and now I can’t go back.
Chocolate Version
Swap the graham crackers for chocolate wafer cookies or Oreo thins. Use the same berry sauce, or swap it for a chocolate ganache. It’s a completely different dessert, but just as delicious.
Dairy-Free Option
Use full-fat coconut cream (chilled and whipped) in place of the heavy cream, and a vegan cream cheese alternative. The texture will be slightly softer, so chill the cake for a full 24 hours. I’ve made this for a friend with dairy allergies, and it was a hit.
Individual Servings
Layer everything in small mason jars or dessert cups for a portable, single-serving version. This is great for picnics or parties. Just layer the same way, chill, and serve with a spoon.
Low-Sugar Option
Use a sugar substitute like monk fruit or stevia in the cream filling and berry sauce. The texture will be the same, though the flavor will be slightly different. I’ve done this for my mom, who watches her sugar intake, and she loved it.
If you love no-bake treats, you might also enjoy our fun rainbow muddy buddies no-bake treats for another easy, crowd-pleasing dessert.
Serving & Storage Suggestions
This cake is best served cold, straight from the fridge. The texture is soft and creamy, almost like a frozen mousse. Here’s how to serve and store it.
Serving Temperature
Serve chilled. If it sits out for more than 30 minutes, the cream will start to soften and the cake may lose its structure. I usually take it out of the fridge about 10 minutes before slicing, just to take the chill off, but no longer.
Presentation
Top with fresh berries, a dusting of powdered sugar, and a few mint leaves. If you’re feeling fancy, drizzle a little extra berry sauce over each slice. A springform pan makes the cleanest slices, but a regular dish works fine.
Complementary Dishes
This cake is rich enough to stand alone, but it pairs beautifully with a cup of coffee or iced tea. For a summer brunch, serve it alongside a fresh sushi cucumber salad for a sweet and savory contrast.
Storage
Cover the dish tightly with plastic wrap or transfer slices to an airtight container. The cake will keep in the refrigerator for up to 3 days. After day two, the crackers get very soft, almost pudding-like. It’s still delicious, just different.
Freezing
You can freeze this cake for up to 2 months. Assemble it in a freezer-safe dish, cover tightly with plastic wrap and foil, and freeze. Thaw in the refrigerator overnight before serving. The texture will be slightly icier, but it’s still very good.
Flavor Development
This cake actually gets better after a day in the fridge. The flavors meld together, and the texture becomes perfectly creamy. I always try to make it a day ahead for the best results.
Nutritional Information & Benefits
Here’s an approximate nutritional breakdown per serving (based on 12 servings).
| Nutrient | Amount Per Serving |
|---|---|
| Calories | 320 |
| Total Fat | 22g |
| Saturated Fat | 13g |
| Cholesterol | 75mg |
| Sodium | 210mg |
| Total Carbohydrates | 30g |
| Dietary Fiber | 3g |
| Sugars | 20g |
| Protein | 4g |
Berries are packed with antioxidants, vitamin C, and fiber. They’re one of the best things you can eat for overall health. The cream and cream cheese provide calcium and protein, though this is definitely a treat, not a health food. If you’re watching your sugar intake, use a sugar substitute and reduce the amount in the berry sauce.
This recipe is naturally gluten-free if you use gluten-free graham crackers. It’s also vegetarian. For a lighter version, use reduced-fat cream cheese and a sugar substitute, but keep the full-fat heavy cream for stability.
Conclusion
This Easy No Bake Summer Berry Icebox Cake is everything I want in a summer dessert. It’s cool, creamy, bursting with berry flavor, and it doesn’t require turning on the oven. The first time I made it, I was just trying to use up some frozen berries. Now it’s my go-to for barbecues, potlucks, and lazy weekends when I want something special without a lot of work.
I love how forgiving this recipe is. You can swap berries, change the cookies, or add a citrus twist, and it always turns out delicious. It’s the kind of dessert that makes people think you spent hours in the kitchen, when really, you just layered a few things and let the fridge do the work.
I’d love to hear how yours turns out. Did you try a different berry combination? Add a chocolate twist? Let me know in the comments below. And if you’re looking for more easy, no-fuss desserts, check out our creamy ube rice krispie treats for another fun, no-bake option. Happy summer cooking, friends!
Frequently Asked Questions
Can I use fresh berries instead of frozen?
Absolutely. Fresh berries work perfectly. Just adjust the sugar based on their sweetness. Very ripe berries may need a little less sugar.
How long does this cake need to set?
At least 6 hours, but overnight is best. The graham crackers need time to soften and absorb the cream and berry juices for that perfect icebox cake texture.
Can I make this cake gluten-free?
Yes. Use gluten-free graham crackers or gluten-free vanilla wafers. The rest of the ingredients are naturally gluten-free.
Why did my berry sauce turn out watery?
You may have added the cornstarch too late or not cooked it long enough. Make sure the sauce simmers for at least 2 minutes after adding the slurry. Also, let it cool completely before layering.
Can I use Cool Whip instead of homemade whipped cream?
You can, but the texture will be different. Homemade whipped cream with cream cheese gives the cake structure and a richer flavor. Cool Whip will make it lighter and less stable.
Pin This Recipe!
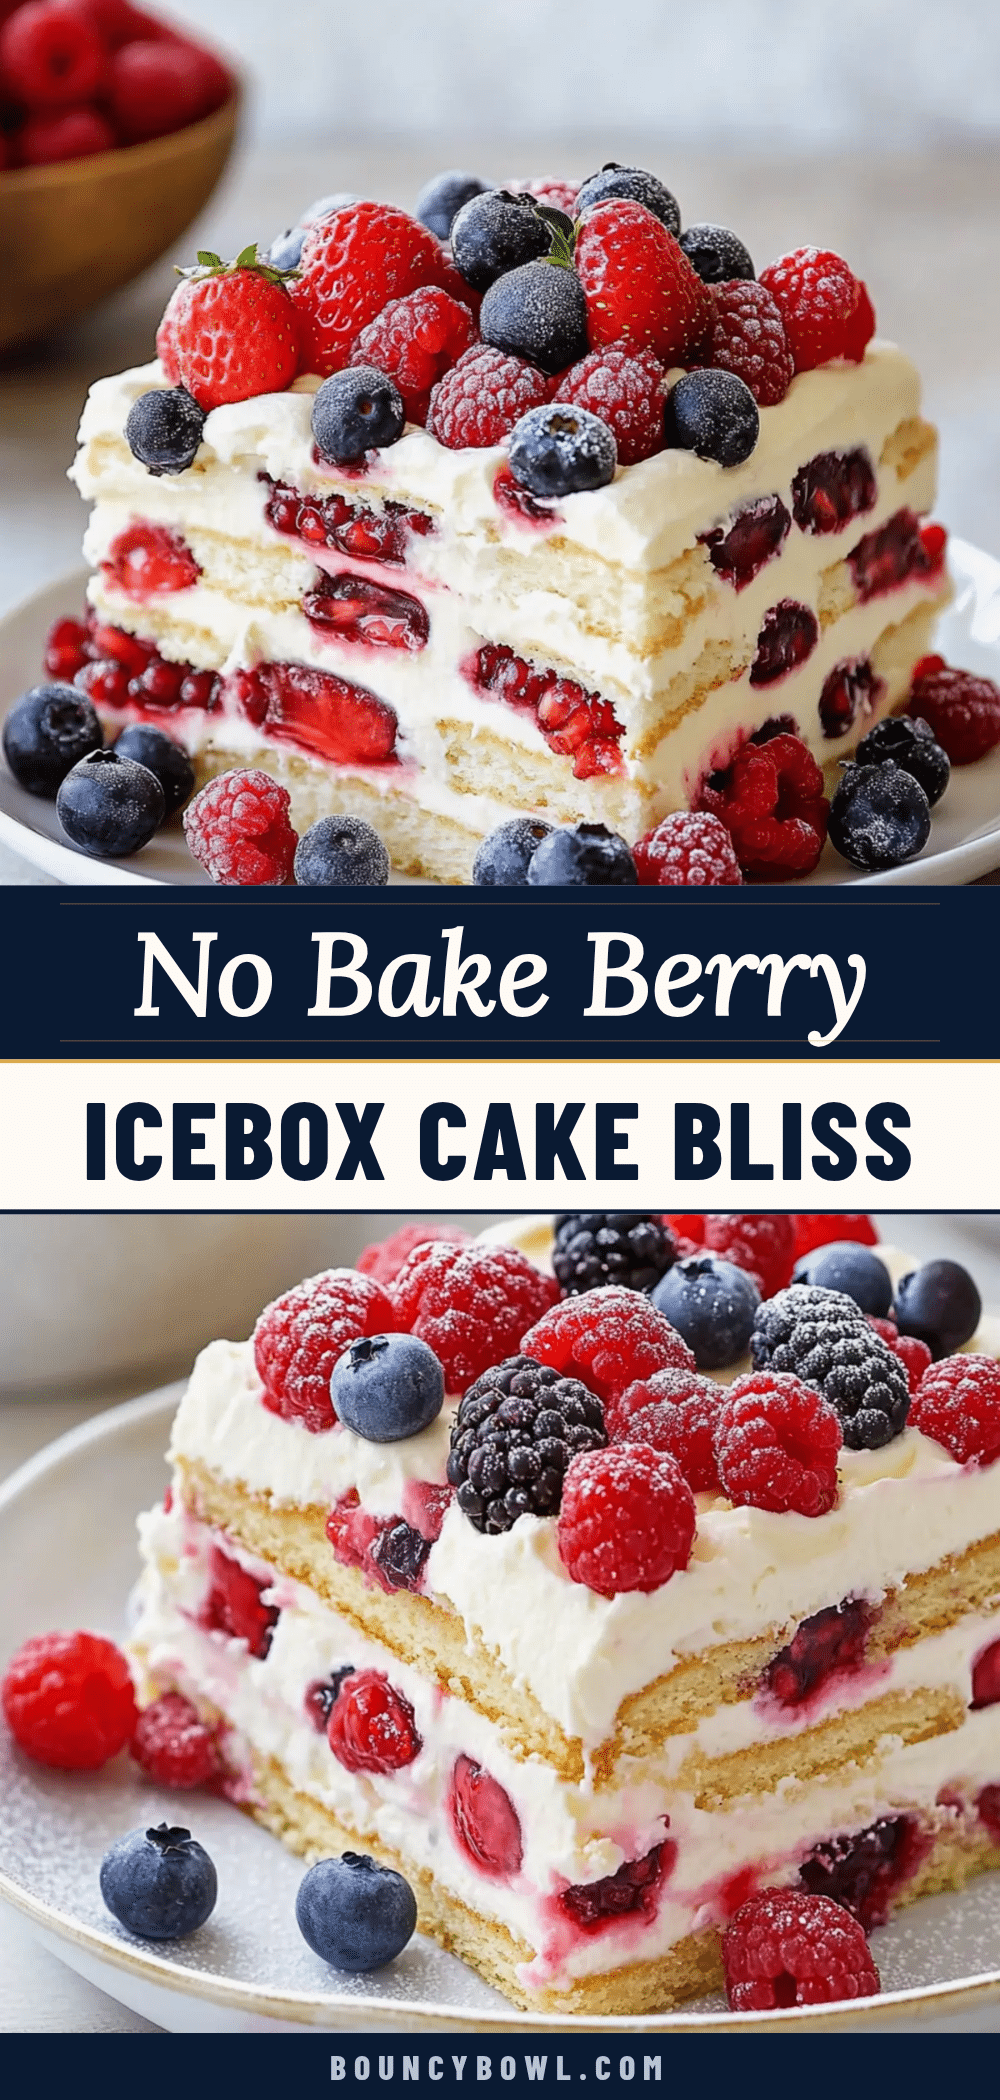
Easy No Bake Summer Berry Icebox Cake
A cool, creamy, no-bake dessert made with layers of graham crackers, a light cream cheese filling, and a homemade berry sauce. Perfect for hot summer days and make-ahead entertaining.
- Prep Time: 30 minutes
- Cook Time: 10 minutes
- Total Time: 6 hours 40 minutes (includes chilling)
- Yield: 12 servings 1x
- Category: Dessert
- Cuisine: American
Ingredients
- 4 cups mixed berries (fresh or frozen)
- 1/2 cup granulated sugar
- 2 tablespoons lemon juice
- 1 tablespoon cornstarch
- 2 tablespoons cold water
- 2 cups heavy cream
- 1/2 cup powdered sugar
- 1 teaspoon vanilla extract
- 8 ounces cream cheese, softened
- 1 box (about 14 ounces) graham crackers
- Fresh berries for garnish (optional)
- Mint sprigs for garnish (optional)
- Lemon zest for garnish (optional)
Instructions
- Make the berry sauce: In a medium saucepan, combine mixed berries, granulated sugar, and lemon juice. Cook over medium heat, stirring occasionally, until berries break down and release juices, about 5-7 minutes. In a small bowl, whisk cornstarch with 2 tablespoons cold water until smooth. Pour slurry into simmering berry mixture and stir constantly. Cook for another 2 minutes until sauce thickens. Remove from heat and let cool completely.
- Whip the cream filling: In a large mixing bowl, beat softened cream cheese with an electric mixer until smooth, about 2 minutes. Add powdered sugar and vanilla, beat until combined. In a separate bowl, whip cold heavy cream until stiff peaks form, about 3-4 minutes. Gently fold whipped cream into cream cheese mixture until no white streaks remain.
- Assemble the layers: Spread a thin layer (about 1/2 cup) of cream filling on the bottom of a 9×13-inch dish. Arrange a single layer of graham crackers over the cream, breaking as needed. Spread about 1 cup of cream filling evenly over crackers. Drizzle about 1/2 cup of cooled berry sauce over the cream and gently spread. Repeat layers (graham crackers, cream filling, berry sauce) 3-4 times, ending with a final layer of cream filling on top.
- Chill and set: Cover dish tightly with plastic wrap and refrigerate for at least 6 hours, preferably overnight.
- Garnish and serve: Before serving, top with fresh berries, mint sprigs, and a sprinkle of lemon zest. Slice into squares and serve cold.
Notes
Let the berry sauce cool completely before layering to prevent melting the cream filling. Whip cream to stiff peaks for best structure. Use full-fat cream cheese for stability. Chilling overnight yields the best texture. For a dairy-free version, use full-fat coconut cream and vegan cream cheese.
Nutrition
- Serving Size: 1 square
- Calories: 320
- Sugar: 20
- Sodium: 210
- Fat: 22
- Saturated Fat: 13
- Carbohydrates: 30
- Fiber: 3
- Protein: 4
Keywords: no-bake dessert, icebox cake, summer berry dessert, easy dessert, graham cracker cake, berry cake


