Love this? Save it for later!
Share the inspiration with your friends
I was staring at a half-empty carton of heavy cream in my fridge, wondering what to do with it before it went bad. The strawberries on my counter were perfectly ripe—sweet, fragrant, and practically begging to be used. I had a sudden craving for something buttery and tender, something that would feel like a weekend morning even though it was a random Tuesday night.
So I pulled out my pastry cutter and got to work. Honestly, I wasn’t aiming for perfection. I just wanted to use up those ingredients without overthinking it. But when those scones came out of the oven—golden, flaky, with little pockets of jammy strawberry—I knew I had stumbled onto something worth repeating. The first bite made me close my eyes. That’s always a good sign.
These flaky strawberries and cream scones have a way of making any day feel a little more special. They’re not overly sweet, which I love, and the texture is just right—crispy on the outside, soft and tender on the inside. The cream keeps them rich without being heavy, and the strawberries add little bursts of summer in every bite. If you’ve ever thought scones were dry or boring, these will change your mind completely.
Why You’ll Love This Recipe
I’ve tested this recipe more times than I care to admit. The first batch was good. The second was better. By the fifth, I had it exactly where I wanted it—and I’m pretty picky about my baked goods. Here’s why these scones are worth every minute in the kitchen.
- Quick and Easy : From mixing bowl to oven in under 20 minutes. No yeast, no rising time, no fuss.
- Simple Ingredients : You probably have most of these in your kitchen right now. Heavy cream, flour, butter, sugar, and fresh strawberries.
- Perfect for Brunch or Tea Time : These scones feel fancy without being finicky. Great for baby showers, Mother’s Day, or just a quiet afternoon treat.
- Crowd-Pleaser : I brought a batch to a friend’s house last weekend, and they disappeared before I could grab a second one. Kids and adults both went back for more.
- Unbelievably Flaky : The secret is cold butter and heavy cream. No buttermilk needed. The result is a tender, layered scone that practically melts in your mouth.
What makes these different from other strawberry scone recipes? It’s the technique. I use frozen grated butter, which creates those beautiful flaky layers without overworking the dough. And instead of cutting the strawberries into tiny pieces, I leave them in slightly bigger chunks so you get those lovely jammy pockets after baking. It’s a small detail, but it makes a big difference.
There’s something about biting into a warm scone with a cup of coffee that just feels right. These scones deliver that comfort without any of the stress. They’re the kind of recipe you’ll want to memorize.
What Ingredients You Will Need
This recipe keeps things simple. You don’t need any fancy baking supplies or hard-to-find ingredients. Just good, honest basics that come together beautifully.
For the Scones:
- 2 cups all-purpose flour (250g) – Spoon and level for accuracy. Too much flour makes dense scones.
- 1/3 cup granulated sugar (65g) – Adds just enough sweetness without overpowering the fruit.
- 1 tablespoon baking powder – Make sure it’s fresh. Old baking powder won’t give you that nice rise.
- 1/2 teaspoon salt – Balances the sweetness and enhances the flavor.
- 1/2 cup cold unsalted butter (113g, 1 stick) – Frozen is best. I prefer Kerrygold for its rich flavor, but any good-quality butter works.
- 3/4 cup cold heavy cream (180ml) – Plus extra for brushing on top. Don’t substitute with milk or half-and-half; the high fat content is what makes these scones tender.
- 1 teaspoon vanilla extract – Pure vanilla, not imitation. It makes a difference.
- 1 1/2 cups fresh strawberries (about 200g), hulled and cut into 1/2-inch chunks – Frozen strawberries release too much moisture and will make the dough soggy. Stick with fresh.
For the Topping:
- 1 tablespoon heavy cream – For brushing the tops before baking.
- 1 tablespoon coarse sugar (like turbinado or demerara) – That crunchy, sparkly finish that makes scones look bakery-worthy.
A quick note on substitutions: If you don’t have heavy cream, you can try using full-fat coconut cream for a dairy-free version, though the texture will be slightly different. For a gluten-free option, use a 1:1 gluten-free flour blend that contains xanthan gum. I’ve tested this with Bob’s Red Mill, and it worked well.
When picking strawberries, look for ones that are deep red, fragrant, and firm. Avoid berries that are soft or have white shoulders—they’ll be less sweet and might turn mushy in the dough.
Equipment Needed
You don’t need a ton of fancy tools for these scones. Here’s what I use:
- Large mixing bowl – Any bowl will do, but I prefer a wide one for easy mixing.
- Pastry cutter or box grater – A pastry cutter works great for cutting in butter. But honestly? I’ve started using a box grater to shred frozen butter directly into the flour. It’s faster and creates the most perfect little butter pieces.
- Bench scraper – Super helpful for folding the dough without overworking it. Also great for cleaning up flour mess.
- Baking sheet – Line it with parchment paper for easy cleanup.
- Parchment paper – Prevents sticking and makes transferring scones a breeze.
- Sharp knife or bench scraper – For cutting the scones into wedges.
- Pastry brush – For brushing cream on top. A silicone one works best.
- Cooling rack – Lets air circulate so the bottoms don’t get soggy.
If you don’t have a pastry cutter, two butter knives work in a pinch. Just cross them and pull in opposite directions to cut the butter into the flour. It takes a little longer, but it gets the job done.
Preparation Method
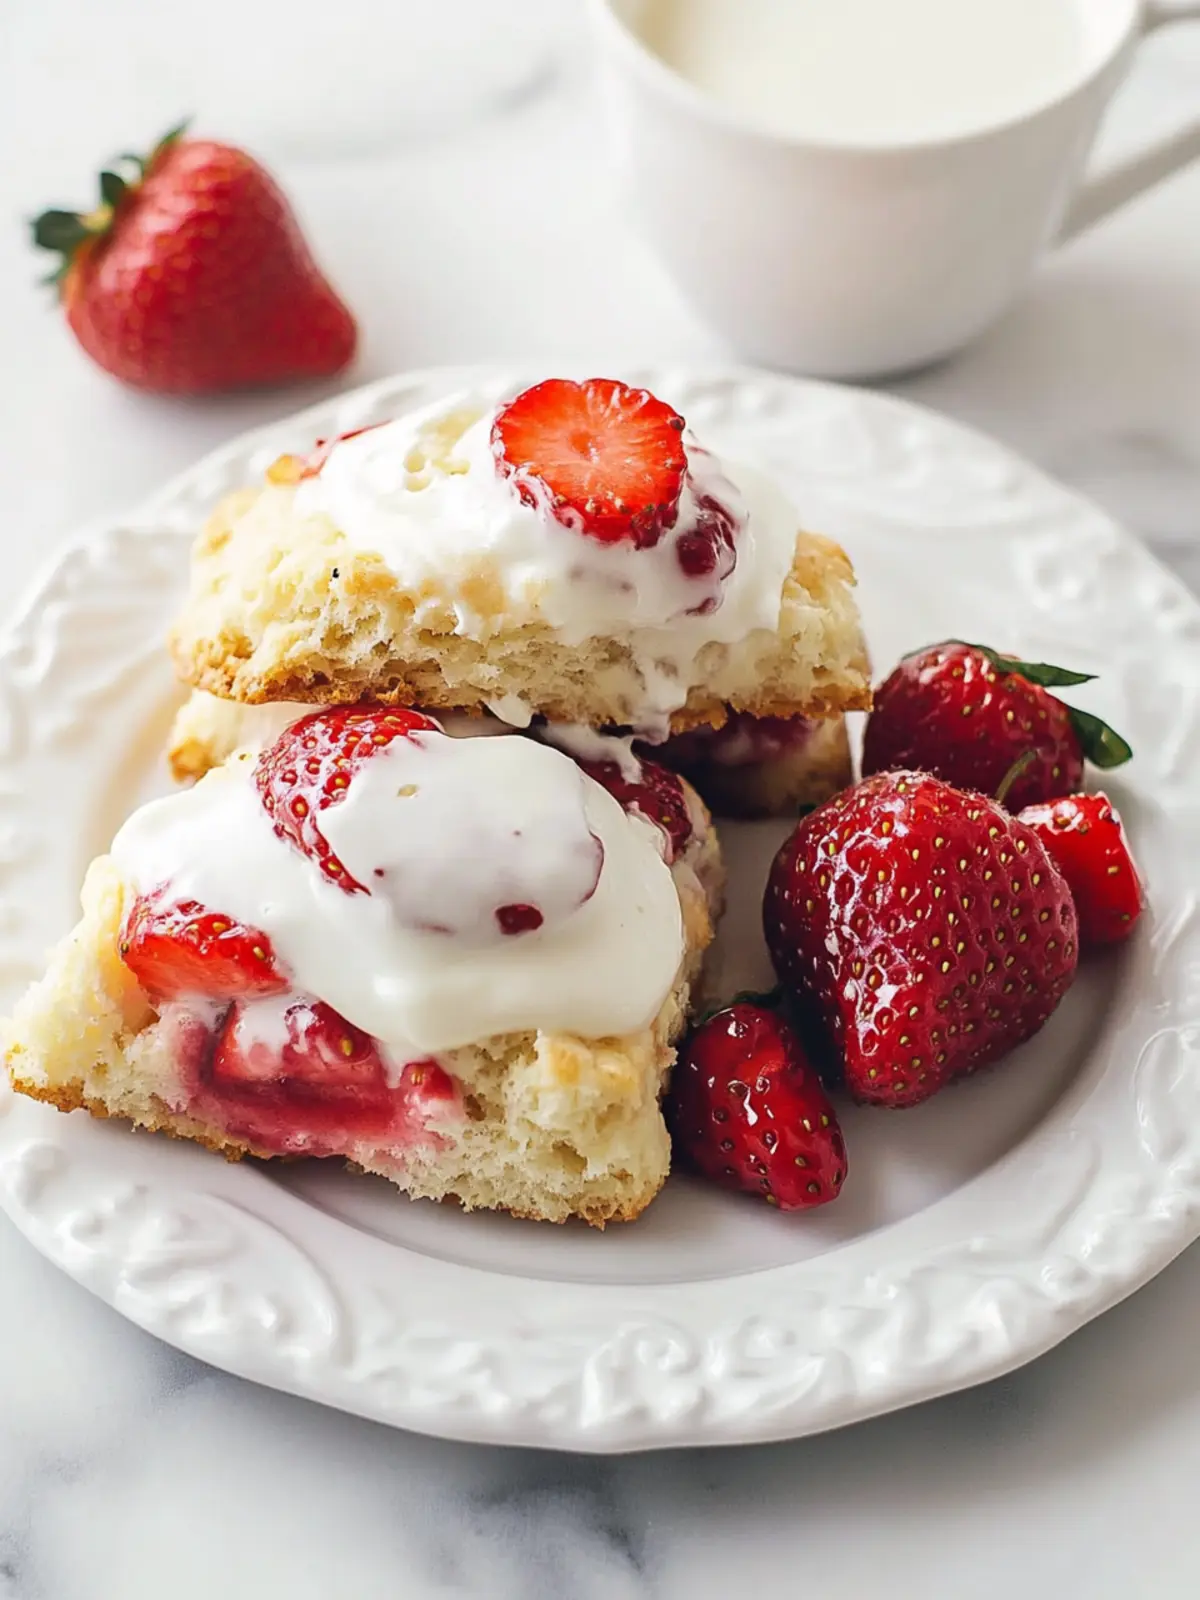
Let’s make some scones! This process is straightforward, but a few key steps make all the difference. Trust me on the cold ingredients—they’re non-negotiable.
- Preheat your oven to 400°F (200°C). Line a baking sheet with parchment paper. Get this going first so the oven is nice and hot when you’re ready to bake.
- Freeze your butter. Pop your stick of butter in the freezer for at least 15-20 minutes before you start. You want it rock hard. While you’re at it, put your heavy cream in the fridge if it’s not already cold.
- Whisk the dry ingredients. In a large bowl, whisk together the flour, sugar, baking powder, and salt. Make sure the baking powder is evenly distributed—nobody wants a pocket of baking powder in their scone.
- Grate the butter. Here’s where things get fun. Take your frozen butter and grate it on the large holes of a box grater directly into the flour mixture. Toss the grated butter with a fork to coat each piece in flour. You want the butter pieces to be about the size of small peas.
- Add the cream and vanilla. Make a well in the center of the flour-butter mixture. Pour in the cold heavy cream and vanilla extract. Use a fork or your hands to gently mix until the dough just comes together. It will look shaggy and a little dry—that’s exactly what you want.
- Fold in the strawberries. Gently add the strawberry chunks. Use your hands to fold them in with as few strokes as possible. The strawberries will release some juice, and the dough might get a little pink in spots. That’s fine. Just don’t overmix, or you’ll end up with tough scones.
- Shape the dough. Turn the dough out onto a lightly floured surface. Pat it into a rectangle about 3/4-inch thick. Fold it in half, then gently pat it back into a rectangle again. This creates those beautiful flaky layers. Repeat this folding process one more time.
- Cut the scones. Pat the dough into a circle about 3/4-inch thick. Use a sharp knife or bench scraper to cut the circle into 8 wedges (like a pizza). Don’t twist the knife—press straight down. Twisting seals the edges and prevents the scones from rising properly.
- Chill the scones. Place the scones on your prepared baking sheet, spacing them about 2 inches apart. Pop the sheet in the fridge for 15-20 minutes. This step is crucial—it firms up the butter and helps the scones hold their shape while baking.
- Brush and sprinkle. Right before baking, brush the tops of the scones with a little heavy cream. Sprinkle generously with coarse sugar. That sugar gives you the most gorgeous crunchy top.
- Bake. Bake for 14-18 minutes, until the scones are golden brown on the edges and the tops look set. The strawberries will be bubbling a little, and your kitchen will smell absolutely divine.
- Cool. Let the scones cool on the baking sheet for 5 minutes, then transfer them to a wire rack. They’re best eaten warm, but they’re still delicious at room temperature.
A quick sensory check: Your scones should be golden on the outside and tender on the inside. When you break one open, you should see visible layers and little pockets of jammy strawberry. If the edges are too dark but the centers are still doughy, your oven might run hot. Try lowering the temperature by 25 degrees next time.
Cooking Tips & Techniques
I’ve made my fair share of scone mistakes. Here’s what I’ve learned so you don’t have to repeat them.
Keep everything cold. I cannot stress this enough. Cold butter creates steam pockets as it melts in the oven, which gives you those flaky layers. If your butter warms up, your scones will spread out flat and turn out dense. If your kitchen is warm, chill your mixing bowl and flour too.
Don’t overmix the dough. This was my biggest mistake early on. I would keep mixing until the dough looked smooth and uniform. Big mistake. Overmixing develops gluten, which makes scones tough and chewy. Mix just until the flour is incorporated, and stop. A few dry spots are totally fine.
Use a light hand. When you’re folding in the strawberries and shaping the dough, treat it gently. Think of it like you’re handling a delicate flower, not a lump of clay. The less you handle the dough, the more tender your scones will be.
Freeze your baking sheet. If you have room, pop your baking sheet in the freezer for 10 minutes before placing the scones on it. This extra chill helps the scones hold their shape during the first few minutes of baking.
Rotate halfway through. Ovens have hot spots. I always rotate my baking sheet halfway through baking to ensure even browning. It takes two seconds and makes a noticeable difference.
Variations & Adaptations
One of the best things about this recipe is how adaptable it is. Here are a few ways to switch things up.
Berry Swap: Not a strawberry fan? Use blueberries, raspberries, or chopped peaches instead. Each fruit brings its own personality. Blueberries are classic, but raspberries add a nice tartness that balances the cream.
Citrus Twist: Add the zest of one lemon or orange to the dry ingredients. The citrus brightens up the strawberries beautifully. I tried this on a whim one morning, and it’s now one of my favorite versions.
Chocolate Strawberry: Fold in 1/2 cup of mini chocolate chips along with the strawberries. The combination of strawberries and chocolate is always a winner. My kids go crazy for this version.
Gluten-Free Option: Substitute the all-purpose flour with a 1:1 gluten-free flour blend. I’ve had good results with King Arthur Measure for Measure. The texture is slightly more delicate, but the flavor is still spot on.
Dairy-Free Adaptation: Use cold coconut cream instead of heavy cream and vegan butter in place of regular butter. The scones won’t be quite as flaky, but they’ll still be delicious. Just make sure everything is ice cold.
Herb-Infused: Add 1 tablespoon of finely chopped fresh thyme or basil to the dough. Sounds weird, I know, but the herbal notes complement the strawberries in a way that’s surprisingly elegant. Great for a fancy brunch.
Serving & Storage Suggestions
These scones are at their absolute best within a few hours of baking. The edges are still crisp, the centers are tender, and the strawberries are warm and jammy. But they’re still pretty fantastic the next day.
How to Serve: I love these scones with a pat of salted butter and a drizzle of honey. Or serve them with a dollop of clotted cream and strawberry jam for a proper cream tea experience. They’re also wonderful alongside a cup of Earl Grey or a strong latte. For a special brunch, pair them with our pretty pink cinnamon rolls for a stunning spread.
Storage: Store leftover scones in an airtight container at room temperature for up to 2 days. If you live in a humid climate, they might get a little soft. You can pop them in a 300°F oven for 5 minutes to re-crisp the edges.
Freezing: These scones freeze beautifully. Freeze them unbaked on a baking sheet until solid, then transfer to a freezer bag. Bake directly from frozen, adding 2-3 minutes to the baking time. You can also freeze baked scones for up to 3 months. Thaw at room temperature and reheat in the oven.
Make-Ahead Tip: You can prepare the dry ingredients and grate the butter into them the night before. Store the mixture in the fridge, then add the cream and strawberries the next morning. Fresh scones in under 30 minutes!
Nutritional Information & Benefits
Let’s be real—scones are a treat, not a health food. But there are a few bright spots in this recipe worth mentioning.
Estimated per scone (based on 8 scones):
- Calories: 320
- Fat: 18g
- Carbohydrates: 36g
- Fiber: 1g
- Sugar: 12g
- Protein: 4g
Strawberries are packed with vitamin C and antioxidants, so at least there’s that. The heavy cream provides some calcium and vitamin A. And if you use grass-fed butter, you get a little dose of healthy conjugated linoleic acid (CLA).
For a slightly lighter version, you can reduce the sugar to 1/4 cup and skip the coarse sugar topping. The scones won’t be as sweet, but the strawberries will still shine through.
These scones are vegetarian-friendly and can be made gluten-free or dairy-free with the substitutions I mentioned earlier. They contain dairy and gluten in their original form, so keep that in mind for guests with allergies.
Conclusion
These flaky strawberries and cream scones have become my go-to for lazy weekends, impromptu brunches, and any time I need a little baking therapy. They come together quickly, use simple ingredients, and deliver that bakery-quality result that makes you feel like a pro. The combination of buttery, flaky layers and sweet, jammy strawberries is honestly hard to beat.
I hope you give these scones a try. Don’t be afraid to make them your own—swap in different fruits, add some lemon zest, or go wild with chocolate chips. Baking should be fun, not stressful. And if your first batch isn’t perfect? That’s okay. Eat them anyway. They’ll still be delicious.
If you make these, I’d love to hear how they turned out! Leave a comment below or tag me in your photos. And if you’re looking for more easy breakfast and brunch ideas, check out our homemade kolaches or our moist banana nut bread for another simple, satisfying treat.
Happy baking, friends!
Frequently Asked Questions
Can I use frozen strawberries instead of fresh?
I don’t recommend it. Frozen strawberries release a lot of moisture as they thaw, which will make your dough sticky and wet. The scones will spread out flat and turn out dense rather than flaky. Stick with fresh strawberries for the best results.
Why do I need to chill the scones before baking?
Chilling firms up the butter again after you’ve handled the dough. Cold butter melts slowly in the oven, creating steam pockets that give you those beautiful flaky layers. If you skip this step, the butter will melt too quickly and your scones will spread out instead of rising up.
Can I make the dough ahead of time?
Absolutely! You can shape the scones, place them on a baking sheet, and refrigerate them for up to 24 hours before baking. You can also freeze the unbaked scones for up to 3 months. Just bake them straight from frozen, adding a few extra minutes to the baking time.
My scones turned out dry. What went wrong?
Dry scones usually come from one of two things: too much flour or overbaking. Make sure you’re measuring your flour correctly by spooning it into the measuring cup and leveling it off. Also, check your scones at the 14-minute mark. Ovens vary, and even an extra minute or two can dry them out.
Can I add a glaze to these scones?
Sure! If you want a sweeter finish, whisk together 1 cup of powdered sugar with 2-3 tablespoons of heavy cream or milk and a splash of vanilla. Drizzle it over the cooled scones. For a strawberry glaze, mash a few strawberries and strain the juice, then use that instead of the cream. It adds a pretty pink color and extra strawberry flavor.
Pin This Recipe!

Flaky Strawberries and Cream Scones Recipe

These flaky strawberries and cream scones are buttery, tender, and packed with jammy strawberry pockets. Quick and easy to make with simple ingredients, they’re perfect for brunch or tea time.
- Prep Time: 20 minutes
- Cook Time: 16 minutes
- Total Time: 36 minutes
- Yield: 8 servings 1x
- Category: Breakfast
- Cuisine: American
Ingredients
- 2 cups all-purpose flour (250g)
- 1/3 cup granulated sugar (65g)
- 1 tablespoon baking powder
- 1/2 teaspoon salt
- 1/2 cup cold unsalted butter (113g, 1 stick), frozen
- 3/4 cup cold heavy cream (180ml), plus extra for brushing
- 1 teaspoon vanilla extract
- 1 1/2 cups fresh strawberries (about 200g), hulled and cut into 1/2-inch chunks
- 1 tablespoon heavy cream (for brushing)
- 1 tablespoon coarse sugar (like turbinado or demerara)
Instructions
- Preheat your oven to 400°F (200°C). Line a baking sheet with parchment paper.
- Freeze your butter for at least 15-20 minutes before starting. Keep heavy cream cold.
- In a large bowl, whisk together the flour, sugar, baking powder, and salt.
- Grate the frozen butter on the large holes of a box grater directly into the flour mixture. Toss with a fork to coat each piece in flour until butter pieces are about the size of small peas.
- Make a well in the center of the flour-butter mixture. Pour in the cold heavy cream and vanilla extract. Mix gently with a fork or your hands until the dough just comes together. It will look shaggy and a little dry.
- Gently fold in the strawberry chunks with as few strokes as possible. Do not overmix.
- Turn the dough out onto a lightly floured surface. Pat it into a rectangle about 3/4-inch thick. Fold it in half, then gently pat it back into a rectangle again. Repeat this folding process one more time to create flaky layers.
- Pat the dough into a circle about 3/4-inch thick. Use a sharp knife or bench scraper to cut the circle into 8 wedges (like a pizza). Press straight down without twisting.
- Place the scones on the prepared baking sheet, spacing them about 2 inches apart. Chill in the fridge for 15-20 minutes.
- Right before baking, brush the tops of the scones with a little heavy cream. Sprinkle generously with coarse sugar.
- Bake for 14-18 minutes, until the scones are golden brown on the edges and the tops look set.
- Let the scones cool on the baking sheet for 5 minutes, then transfer them to a wire rack. Best served warm.
Notes
Keep all ingredients cold for flaky layers. Do not overmix the dough. Fresh strawberries are essential; frozen will make the dough soggy. Scones can be frozen unbaked for up to 3 months. For a dairy-free version, use coconut cream and vegan butter. For gluten-free, use a 1:1 gluten-free flour blend with xanthan gum.
Nutrition
- Serving Size: 1 scone
- Calories: 320
- Sugar: 12
- Sodium: 280
- Fat: 18
- Saturated Fat: 11
- Carbohydrates: 36
- Fiber: 1
- Protein: 4
Keywords: strawberry scones, cream scones, flaky scones, easy scone recipe, brunch recipe, strawberry recipe


