Love this? Save it for later!
Share the inspiration with your friends
“Hey, you’ve got to try these mini cheese danishes!” That was the text from my coworker just as I was juggling a pile of deadlines and an empty stomach. Honestly, I wasn’t expecting much — you know how it goes, quick recipes sometimes mean bland results. But the moment I bit into one of these flaky, buttery pastries filled with that creamy cheese mix, I stopped mid-scroll and made a mental note: this recipe is a keeper.
It’s funny how something so simple can turn a hectic day into a small celebration. I’ve since whipped up these quick irresistible mini cheese danishes more times than I can count—sometimes for a spontaneous brunch, other times for an after-school treat. The thing is, they taste way more luxurious than the 30 minutes it takes to make them would suggest. The golden puff pastry, a slight tang from the cream cheese filling, and just the right touch of sweetness—it all comes together in this little package of cozy comfort.
What stuck with me is that you don’t need fancy ingredients or hours of waiting around. This recipe fits perfectly into those busy mornings or sudden cravings. Plus, they pair surprisingly well with a cup of coffee or even a glass of cold milk. So if you’ve ever thought, “I wish I could have bakery-quality treats without the fuss,” these mini cheese danishes might just become your new go-to.
Every time I make them, there’s this quiet satisfaction—no stress, no complicated steps, just a warm, flaky bite that feels like a small reward. That’s why I keep coming back to this recipe, convinced it’s one of the best quick treats you can have on hand.
Why You’ll Love This Recipe
Having tested dozens of cheese danish recipes, I can say with a bit of pride that this one nails the balance of ease and flavor. Here’s why it stands out:
- Quick & Easy: Ready in just 30 minutes, making it perfect for mornings when you want something special but don’t have all day.
- Simple Ingredients: Uses pantry staples like puff pastry and cream cheese, so no last-minute grocery runs.
- Perfect for Any Occasion: Whether it’s a cozy weekend brunch or an impromptu gathering, these mini danishes fit right in.
- Crowd-Pleaser: The flaky crust and creamy filling always get rave reviews from both kids and adults.
- Unbelievably Delicious: The texture contrast—crispy outside, soft inside—and a subtle sweetness make it comfort food you want more of.
What really sets this recipe apart is the filling technique. I blend the cream cheese just enough to keep it smooth but still rich with a little lemon zest for that fresh zing. Plus, folding the pastry into neat little parcels traps the moisture perfectly, so nothing gets soggy. Trust me, this is not just another danish—it’s my favorite quick fix when I want a bakery-worthy treat without the fuss.
Honestly, it’s the kind of recipe that makes you pause and enjoy the moment, even if the rest of the day feels chaotic. If you love treats like the fluffy apple yogurt pancakes, this mini cheese danish will slide right into your breakfast favorites list.
What Ingredients You Will Need
This recipe uses simple, wholesome ingredients that come together to deliver bold flavor and satisfying texture without any fuss. Most are pantry staples, and you can swap a few if needed.
- Puff pastry sheets: Usually found frozen in the freezer aisle. I prefer brands like Pepperidge Farm for reliable flakiness.
- Cream cheese: Full-fat, softened for easy mixing. Philadelphia cream cheese works great here.
- Granulated sugar: Just a touch to sweeten the cream cheese filling.
- Vanilla extract: Adds warm aroma and depth.
- Lemon zest: Freshly grated for a subtle zing that brightens the filling.
- Egg yolk: For brushing the pastry to get that shiny golden finish.
- Milk or cream: A splash mixed with the egg yolk for an even richer glaze.
- Powdered sugar (optional): For dusting over the finished danishes to add a sweet finishing touch.
If you want to make this dairy-free, swap cream cheese for a plant-based alternative and use non-dairy milk for the egg wash. For a gluten-free version, you might try a specialty puff pastry made with gluten-free flour blends, though texture will vary.
When I have fresh berries on hand, I sometimes add a few blueberries or raspberries to the filling before baking—it brings a burst of freshness that pairs beautifully with the creamy cheese. For a seasonal twist, this is a nice touch, especially in summer.
Equipment Needed
- Baking sheet: A standard half-sheet pan works fine; line it with parchment paper to prevent sticking and make cleanup easier.
- Mixing bowl: Medium size for blending the cream cheese filling.
- Whisk or fork: For beating the cream cheese and sugar together smoothly.
- Pastry brush: To apply the egg wash evenly and get that glossy finish.
- Sharp knife or pizza cutter: To cut the puff pastry into even squares for the mini danishes.
- Cooling rack: Helps pastries cool down evenly and keeps them crisp.
If you don’t have a pastry brush, you can lightly dab the egg wash with the back of a spoon or a clean fingertip. I’ve also used a serrated knife to gently score the pastry edges before folding, which gives a neat look. For the puff pastry, keep it well chilled until ready to use to avoid it becoming too soft and sticky.
Preparation Method

- Preheat your oven to 400°F (200°C). Line a baking sheet with parchment paper to prevent sticking and make cleanup easy.
- Prepare the filling: In a medium bowl, beat 8 oz (225 g) softened cream cheese with 1/4 cup (50 g) granulated sugar, 1 tsp vanilla extract, and the zest of one lemon until smooth and creamy. This should take about 2-3 minutes with a whisk or hand mixer.
- Prepare the puff pastry: Thaw one sheet of frozen puff pastry according to package instructions until just pliable (usually 20-25 minutes). On a lightly floured surface, roll it out gently to smooth seams and even thickness.
- Cut the pastry: Using a sharp knife or pizza cutter, cut the puff pastry into 9 equal squares, roughly 3×3 inches (7.5×7.5 cm).
- Assemble the danishes: Place about 1 tablespoon of the cream cheese filling in the center of each square. Fold the squares over the filling in your preferred style (I like folding corners toward the center or making a simple envelope shape). Press edges lightly to seal but avoid squeezing out the filling.
- Brush with egg wash: Beat one egg yolk with 1 tablespoon milk or cream. Using a pastry brush, lightly coat each danish with the egg wash for a shiny golden finish.
- Bake: Place the danishes on the prepared baking sheet, leaving a little space between each. Bake in the preheated oven for 15-18 minutes or until puffed and golden brown. Keep an eye on them after 12 minutes to avoid over-browning.
- Cool and serve: Remove from oven, transfer to a cooling rack, and let cool for 5-10 minutes. Dust with powdered sugar if desired before serving.
A quick tip: If your filling seems too soft and watery, chill it for 10 minutes before assembling. This helps prevent leaking during baking. And don’t worry if the danishes puff unevenly—they still taste amazing.
Cooking Tips & Techniques
Getting that perfect flaky, golden crust with a creamy center takes a few tricks I’ve picked up over the years. First, keep your puff pastry cold until just before you bake. Warm pastry gets sticky and won’t puff as well.
When mixing the filling, don’t overblend it into a liquid. You want it smooth but still thick enough to hold shape inside the pastry. Adding lemon zest is a small step that really brightens the flavor and balances the richness.
Applying the egg wash evenly is key to that shiny, bakery-style finish. Use a light hand—too much can cause sogginess or uneven browning. If you’re pressed for time, you can skip resting the assembled pastries in the fridge, but a 10-minute chill helps the pastry hold shape better during baking.
I once tried making these mini danishes with homemade pastry dough. While tasty, it was a lot more work and didn’t puff up quite as beautifully. So for busy days, the store-bought puff pastry is honestly the best shortcut that doesn’t compromise taste.
Also, multitasking helps here: while the pastries bake, you can whip up a quick batch of tropical Hawaiian chicken with coconut rice for dinner later. That way, your day stays on track and you get a delightful treat without slowing down.
Variations & Adaptations
- Fruit-Filled Mini Danishes: Add a teaspoon of your favorite jam or fresh berries to the cream cheese filling before folding the pastry for a fruity twist.
- Savory Version: Swap the sweet filling for a mix of ricotta, herbs, and grated Parmesan. Perfect for a light snack or appetizer.
- Gluten-Free Pastry: Use a gluten-free puff pastry available at specialty stores. The texture will be slightly different but still delicious.
- Nutty Crunch: Sprinkle chopped toasted almonds or pecans on top of the filling before baking for added texture and flavor.
- Personal Favorite: I like adding a pinch of cinnamon to the cream cheese filling sometimes—it gives a warm, cozy note that’s fantastic in cooler months.
For cooking method adjustments, if you’re short on oven space, these can be baked in batches or even turned into quick toaster oven treats. Just watch closely as the baking time might be shorter.
Serving & Storage Suggestions
Serve these mini cheese danishes warm or at room temperature. They pair beautifully with coffee, tea, or fresh juice for breakfast or brunch. For a sweet brunch spread, consider serving alongside maple bacon breakfast casserole to balance sweet and savory flavors.
Store leftovers in an airtight container at room temperature for up to 24 hours or in the fridge for 2-3 days. To keep that flaky crispness, reheat gently in a toaster oven or conventional oven at 350°F (175°C) for 5-7 minutes rather than microwaving, which can make the pastry soggy.
These danishes also freeze well. Wrap them individually in plastic wrap and store in a freezer-safe bag for up to one month. Defrost at room temperature and reheat before serving. Flavors tend to meld nicely after a day, so leftovers actually taste even better the next day.
Nutritional Information & Benefits
Each mini cheese danish contains roughly 180-220 calories depending on size and exact ingredients. They’re a source of calcium and protein thanks to the cream cheese, and the puff pastry provides satisfying carbs.
While not a health food per se, you can feel good knowing this recipe uses real, simple ingredients without preservatives or artificial additives. Using fresh lemon zest adds a bit of vitamin C and a refreshing flavor punch.
If you’re keeping an eye on dietary needs, this recipe is naturally vegetarian and can be adapted for gluten-free or dairy-free diets with simple swaps. Just be mindful of portion sizes, as puff pastry is rich and buttery.
Conclusion
Quick irresistible mini cheese danishes are one of those rare finds that combine simplicity and taste so effortlessly that you want to make them over and over. They’ve become my secret weapon for busy mornings, last-minute guests, or when I just need a little comfort in pastry form.
Feel free to personalize the filling, fold styles, or toppings to make this recipe your own. It’s forgiving, fast, and frankly, hard to resist once you get started.
Give these a try next time you want a bakery-quality treat without the wait. And if you feel like mixing up your breakfast rotation, pairing them with something like the fluffy apple yogurt pancakes will make any morning feel special.
Happy baking and even happier snacking!
FAQs
Can I make mini cheese danishes ahead of time?
You can prepare them up to the point of baking, cover, and refrigerate for a few hours before baking. For longer storage, freeze assembled danishes and bake directly from frozen, adding a few extra minutes to the bake time.
What can I substitute for cream cheese in the filling?
Ricotta or mascarpone can be used for a milder flavor. For dairy-free options, try a plant-based cream cheese alternative; just make sure it’s firm enough to hold shape.
How do I prevent the filling from leaking out during baking?
Don’t overfill the pastry squares and press the edges firmly but gently to seal. Chilling the assembled danishes for 10 minutes before baking also helps the filling stay put.
Can I use homemade puff pastry for this recipe?
Yes, but homemade puff pastry requires more time and skill. Store-bought puff pastry works perfectly for a quick and reliable result.
What’s the best way to reheat leftover danishes?
Reheat in a toaster oven or conventional oven at 350°F (175°C) for 5-7 minutes to restore flakiness. Avoid microwaving as it can make the pastry soggy.
Pin This Recipe!
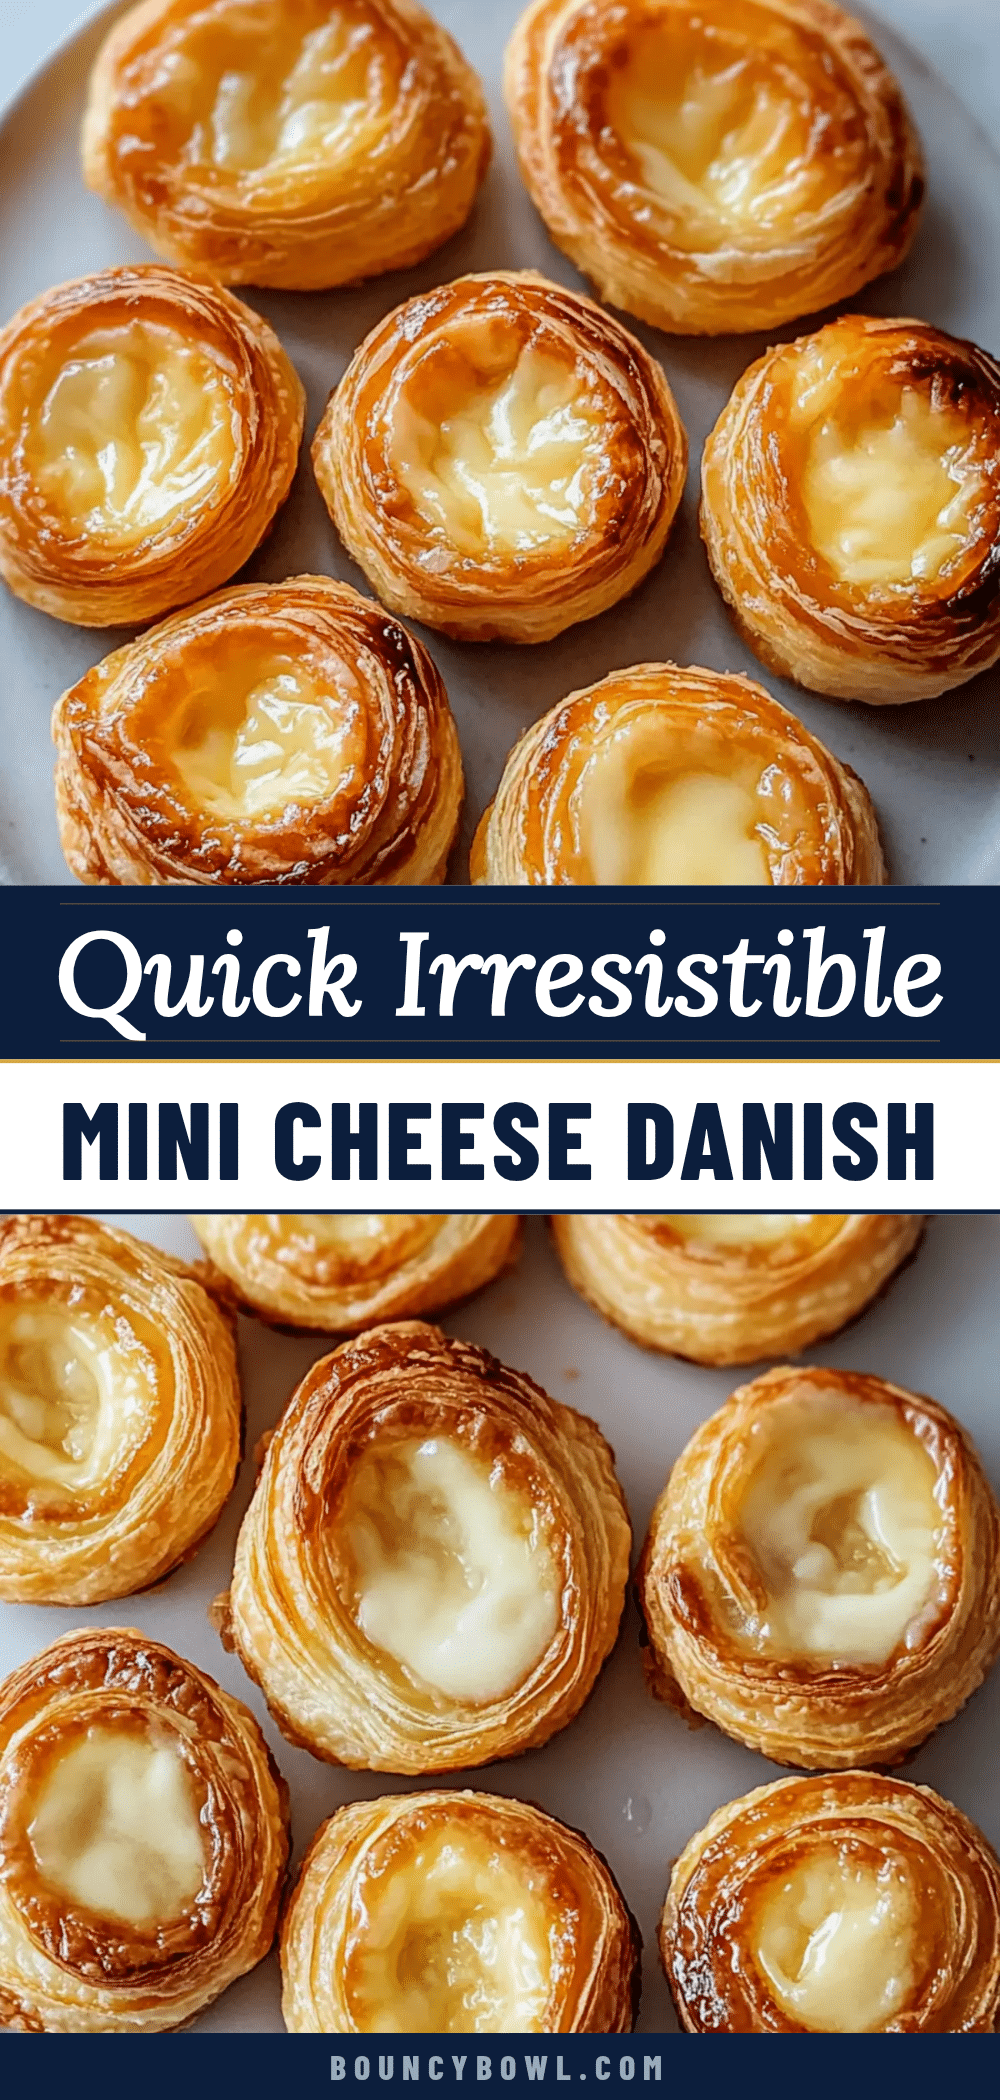
Quick Irresistible Mini Cheese Danish

These mini cheese danishes are flaky, buttery pastries filled with a creamy, slightly sweetened cream cheese mixture with a hint of lemon zest. Ready in just 30 minutes, they make a perfect quick treat for breakfast or brunch.
- Prep Time: 10 minutes
- Cook Time: 18 minutes
- Total Time: 28 minutes
- Yield: 9 mini danishes 1x
- Category: Breakfast, Snack, Dessert
- Cuisine: American
Ingredients
- 1 sheet frozen puff pastry (about 9x9 inches), thawed
- 8 oz (225 g) full-fat cream cheese, softened
- 1/4 cup (50 g) granulated sugar
- 1 tsp vanilla extract
- Zest of 1 lemon
- 1 egg yolk
- 1 tbsp milk or cream
- Powdered sugar (optional, for dusting)
- Fresh berries (optional, for filling)
- Jam (optional, for filling)
- Ricotta, herbs, and grated Parmesan (optional, for savory version)
- Chopped toasted almonds or pecans (optional, for topping)
- Cinnamon (optional, for filling)
Instructions
- Preheat your oven to 400°F (200°C). Line a baking sheet with parchment paper.
- In a medium bowl, beat the softened cream cheese with granulated sugar, vanilla extract, and lemon zest until smooth and creamy (about 2-3 minutes).
- Thaw the puff pastry sheet until pliable (about 20-25 minutes). On a lightly floured surface, roll it out gently to smooth seams and even thickness.
- Cut the puff pastry into 9 equal squares, approximately 3×3 inches each.
- Place about 1 tablespoon of the cream cheese filling in the center of each square. Fold the pastry over the filling in your preferred style (corners toward center or envelope shape) and press edges lightly to seal.
- Beat the egg yolk with milk or cream. Using a pastry brush, lightly coat each danish with the egg wash for a shiny golden finish.
- Place the danishes on the prepared baking sheet, leaving space between each. Bake for 15-18 minutes or until puffed and golden brown, checking after 12 minutes to avoid over-browning.
- Remove from oven and transfer to a cooling rack. Let cool for 5-10 minutes.
- Dust with powdered sugar if desired before serving.
Notes
Keep puff pastry cold until ready to use to ensure flakiness. Chill filling if too soft before assembling to prevent leaking. Egg wash should be applied lightly to avoid sogginess. Danishes can be made ahead and refrigerated or frozen before baking. Reheat in oven or toaster oven to maintain crispness; avoid microwaving.
Nutrition
- Serving Size: 1 mini danish
- Calories: 200
- Sugar: 6
- Sodium: 150
- Fat: 13
- Saturated Fat: 7
- Carbohydrates: 18
- Fiber: 0.5
- Protein: 4
Keywords: mini cheese danish, quick pastry, puff pastry recipe, cream cheese danish, easy breakfast, brunch recipe, flaky pastry, sweet danish


