Love this? Save it for later!
Share the inspiration with your friends
The first time I made these peanut butter brookie cups, it was out of pure desperation. I had promised to bring dessert to a friend’s get-together, completely forgot about it until an hour before I had to leave, and my pantry was looking sad. A half-empty bag of chocolate chips, some peanut butter that was down to the last few spoonfuls, and a stick of butter that had been sitting in the fridge for a week. Not exactly the makings of a showstopper.
But I figured, you know what? I could make a simple brownie batter and just pour it into a muffin tin. Then I spotted the peanut butter and thought, “Why not swirl some in?” Then I thought, “Why not put a giant dollop of it in the middle?” And then, because I have zero chill when it comes to dessert, I pressed a few extra chocolate chips on top. The result was this messy, glorious, fudgy little cup that looked like it came from a bakery. I brought them anyway, and people literally asked for the recipe before they finished the first bite.
Honestly, that was a year ago, and I haven’t stopped making them since. They’ve become my go-to for last-minute parties, lazy Sunday baking sessions, and those evenings when only a combination of chocolate and peanut butter will do. They are, without a doubt, the best peanut butter brookie cups I’ve ever had. And the secret? It’s embarrassingly simple.
Why You’ll Love This Recipe
These aren’t just any dessert. They are a perfect storm of textures and flavors that come together in less than 30 minutes. Here’s why they work so well:
- Quick & Easy: From start to finish, you’re looking at about 25 minutes. No stand mixer required, no chilling time, no complicated steps. Perfect for a sudden sweet tooth or an unexpected guest.
- Simple Ingredients: You probably have everything in your pantry right now. Flour, sugar, cocoa powder, butter, eggs, peanut butter, and chocolate chips. That’s it.
- Perfect for Any Occasion: These little cups are portable, easy to serve, and always a hit. They’re great for potlucks, bake sales, holiday cookie exchanges, or just a fun weekend treat.
- Crowd-Pleaser: I have yet to meet someone who doesn’t love a chocolate and peanut butter combo. Kids go crazy for them, and adults appreciate the nostalgic, satisfying flavor.
- Unbelievably Fudgy: The texture is the real star here. The brownie base is dense, moist, and intensely chocolatey, while the peanut butter center stays soft and slightly gooey. It’s the best of both worlds in one perfect bite.
What makes this recipe different from every other brookie out there is the ratio. Most recipes try to layer a full cookie dough on top of a brownie, which can get dry or complicated. These cups are all about the brownie, with a generous, unapologetic pocket of peanut butter right in the middle. It’s not a hybrid; it’s a brownie that learned how to be a peanut butter cup, and it’s absolutely brilliant.
This is the kind of dessert that makes you close your eyes after the first bite. It’s comfort food, pure and simple. It’s the recipe you’ll turn to when you need a guaranteed win, without any of the stress.
What Ingredients You Will Need
This recipe uses simple, everyday ingredients to create something that tastes anything but ordinary. Each component plays a specific role in building that fudgy texture and rich flavor.
- Unsalted Butter (½ cup / 1 stick, melted): Butter is the foundation of flavor here. Using unsalted lets you control the salt level. Melting it, rather than creaming it, is what gives these cups their dense, fudgy, brownie-like texture. I always use a good quality butter like Kerrygold for the best taste.
- Granulated Sugar (1 cup): Sugar does more than just sweeten. It helps create that crackly, shiny top crust that all great brownies have. It also contributes to the moist, tender crumb.
- Large Eggs (2, at room temperature): Eggs are the binder. They provide structure and richness. Make sure they are at room temperature so they emulsify properly with the melted butter, creating a smooth, glossy batter.
- Vanilla Extract (1 teaspoon): A little vanilla rounds out the chocolate flavor and adds warmth. Use pure vanilla extract if you have it; the flavor is noticeably better.
- All-Purpose Flour (¾ cup): Just enough flour to give the cups structure without making them cakey. We want them fudgy, so we use less flour than a typical cake recipe. For a gluten-free version, you can substitute a 1:1 gluten-free baking flour blend.
- Unsweetened Cocoa Powder (⅓ cup): This is your chocolate backbone. I prefer a Dutch-processed cocoa powder for a deeper, more mellow chocolate flavor. If you only have natural cocoa powder, it will work fine, but the flavor will be slightly more sharp and acidic.
- Salt (¼ teaspoon): Salt is crucial. It doesn’t make things salty; it enhances the sweetness of the sugar and the depth of the chocolate. Don’t skip it.
- Baking Powder (¼ teaspoon): A tiny bit of baking powder gives the brownies a slight lift so they aren’t completely dense pucks. It helps create a more pleasant, tender texture.
- Creamy Peanut Butter (about 6 tablespoons): This is the star of the show. Use a standard, shelf-stable creamy peanut butter like Jif or Skippy. Natural peanut butter that separates can be too oily and might not hold its shape as well in the center, though you can use it if you stir it very well.
- Semi-Sweet Chocolate Chips (½ cup + more for topping): These add pockets of melted chocolate throughout the batter and a beautiful, inviting look on top. Semi-sweet is perfect because it’s not too sweet and balances the rich brownie. Dark chocolate chips would also be amazing.
Equipment Needed
You don’t need any fancy equipment for these peanut butter brookie cups. Here’s what you’ll need:
- Standard 12-Cup Muffin Tin: This is non-negotiable. It gives the brookie cups their perfect shape and size. A mini muffin tin works too, but you’ll need to reduce the baking time to about 8-10 minutes.
- Mixing Bowls: One large bowl for the brownie batter and one small bowl for the peanut butter filling (optional, you can just scoop it from the jar).
- Whisk: For combining the wet ingredients smoothly.
- Rubber Spatula: Essential for folding in the flour and chocolate chips without overmixing.
- Measuring Cups and Spoons: For accuracy, especially with the flour and cocoa powder.
- Small Cookie Scoop or Two Spoons: For portioning the batter evenly into the muffin tin. This helps all the cups bake at the same rate.
- Non-Stick Cooking Spray or Paper Liners: I prefer using paper liners for easy removal and zero cleanup. If you spray the tin directly, make sure to get the corners well.
Preparation Method
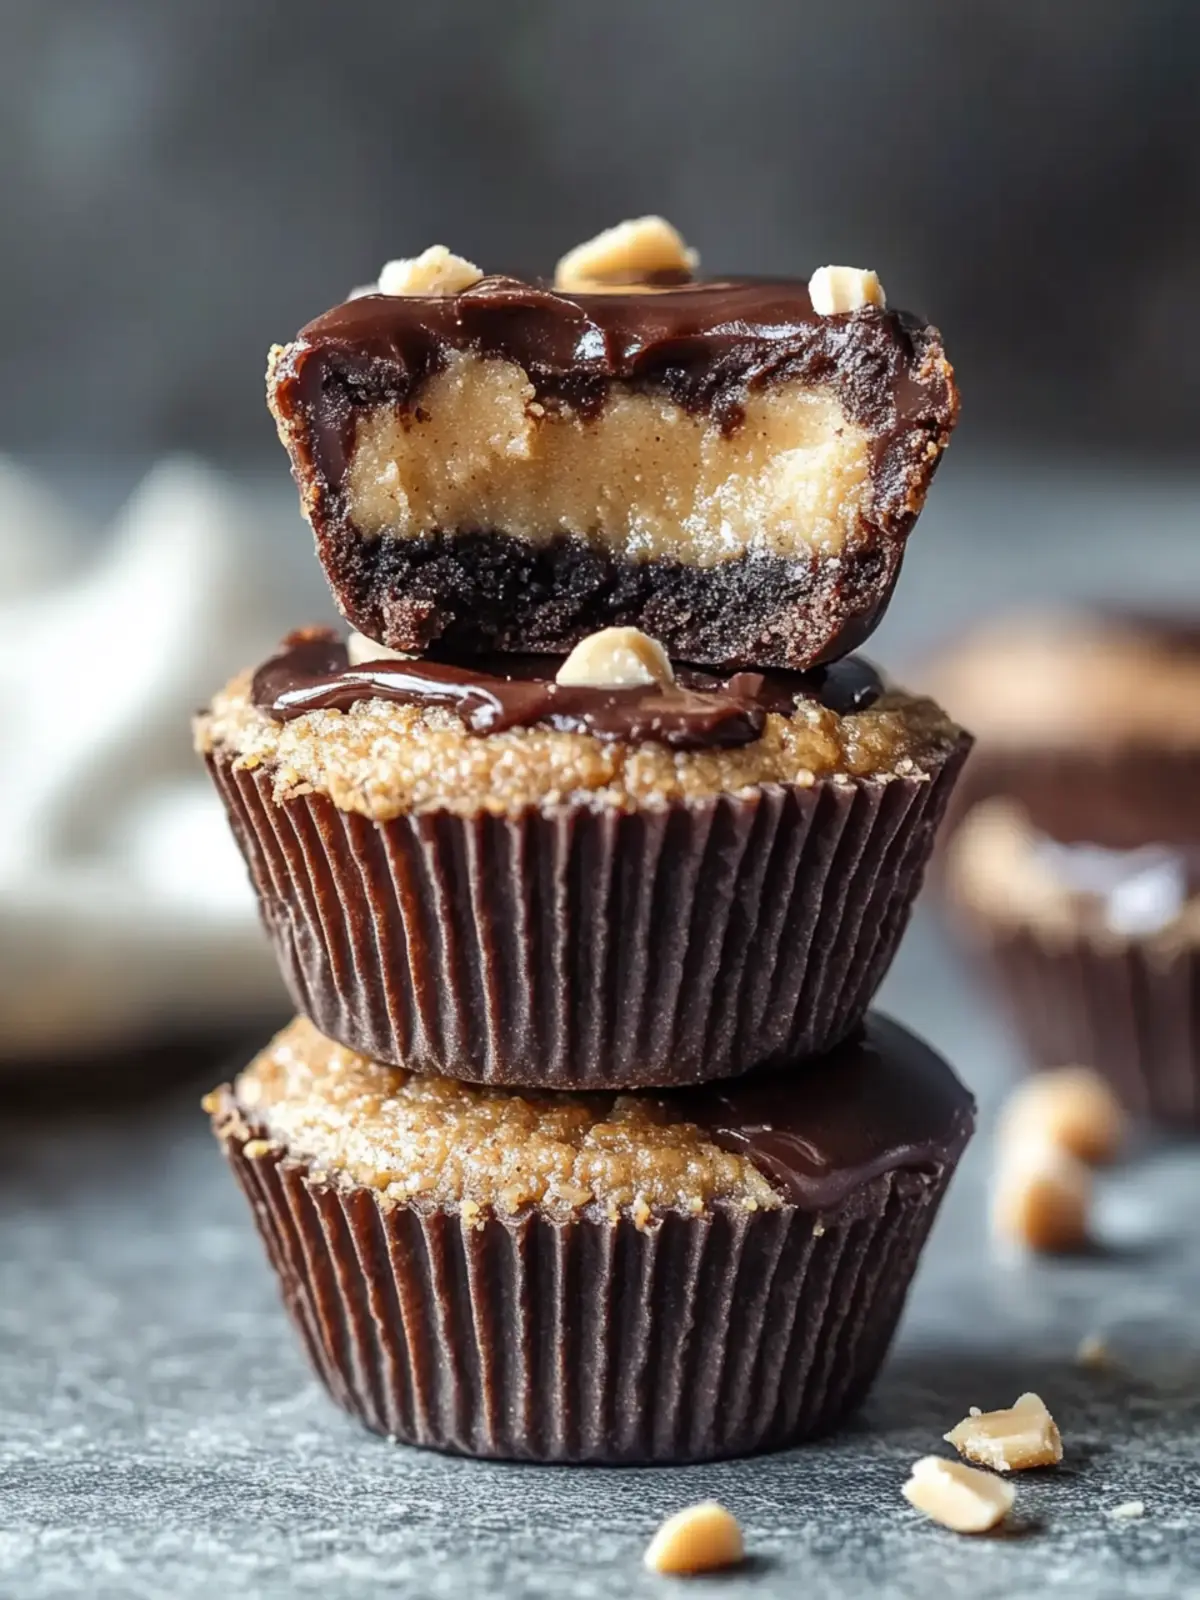
Let’s get baking. These steps are simple, but following them closely will guarantee perfect results every single time.
- Preheat and Prep: Preheat your oven to 350°F (175°C). Line a standard 12-cup muffin tin with paper liners. This makes removal a breeze and keeps the cups looking neat. If you don’t have liners, generously spray the cups with non-stick spray.
- Melt the Butter: In a large microwave-safe bowl, melt the ½ cup of unsalted butter in 30-second increments until completely melted. Let it cool for a minute or two. You don’t want it piping hot, or it will scramble the eggs.
- Mix Wet Ingredients: To the melted butter, add the 1 cup of granulated sugar and whisk vigorously for about 30 seconds. The mixture will look thick and slightly grainy. Then, add the 2 large eggs and 1 teaspoon of vanilla extract. Whisk until everything is well combined, smooth, and glossy.
- Combine Dry Ingredients: In a separate small bowl, whisk together the ¾ cup of all-purpose flour, ⅓ cup of unsweetened cocoa powder, ¼ teaspoon of salt, and ¼ teaspoon of baking powder. This ensures the baking powder and salt are evenly distributed.
- Fold it Together: Pour the dry ingredients into the wet ingredients. Using your rubber spatula, fold gently until just combined. A few streaks of flour are okay. Overmixing will develop the gluten and make the brownies tough, so be gentle.
- Add the Chocolate Chips: Fold in the ½ cup of semi-sweet chocolate chips. The batter will be thick, shiny, and incredibly fragrant.
- Fill the Muffin Tin: Using your cookie scoop or two spoons, divide the brownie batter evenly among the 12 muffin cups. You’ll use about 1.5 to 2 tablespoons of batter per cup. It should fill each liner about halfway. This is important because the peanut butter needs room to sit in the center.
- Add the Peanut Butter: Now for the fun part. Take your creamy peanut butter and drop a generous teaspoonful right into the center of each brownie batter cup. Don’t press it down; just let it sit on top. I find it easiest to use a small spoon to make a little well in the batter first, then drop the peanut butter in.
- Top with More Chips: Press a few extra semi-sweet chocolate chips onto the top of each cup, right around the peanut butter. This gives them that bakery-style look.
- Bake: Place the muffin tin in the preheated oven and bake for 12-15 minutes. The edges will look set and slightly puffed, but the center (especially around the peanut butter) will still look soft and a little jiggly. This is what you want. A toothpick inserted into the brownie part (not the peanut butter) should come out with a few moist crumbs, not wet batter.
- Cool Completely: This is the hardest step. Let the brookie cups cool in the pan for at least 15 minutes. The residual heat will continue to set them. Then, carefully transfer them to a wire rack to cool completely. They are very delicate when warm, so be patient. Once completely cool, they will firm up perfectly.
Cooking Tips & Techniques
I’ve made these peanut butter brookie cups more times than I can count, and I’ve learned a few things the hard way. Here are my best tips to ensure your success:
- Don’t Overbake: This is the golden rule of fudgy brownies. The difference between a perfect, gooey center and a dry, cakey one is about 60 seconds. Pull them out when the edges are set but the center still looks a bit underdone. They will continue to cook as they cool in the hot pan.
- Use a Cookie Scoop: For even baking, you want each cup to have the same amount of batter. A small cookie scoop (about 1.5 tablespoons) is perfect for this. It also makes the process much faster and less messy.
- Room Temperature Eggs: Cold eggs can seize the melted butter and create a lumpy batter. Let your eggs sit on the counter for 15-20 minutes before you start. If you’re in a hurry, place them in a bowl of warm water for 5 minutes.
- My Biggest Failure: The first time I made these, I used natural peanut butter. It was a disaster. The oil separated during baking, and the peanut butter just melted into a greasy puddle, leaving a sad, empty crater in the middle. Stick with the processed, creamy stuff for the best, most stable results.
- Timing is Everything: These come together in under 30 minutes, so they are perfect for multitasking. While the butter is melting, you can measure out your dry ingredients. While the brownies are baking, you can clean up the kitchen. It’s an efficient little recipe.
Variations & Adaptations
One of the best things about this recipe is how easy it is to customize. Here are a few ways I’ve played around with it:
- Flavor Twist – Peanut Butter & Jelly: Before adding the peanut butter dollop, drop a small spoonful of your favorite jam or jelly (raspberry or strawberry is amazing) onto the brownie batter. Then add the peanut butter on top. The sweet-tart jam cuts through the richness beautifully.
- Dietary Adaptation – Gluten-Free: I’ve made these for friends with gluten sensitivities by substituting the all-purpose flour with a 1:1 gluten-free baking blend. They turned out just as fudgy and delicious. No one could tell the difference.
- Texture Change – Add Crunch: If you love a little crunch, swap the creamy peanut butter for crunchy peanut butter. You can also fold in ¼ cup of chopped salted peanuts to the brownie batter for an extra salty, crunchy bite.
- Seasonal Variation – Mint Chocolate: For a holiday twist, add ½ teaspoon of peppermint extract to the brownie batter along with the vanilla. Then, instead of semi-sweet chips, use dark chocolate chips and press a few crushed candy canes on top before baking.
- My Personal Favorite: I once made a batch with a spoonful of cookie butter (speculoos) instead of peanut butter. It was outrageously good. The warm, spiced flavor of the cookie butter paired perfectly with the rich chocolate. I highly recommend trying it if you have a jar on hand.
Serving & Storage Suggestions
These brookie cups are incredibly versatile. Here’s how to serve and store them for the best experience.
- Serving Temperature: They are fantastic at room temperature, but I think they are absolutely magical when served slightly warm. Pop one in the microwave for about 10 seconds, and the peanut butter center becomes gloriously soft and gooey. Serve them with a scoop of vanilla ice cream for an unforgettable dessert.
- Presentation: Because they are baked in a muffin tin, they are naturally portion-controlled and beautiful. I like to arrange them on a simple cake stand or a wooden board. A light dusting of powdered sugar or a drizzle of melted chocolate makes them look extra special.
- Complementary Pairings: These are rich, so they pair beautifully with a cold glass of milk, a hot cup of coffee, or a scoop of vanilla bean ice cream. For a more decadent treat, serve them alongside a creamy chicken alfredo garlic bread for a sweet and savory dinner party.
- Storage Instructions: Store any leftover brookie cups in an airtight container at room temperature for up to 4 days. They will stay incredibly moist and fudgy. I actually think they taste even better the next day after the flavors have had time to meld.
- Freezing: These freeze like a dream. Place the completely cooled cups in a single layer in a freezer-safe bag or container. They will keep for up to 3 months. To thaw, just leave them on the counter for about 30 minutes, or pop them in the microwave for 15-20 seconds for that fresh-from-the-oven feel.
Nutritional Information & Benefits
Let’s be real—these are a treat, not a health food. But that doesn’t mean they can’t have a place in a balanced lifestyle. Here’s a quick look at what you’re getting in each cup.
- Estimated Nutritional Values (per cup): Calories: ~280, Fat: 16g, Carbohydrates: 32g, Protein: 5g, Fiber: 2g, Sugar: 22g. (These are estimates and will vary based on specific brands used.)
- Health Benefits of Key Ingredients: Dark chocolate (from the cocoa powder and chips) is rich in antioxidants and flavonoids. Peanut butter provides plant-based protein and healthy monounsaturated fats, which can help keep you feeling full and satisfied.
- Dietary Considerations: This recipe can easily be made gluten-free (as noted above). It is naturally nut-free if you use a nut-free seed butter like sunflower seed butter in place of the peanut butter. It is not low-carb or keto-friendly due to the sugar content.
- Potential Allergens: This recipe contains wheat (gluten), dairy (butter), eggs, and peanuts. Please be mindful of these when serving to guests with allergies.
- My Personal Take: I believe in enjoying real food, including dessert. These brookie cups are made from simple, recognizable ingredients. They are a wonderful way to satisfy a craving without relying on processed, packaged snacks. A little indulgence, made from scratch, is a beautiful thing.
Conclusion
These best peanut butter brookie cups are more than just a recipe—they are a solution. A solution to a last-minute dessert panic, a solution to a stubborn chocolate and peanut butter craving, and a solution to the age-old question of “What can I make that’s impressive but takes almost no effort?”
I honestly love how forgiving they are. You don’t need to be a pastry chef to nail them. You just need a bowl, a whisk, and a little bit of patience while they cool. The result is a fudgy, rich, perfectly portioned little cup of joy that looks like you spent hours on it.
I encourage you to make them your own. Swap the peanut butter for cookie butter, add a swirl of raspberry jam, or throw in some pretzel pieces for a salty crunch. The base is so good that it welcomes almost any twist. And when you do make them, I’d love to hear about it. Leave a comment below and tell me how they turned out, or share a photo on Pinterest with your favorite variation!
Happy baking, and remember—sometimes the best recipes come from a moment of pure, happy desperation.
Frequently Asked Questions
Can I use a brownie mix instead of making the batter from scratch?
Absolutely! If you are short on time, you can use a standard 18-ounce box of brownie mix. Just prepare the batter according to the package directions (usually requiring oil, water, and eggs) and follow the same instructions for filling the muffin tin and adding the peanut butter. The flavor won’t be quite as rich as homemade, but it will still be delicious and incredibly easy.
Why did my peanut butter sink to the bottom of the cup?
This usually happens for one of two reasons. First, your brownie batter might be too thin. Make sure you are using the correct amount of flour. Second, the peanut butter might be too runny. Stick with a standard, shelf-stable creamy peanut butter like Jif or Skippy. Natural peanut butter tends to be too oily and will sink or melt away.
Can I make these in a mini muffin tin?
Yes, you can! Mini peanut butter brookie cups are perfect for parties and snacking. Just reduce the baking time significantly. Start checking them at 8 minutes. They will be done when the edges are set and a toothpick inserted into the brownie part comes out with moist crumbs. You will also get a much larger yield, probably around 24-30 mini cups.
My brownie cups turned out cakey, not fudgy. What went wrong?
The most common culprit is overbaking. Fudgy brownies rely on being pulled from the oven before they are fully set in the center. If you wait until a toothpick comes out clean, they will be dry and cakey. Next time, pull them out when the center still looks a little soft and jiggly. Another reason could be overmixing the batter, which develops gluten and creates a tougher, more cake-like texture.
Can I make these dairy-free?
Yes, with a few simple swaps. Replace the unsalted butter with a high-quality vegan butter stick (like Earth Balance or Miyoko’s). Use dairy-free semi-sweet chocolate chips. Most standard creamy peanut butters are already dairy-free, but always double-check the label. The texture and flavor will still be wonderfully fudgy and rich.
Pin This Recipe!
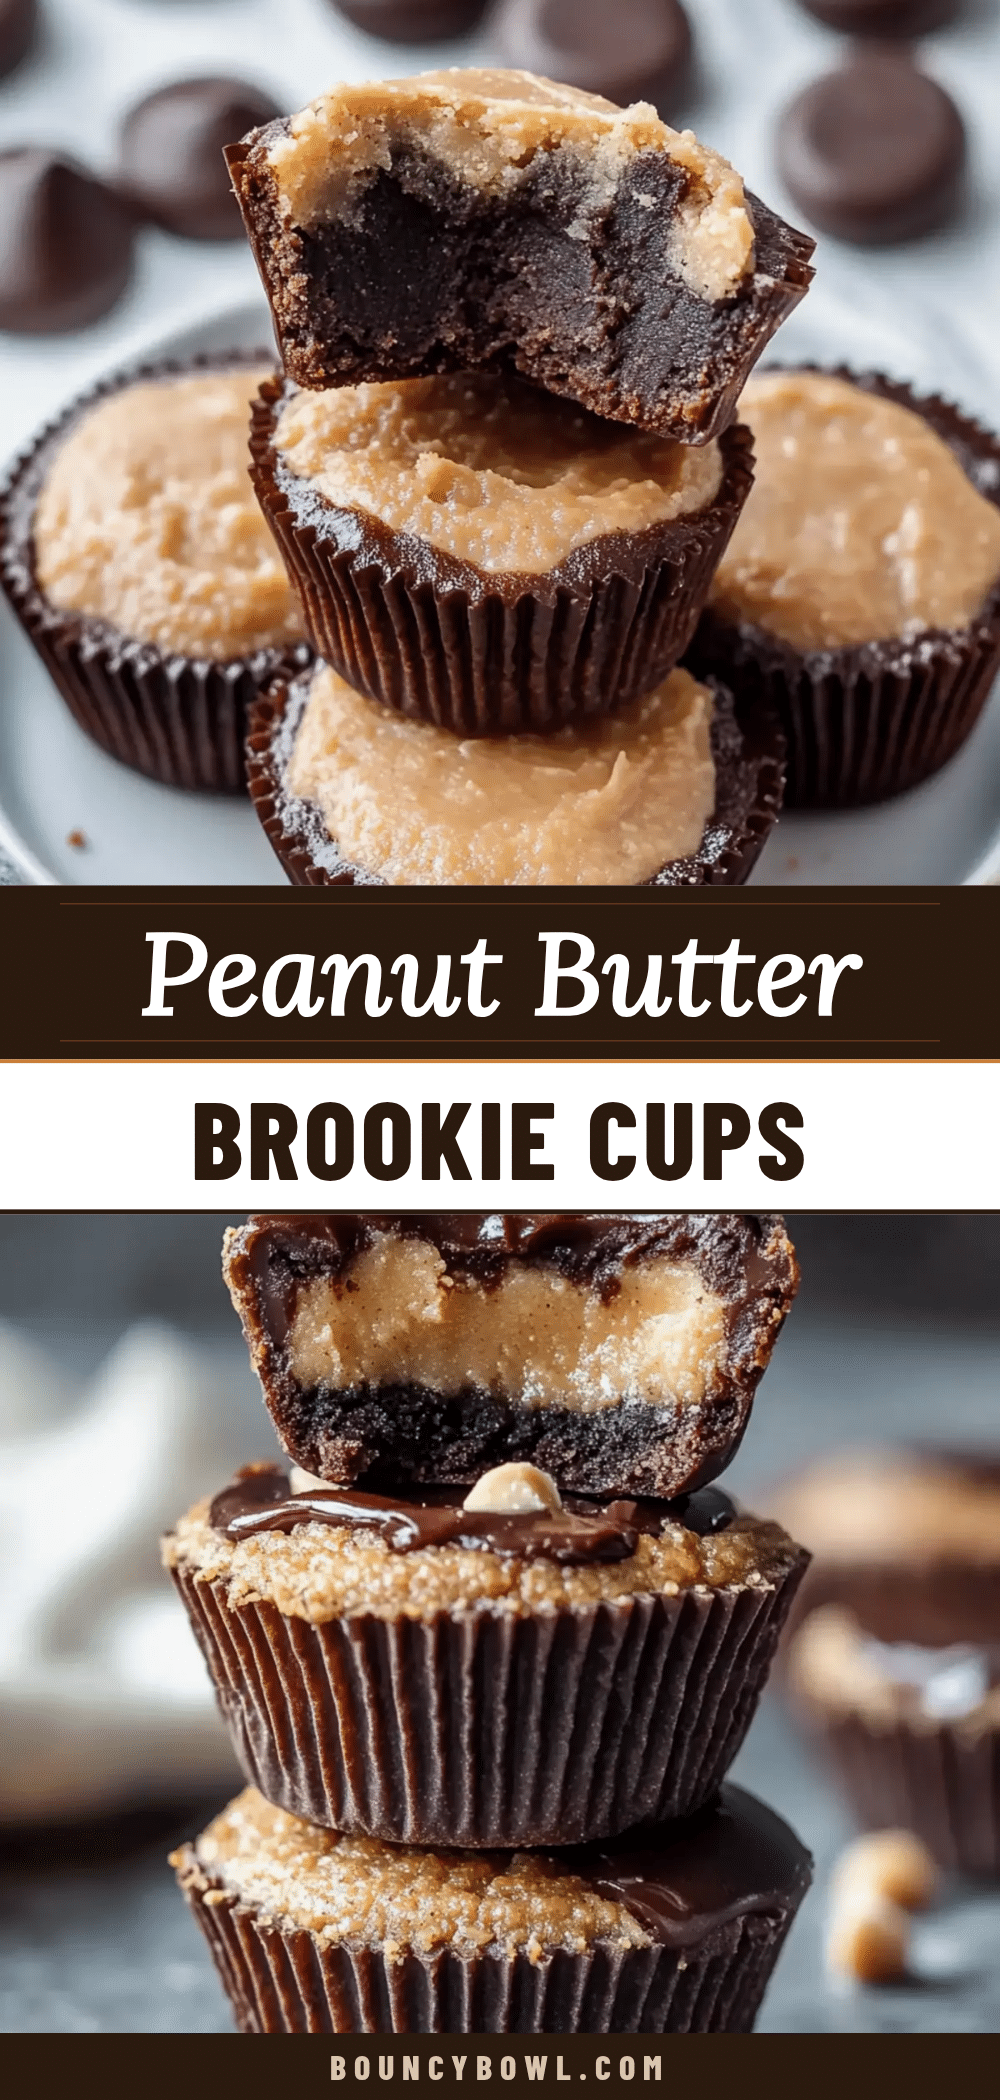
The Best Peanut Butter Brookie Cups: Easy Fudgy Recipe
These peanut butter brookie cups are a perfect storm of textures and flavors that come together in less than 30 minutes. A fudgy brownie base with a generous pocket of creamy peanut butter in the middle, topped with chocolate chips.
- Prep Time: 10 minutes
- Cook Time: 15 minutes
- Total Time: 25 minutes
- Yield: 12 servings 1x
- Category: Dessert
- Cuisine: American
Ingredients
- ½ cup (1 stick) unsalted butter, melted
- 1 cup granulated sugar
- 2 large eggs, at room temperature
- 1 teaspoon vanilla extract
- ¾ cup all-purpose flour
- ⅓ cup unsweetened cocoa powder (Dutch-processed preferred)
- ¼ teaspoon salt
- ¼ teaspoon baking powder
- 6 tablespoons creamy peanut butter (like Jif or Skippy)
- ½ cup semi-sweet chocolate chips, plus more for topping
Instructions
- Preheat your oven to 350°F (175°C). Line a standard 12-cup muffin tin with paper liners or generously spray with non-stick spray.
- In a large microwave-safe bowl, melt the ½ cup of unsalted butter in 30-second increments until completely melted. Let it cool for a minute or two.
- To the melted butter, add the 1 cup of granulated sugar and whisk vigorously for about 30 seconds. Then, add the 2 large eggs and 1 teaspoon of vanilla extract. Whisk until well combined, smooth, and glossy.
- In a separate small bowl, whisk together the ¾ cup of all-purpose flour, ⅓ cup of unsweetened cocoa powder, ¼ teaspoon of salt, and ¼ teaspoon of baking powder.
- Pour the dry ingredients into the wet ingredients. Using a rubber spatula, fold gently until just combined. A few streaks of flour are okay.
- Fold in the ½ cup of semi-sweet chocolate chips.
- Using a cookie scoop or two spoons, divide the brownie batter evenly among the 12 muffin cups, filling each liner about halfway.
- Drop a generous teaspoonful of creamy peanut butter into the center of each brownie batter cup. Don’t press it down.
- Press a few extra semi-sweet chocolate chips onto the top of each cup, around the peanut butter.
- Bake for 12-15 minutes. The edges will look set and slightly puffed, but the center will still look soft and a little jiggly. A toothpick inserted into the brownie part (not the peanut butter) should come out with a few moist crumbs.
- Let the brookie cups cool in the pan for at least 15 minutes. Then, carefully transfer them to a wire rack to cool completely.
Notes
Don’t overbake! The difference between a perfect, gooey center and a dry, cakey one is about 60 seconds. Pull them out when the edges are set but the center still looks a bit underdone. Use standard creamy peanut butter like Jif or Skippy; natural peanut butter can separate and cause issues. For gluten-free, substitute all-purpose flour with a 1:1 gluten-free baking blend.
Nutrition
- Serving Size: 1 brookie cup
- Calories: 280
- Sugar: 22
- Sodium: 150
- Fat: 16
- Saturated Fat: 8
- Carbohydrates: 32
- Fiber: 2
- Protein: 5
Keywords: peanut butter brookie cups, fudgy brownie cups, chocolate peanut butter dessert, easy dessert recipe, last minute dessert


