Love this? Save it for later!
Share the inspiration with your friends
The banana on my counter had gone from speckled to practically weeping. You know the ones—those overly ripe bananas that look more sad than useful, sitting there like they’re daring you to do something with them before they turn into science experiments. I was about to toss it, honestly. But then I remembered I had a bag of crushed graham crackers leftover from a summer dessert phase, and a tiny voice in my head said, “What if you just… mashed it all together?”
That’s how these Easy No-Bake Banana Bread Truffles happened. Not from a family recipe handed down through generations. Not from a fancy cooking class. Just a Tuesday afternoon where I didn’t want to turn on the oven, didn’t want to wash a dozen dishes, and really, really wanted something that tasted like banana bread without waiting an hour for it to bake.
I mashed that banana with my fork—kind of aggressively, if I’m being honest—stirred in some vanilla wafer crumbs, a pinch of cinnamon, and rolled the whole thing into little balls. Dipped a few in melted chocolate because, well, chocolate makes everything better. The first bite stopped me mid-step. It tasted exactly like banana bread. The soft, tender crumb. That warm cinnamon-hug flavor. But it took me less than twenty minutes from start to finish.
I’ve made these truffles at least four times since then. They’ve become my secret weapon for using up spotty bananas, my go-to when I need a dessert that looks impressive but requires zero oven time, and honestly, the thing I crave when I want that cozy banana bread feeling without the commitment. These little bites just work. And once you try them, you’ll see exactly what I mean.
Why You’ll Love This Recipe
These Easy No-Bake Banana Bread Truffles hit every single note you want from a dessert without any of the usual hassle. Here’s what makes them special:
- Ready in 20 Minutes — No oven, no mixer, no complicated steps. Just mash, mix, roll, and chill. Perfect for those moments when a craving hits hard and fast.
- Uses Pantry Staples — Ripe bananas, cookie crumbs, a little butter, and vanilla. Chances are you already have everything you need. No special trips to the store required.
- Tastes Like Real Banana Bread — The texture is soft and tender, the flavor is warm and spiced, and it genuinely satisfies that banana bread craving. I’ve fooled multiple people into thinking these were baked.
- Perfect for Any Occasion — Bring them to a potluck, pack them in lunchboxes, serve them at a party, or keep them in the fridge for a late-night treat. They travel well and always get compliments.
- Naturally Gluten-Free Adaptable — Swap in gluten-free cookie crumbs or certified gluten-free oats, and you’ve got a dessert that works for almost everyone.
- Kid-Friendly to Make — My niece helped me roll these last weekend, and she had a blast. No sharp knives, no hot surfaces, just messy hands and delicious results.
What really sets these truffles apart is the texture. Most no-bake banana treats end up dense or gummy. But these? They’re light, almost cloud-like, with a melt-in-your-mouth quality that makes you reach for another one before you’ve finished the first. The secret is using crushed vanilla wafers or graham crackers instead of flour—they absorb moisture without turning gluey.
These truffles are the kind of dessert you make when you want something that feels special but takes almost no effort. They’re comfort food reimagined—faster, easier, but with the same soul-soothing satisfaction. If you’ve ever made our moist extreme banana nut bread, you know we take banana flavor seriously. These truffles deliver that same goodness in bite-sized form.
What Ingredients You Will Need
This recipe uses simple, wholesome ingredients to deliver bold banana bread flavor and a soft, tender texture without turning on the oven. Most of these are probably already sitting in your kitchen right now.
For the Truffle Base
- 2 large ripe bananas — The riper the better. Look for bananas with brown spots all over the peel. They should be soft and almost mushy when you squeeze them. This is where all the natural sweetness and banana flavor comes from.
- 1 ½ cups crushed vanilla wafers (about 45 wafers) — These provide structure and a subtle vanilla flavor. You can crush them in a food processor or place them in a zip-top bag and smash them with a rolling pin. I prefer the bag method because it’s oddly satisfying.
- 2 tablespoons unsalted butter, melted — Adds richness and helps bind everything together. Use salted butter if that’s all you have, just reduce any added salt in the recipe.
- 1 teaspoon vanilla extract — Enhances the banana flavor and adds warmth. Pure vanilla extract makes a difference here, but imitation works fine too.
- ½ teaspoon ground cinnamon — That classic banana bread spice. Fresh cinnamon has a stronger, more aromatic flavor that really shines.
- Pinch of salt — Balances the sweetness and deepens all the flavors. Don’t skip it.
For the Coating (Optional but Highly Recommended)
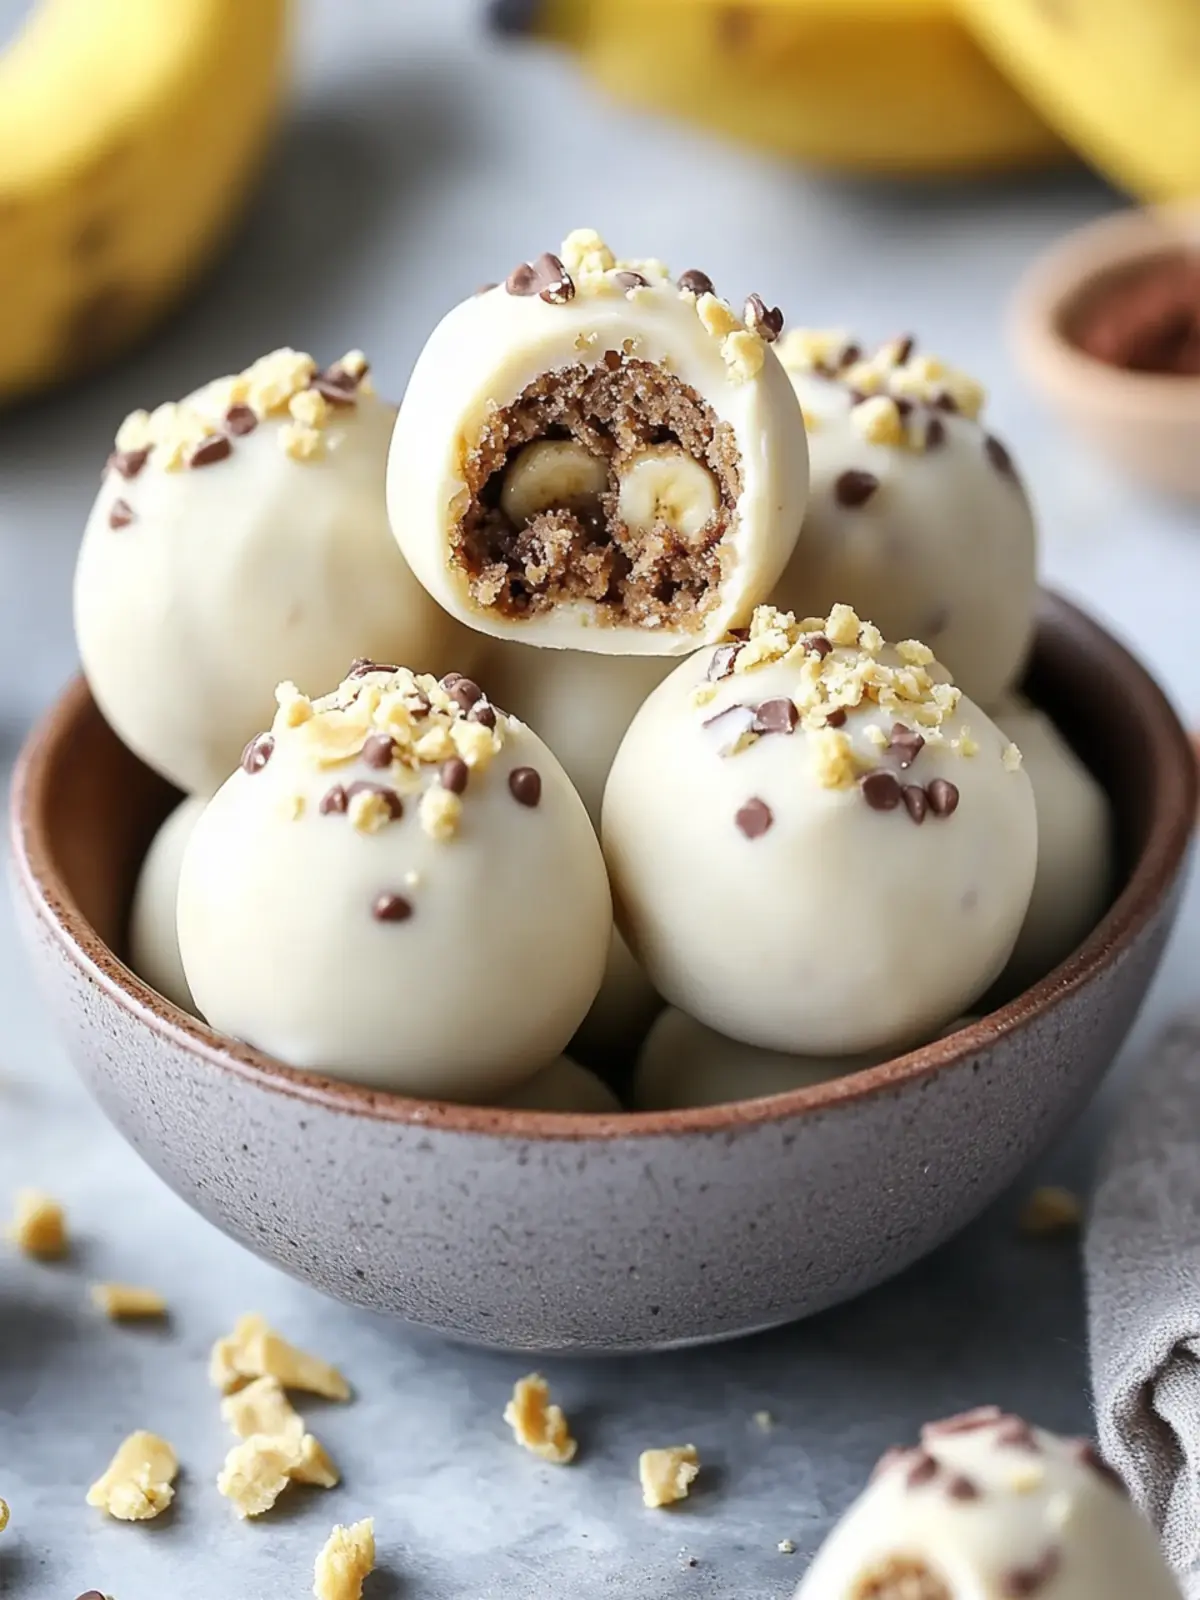
- 1 cup semi-sweet chocolate chips — Melts smoothly and creates a beautiful shell. Dark chocolate or milk chocolate both work great.
- 1 teaspoon coconut oil or vegetable shortening — Helps the chocolate thin out for easier dipping and gives it a nice shine. Optional but helpful.
Ingredient Selection Tips
I’ve tested this recipe with different cookie bases, and vanilla wafers consistently give the best texture. Nilla Wafers are my go-to brand because they crush into a fine, even crumb that absorbs moisture perfectly. Graham crackers work well too, though the texture comes out slightly denser. For a nutty twist, you can substitute half the cookie crumbs with finely ground pecans or walnuts. If you love nutty banana bread, try this alongside our moist extreme banana nut bread for a full banana experience.
Substitution Guidance
- Gluten-free option: Use gluten-free vanilla wafers or certified gluten-free graham crackers. The texture remains nearly identical.
- Dairy-free option: Substitute the butter with coconut oil or vegan butter, and use dairy-free chocolate chips for the coating.
- Lower sugar: Choose reduced-sugar vanilla wafers or use crushed unsweetened shredded coconut mixed with a few crushed dates as the base.
- No chocolate coating: Roll the truffles in cocoa powder, shredded coconut, crushed nuts, or simply leave them plain. They’re delicious every way.
The beauty of these truffles is their flexibility. You can adjust the sweetness, change up the coating, or experiment with different spices. Just keep the banana-to-crumb ratio roughly the same, and you’ll get perfect results every time.
Equipment Needed
- Large mixing bowl — For mashing the bananas and combining ingredients. Any medium-to-large bowl works.
- Fork or potato masher — A fork works perfectly for mashing ripe bananas. A potato masher makes it even faster.
- Measuring cups and spoons — For accurate ingredient portions. I recommend using dry measuring cups for the cookie crumbs.
- Food processor or zip-top bag and rolling pin — For crushing the vanilla wafers. The bag method is cheaper and creates less cleanup.
- Small cookie scoop or tablespoon — For portioning uniform truffle balls. A 1-tablespoon scoop gives you consistent sizes.
- Baking sheet lined with parchment paper — For holding the rolled truffles while they chill. Parchment prevents sticking.
- Microwave-safe bowl or double boiler — For melting the chocolate coating. A microwave is faster; a double boiler gives you more control.
- Fork or dipping tool — For coating the truffles in chocolate. A regular fork works; just tap off the excess.
If you don’t have a cookie scoop, use your hands—just lightly oil them so the mixture doesn’t stick. If you don’t have parchment paper, wax paper works fine. Honestly, you can make these with just a bowl, a fork, and your hands. That’s how simple this recipe is.
Preparation Method
-
Crush the vanilla wafers — Place 1 ½ cups of vanilla wafers in a zip-top bag and seal it, removing as much air as possible. Use a rolling pin or the bottom of a heavy cup to crush them into fine crumbs. You want a texture similar to sand, with no large chunks remaining. Alternatively, pulse them in a food processor for 10-15 seconds. Set the crumbs aside.
-
Mash the bananas — Peel the 2 ripe bananas and place them in a large mixing bowl. Use a fork to mash them thoroughly until smooth with only tiny lumps remaining. The bananas should be completely broken down—no large pieces. This takes about 1 minute of steady mashing. The mixture should look like a thick, creamy puree.
-
Combine the wet ingredients — Add the 2 tablespoons of melted unsalted butter, 1 teaspoon of vanilla extract, and a pinch of salt to the mashed bananas. Stir until everything is fully incorporated. The butter should be completely mixed in, not pooling on top.
-
Add the dry ingredients — Pour the crushed vanilla wafer crumbs and ½ teaspoon of ground cinnamon into the banana mixture. Use a spatula or wooden spoon to stir until everything is evenly combined. The mixture should come together into a thick, slightly sticky dough that holds its shape when pressed. If it feels too wet, add another tablespoon of cookie crumbs. If it feels too dry, add a teaspoon of milk or water.
-
Chill the mixture — Cover the bowl with plastic wrap and place it in the refrigerator for 15-20 minutes. This step is crucial—chilling firms up the mixture, making it much easier to roll into balls. Don’t skip this, or the truffles will be too soft to handle.
-
Roll the truffles — Once chilled, use a small cookie scoop or tablespoon to portion out the mixture. Roll each portion between your palms to form smooth, round balls about 1 inch in diameter. Place each truffle on a parchment-lined baking sheet. You should get about 18-20 truffles. If the mixture sticks to your hands, lightly dampen your palms with water or coat them with a tiny bit of oil.
-
Freeze the truffles — Place the baking sheet with the rolled truffles in the freezer for 10-15 minutes. This firms them up even more, which makes dipping them in chocolate much cleaner and prevents them from falling apart.
-
Melt the chocolate — While the truffles are freezing, place 1 cup of semi-sweet chocolate chips and 1 teaspoon of coconut oil in a microwave-safe bowl. Microwave in 30-second intervals, stirring between each, until the chocolate is completely smooth and glossy. This usually takes about 1-2 minutes total. Be careful not to overheat—chocolate burns easily and becomes grainy.
-
Dip the truffles — Remove the truffles from the freezer. Working with one truffle at a time, use a fork to lower it into the melted chocolate. Roll it around to coat completely, then lift it out and gently tap the fork on the edge of the bowl to remove excess chocolate. Carefully slide the truffle back onto the parchment-lined baking sheet. Repeat with all truffles.
-
Add toppings (optional) — While the chocolate is still wet, sprinkle the truffles with a pinch of flaky sea salt, crushed nuts, or a dusting of cinnamon. This adds visual appeal and an extra layer of flavor.
-
Set the chocolate — Place the baking sheet back in the refrigerator for 15-20 minutes, or until the chocolate is completely firm and set. The truffles should have a nice snap when you bite into them.
-
Serve and enjoy — Once set, the truffles are ready to eat. They’re best served cold or at cool room temperature. The texture is soft and tender, with a creamy banana center and a crisp chocolate shell.
Cooking Tips & Techniques
After making these Easy No-Bake Banana Bread Truffles more times than I care to admit, I’ve picked up a few tricks that make the process smoother and the results even better.
Use really, really ripe bananas. This is the single most important tip. The bananas should be so soft that they practically fall apart when you peel them. Brown spots covering the entire peel is ideal. Greenish bananas won’t mash smoothly and won’t give you that intense banana flavor. If your bananas aren’t ripe enough, place them in a 300°F oven for 10-15 minutes until the skins turn black. Let them cool, then use them as usual.
Don’t over-crush the wafers. You want fine crumbs, not powder. If you process them too long, they turn into a flour-like consistency that absorbs too much moisture and makes the truffles dry. Aim for crumbs that still have a tiny bit of texture—like coarse sand.
Chill between every step. I know it adds time, but it makes a huge difference. Chilling the mixture before rolling prevents sticky hands. Freezing the rolled truffles before dipping prevents them from crumbling in the chocolate. Patience here pays off with perfectly formed truffles every time.
Use coconut oil in the chocolate. This small addition thins out the melted chocolate, making it easier to dip and creating a thinner, more even coating. It also gives the finished truffles a beautiful shine. If you don’t have coconut oil, vegetable shortening works just as well.
Work quickly when dipping. Once the chocolate is melted, it starts to thicken as it cools. If it becomes too thick to dip smoothly, microwave it for another 10-15 seconds to thin it out again. Keep your dipping process efficient—dip, tap, place, repeat.
One mistake I made early on was skipping the chilling step before dipping. I was impatient and wanted to finish quickly. The truffles started falling apart in the warm chocolate, leaving me with a bowl of chocolate-banana sludge. Learn from my impatience—chill those truffles!
If you’re looking for another no-bake treat that’s perfect for warm weather, our easy no-bake summer berry icebox cake is a crowd-pleaser that requires even less effort.
Variations & Adaptations
One of the best things about this recipe is how easily it adapts to different tastes and dietary needs. Here are some variations I’ve tried and loved:
Vegan Banana Bread Truffles
Replace the butter with melted coconut oil or vegan butter. Use dairy-free chocolate chips for the coating. The texture remains just as soft and delicious. I’ve made these for vegan friends, and they couldn’t tell the difference.
Gluten-Free Version
Use gluten-free vanilla wafers or crushed gluten-free graham crackers. Make sure your oats (if using) are certified gluten-free. This version works beautifully and tastes identical to the original.
Nutty Banana Bread Truffles
Add ¼ cup of finely chopped toasted pecans or walnuts to the truffle mixture. Roll the finished truffles in crushed nuts instead of chocolate for extra crunch. This variation reminds me of our decadent chocolate chip banana bars—both have that wonderful nutty-banana combo.
Spiced Chai Banana Truffles
Add ½ teaspoon of chai spice blend (cinnamon, cardamom, ginger, cloves) to the mixture instead of just cinnamon. Roll the finished truffles in a mixture of powdered sugar and a pinch of cardamom. The warm spices pair beautifully with the banana.
Peanut Butter Banana Truffles
Stir 2 tablespoons of creamy peanut butter into the banana mixture before adding the crumbs. Drizzle the finished truffles with melted peanut butter and chocolate for a classic flavor combination.
Lower Sugar Option
Use reduced-sugar vanilla wafers and skip the chocolate coating. Roll the truffles in unsweetened cocoa powder mixed with a pinch of cinnamon. You still get that banana bread flavor without the extra sweetness.
Serving & Storage Suggestions
These truffles are incredibly versatile when it comes to serving. Here’s how to get the most out of them:
Serving Temperature: Serve them straight from the refrigerator for the best texture. The centers stay soft and creamy while the chocolate coating remains firm and snappy. At room temperature, the truffles soften quickly, so keep them chilled until just before serving.
Presentation Ideas: Arrange the truffles on a decorative platter or in mini cupcake liners for a polished look. Dust them lightly with powdered sugar or cocoa powder just before serving. For parties, place them on a tiered stand alongside fresh berries for a beautiful dessert spread.
Pairing Suggestions: These truffles pair beautifully with a hot cup of coffee, a glass of cold milk, or a warm mug of chai tea. For a dessert board, serve them alongside fresh fruit, cheese, and a drizzle of honey.
Storage Instructions: Store the truffles in an airtight container in the refrigerator for up to 5 days. Place parchment paper between layers to prevent sticking. They actually taste better after a day or two—the flavors meld and deepen as they sit.
Freezer Instructions: These truffles freeze beautifully. Place them in a single layer on a baking sheet and freeze until solid, then transfer to a freezer-safe container or zip-top bag. They’ll keep for up to 3 months. Thaw in the refrigerator for about 30 minutes before serving, or eat them straight from the freezer for a firmer, fudge-like texture.
Flavor Development: The banana flavor becomes more pronounced after 24 hours in the fridge. If you can resist eating them immediately, make them a day ahead for maximum flavor.
Nutritional Information & Benefits
Here’s the estimated nutritional breakdown for one truffle (based on 20 truffles with chocolate coating):
- Calories: 110
- Total Fat: 6g
- Saturated Fat: 3.5g
- Carbohydrates: 14g
- Sugar: 9g
- Fiber: 1g
- Protein: 1g
- Sodium: 55mg
These numbers are estimates and will vary based on your specific ingredients and portion sizes.
Health Benefits: Bananas are packed with potassium, vitamin B6, and vitamin C. They also contain resistant starch, which supports gut health. The cinnamon adds antioxidants and may help regulate blood sugar. While these are definitely a treat, they’re made with real, whole ingredients—no artificial flavors or preservatives here.
Dietary Considerations: This recipe can easily be adapted to be gluten-free, dairy-free, or vegan. It contains no eggs, which is great for those with egg allergies. The main allergens are wheat (from the cookie crumbs) and dairy (from the butter and chocolate), both of which can be substituted.
My Personal Take: I love that these truffles satisfy my sweet tooth without the heavy feeling I get from traditional baked goods. They’re portion-controlled, so it’s easy to enjoy one or two without overindulging. And honestly, knowing they’re made from fruit makes me feel a little better about eating them for breakfast. Don’t judge.
Conclusion
These Easy No-Bake Banana Bread Truffles are proof that you don’t need an oven, fancy equipment, or hours of time to create something truly delicious. They capture everything we love about banana bread—the warm cinnamon flavor, the tender texture, the comforting nostalgia—in a bite-sized form that comes together in under 20 minutes.
What I love most about this recipe is how forgiving it is. You can adjust the sweetness, swap in different coatings, or add your favorite mix-ins. It’s the kind of recipe that invites experimentation and rewards creativity. Whether you’re using up spotty bananas, looking for a quick dessert for a party, or just craving something sweet and satisfying, these truffles deliver every single time.
I’d love to hear how yours turn out! Did you try a different coating? Add a secret ingredient? Share your creations in the comments below, or tag me in your photos. And if you’re looking for more easy, no-bake treats, don’t forget to check out our refreshing Kool-Aid lollipops for another fun, no-oven-required recipe.
Now go grab those sad bananas on your counter and turn them into something magical. You’ve got this.
Frequently Asked Questions
Can I use frozen bananas for these truffles?
Yes, but thaw them completely first and drain off any excess liquid. Frozen bananas release more water as they thaw, which can make the mixture too wet. If that happens, add an extra tablespoon of cookie crumbs to absorb the moisture.
How long do these truffles last in the fridge?
They stay fresh for up to 5 days in an airtight container in the refrigerator. The texture actually improves after a day or two as the flavors meld together. Just keep them chilled until you’re ready to serve.
Can I make these without chocolate?
Absolutely! The truffles are delicious on their own without any coating. You can roll them in cocoa powder, shredded coconut, crushed nuts, or simply leave them plain. They’ll still taste like banana bread in every bite.
Why did my truffle mixture turn out too sticky?
This usually happens if your bananas are extra large or very watery. Simply add more crushed cookie crumbs, one tablespoon at a time, until the mixture holds its shape when pressed. Chilling the mixture for 20 minutes also helps firm it up significantly.
Can I double this recipe?
Yes, this recipe doubles beautifully. Just make sure your mixing bowl is large enough, and work in batches when dipping the truffles in chocolate so the coating doesn’t thicken too much before you finish. These make great gifts during the holidays!
Pin This Recipe!
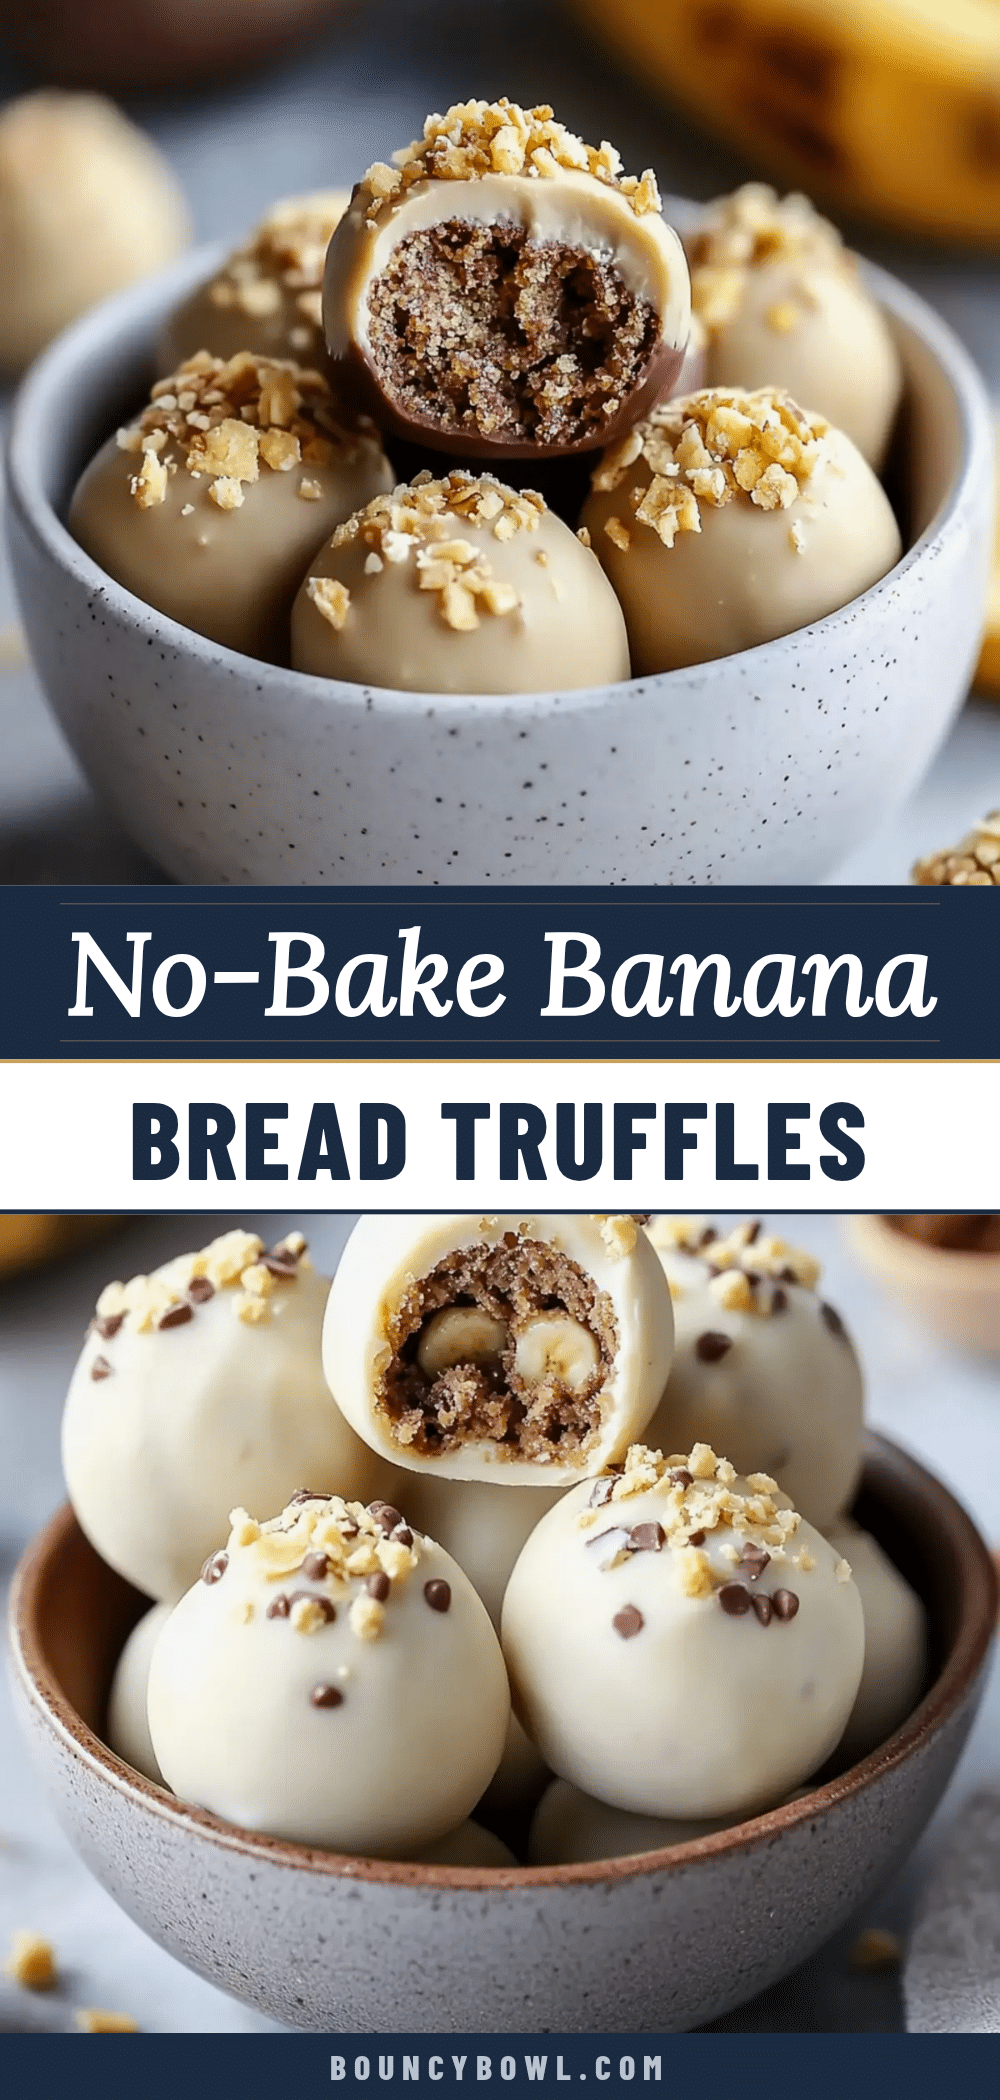
Easy No-Bake Banana Bread Truffles: Best 20-Minute Treat
These Easy No-Bake Banana Bread Truffles capture everything we love about banana bread—the warm cinnamon flavor, the tender texture, the comforting nostalgia—in a bite-sized form that comes together in under 20 minutes. No oven, no mixer, no complicated steps.
- Prep Time: 15 minutes
- Cook Time: 5 minutes
- Total Time: 20 minutes
- Yield: 18-20 truffles 1x
- Category: Dessert
- Cuisine: American
Ingredients
- 2 large ripe bananas
- 1 ½ cups crushed vanilla wafers (about 45 wafers)
- 2 tablespoons unsalted butter, melted
- 1 teaspoon vanilla extract
- ½ teaspoon ground cinnamon
- Pinch of salt
- 1 cup semi-sweet chocolate chips
- 1 teaspoon coconut oil or vegetable shortening
Instructions
- Crush the vanilla wafers: Place 1 ½ cups of vanilla wafers in a zip-top bag and seal it, removing as much air as possible. Use a rolling pin or the bottom of a heavy cup to crush them into fine crumbs. You want a texture similar to sand, with no large chunks remaining. Alternatively, pulse them in a food processor for 10-15 seconds. Set the crumbs aside.
- Mash the bananas: Peel the 2 ripe bananas and place them in a large mixing bowl. Use a fork to mash them thoroughly until smooth with only tiny lumps remaining. The bananas should be completely broken down—no large pieces. This takes about 1 minute of steady mashing. The mixture should look like a thick, creamy puree.
- Combine the wet ingredients: Add the 2 tablespoons of melted unsalted butter, 1 teaspoon of vanilla extract, and a pinch of salt to the mashed bananas. Stir until everything is fully incorporated. The butter should be completely mixed in, not pooling on top.
- Add the dry ingredients: Pour the crushed vanilla wafer crumbs and ½ teaspoon of ground cinnamon into the banana mixture. Use a spatula or wooden spoon to stir until everything is evenly combined. The mixture should come together into a thick, slightly sticky dough that holds its shape when pressed. If it feels too wet, add another tablespoon of cookie crumbs. If it feels too dry, add a teaspoon of milk or water.
- Chill the mixture: Cover the bowl with plastic wrap and place it in the refrigerator for 15-20 minutes. This step is crucial—chilling firms up the mixture, making it much easier to roll into balls. Don’t skip this, or the truffles will be too soft to handle.
- Roll the truffles: Once chilled, use a small cookie scoop or tablespoon to portion out the mixture. Roll each portion between your palms to form smooth, round balls about 1 inch in diameter. Place each truffle on a parchment-lined baking sheet. You should get about 18-20 truffles. If the mixture sticks to your hands, lightly dampen your palms with water or coat them with a tiny bit of oil.
- Freeze the truffles: Place the baking sheet with the rolled truffles in the freezer for 10-15 minutes. This firms them up even more, which makes dipping them in chocolate much cleaner and prevents them from falling apart.
- Melt the chocolate: While the truffles are freezing, place 1 cup of semi-sweet chocolate chips and 1 teaspoon of coconut oil in a microwave-safe bowl. Microwave in 30-second intervals, stirring between each, until the chocolate is completely smooth and glossy. This usually takes about 1-2 minutes total. Be careful not to overheat—chocolate burns easily and becomes grainy.
- Dip the truffles: Remove the truffles from the freezer. Working with one truffle at a time, use a fork to lower it into the melted chocolate. Roll it around to coat completely, then lift it out and gently tap the fork on the edge of the bowl to remove excess chocolate. Carefully slide the truffle back onto the parchment-lined baking sheet. Repeat with all truffles.
- Add toppings (optional): While the chocolate is still wet, sprinkle the truffles with a pinch of flaky sea salt, crushed nuts, or a dusting of cinnamon. This adds visual appeal and an extra layer of flavor.
- Set the chocolate: Place the baking sheet back in the refrigerator for 15-20 minutes, or until the chocolate is completely firm and set. The truffles should have a nice snap when you bite into them.
- Serve and enjoy: Once set, the truffles are ready to eat. They’re best served cold or at cool room temperature. The texture is soft and tender, with a creamy banana center and a crisp chocolate shell.
Notes
Use really, really ripe bananas for best flavor. Don’t over-crush the wafers—aim for fine crumbs like coarse sand. Chill between every step for best results. Use coconut oil in the chocolate for a thinner, shinier coating. Work quickly when dipping as chocolate thickens as it cools. Store in an airtight container in the refrigerator for up to 5 days. Freeze for up to 3 months.
Nutrition
- Serving Size: 1 truffle
- Calories: 110
- Sugar: 9
- Sodium: 55
- Fat: 6
- Saturated Fat: 3.5
- Carbohydrates: 14
- Fiber: 1
- Protein: 1
Keywords: no-bake banana bread truffles, easy banana truffles, 20-minute dessert, no-bake dessert, banana bread bites, gluten-free banana truffles, vegan banana truffles


