Love this? Save it for later!
Share the inspiration with your friends
“Could you just hold on a sec?” I remember yelling to my roommate from the kitchen, juggling a pan, a spatula, and a plate piled with these golden, crispy rolled-up delights. It all started on a hectic Tuesday evening, the kind where every minute feels like a race against the clock and hunger is screaming louder than any deadline. I was craving that melty, comforting feeling of grilled cheese but didn’t want the fuss of a sandwich falling apart or the usual mess. So, in a moment of genuine impatience, I rolled up some bread with a generous amount of cheese, dunked it quickly in an egg wash, and fried it up. Honestly, I was skeptical—roll ups? Crispy grilled cheese? It sounded a bit over the top for a snack. But the first bite proved me wrong. Crunchy, cheesy, and perfectly portable, these roll ups became my go-to for quick bites that felt like a treat without the stress.
The smell alone was enough to bring me back to that exact evening—the buttery crispness mingling with the sharp tang of melted cheddar. And over the weeks, I found myself making these crispy ultimate grilled cheese roll ups multiple times, tweaking them with different cheeses or dipping sauces. They’re simple yet satisfying, and honestly, they save me every time when I need a snack that’s both quick and delicious. It’s funny how a little accident in the kitchen can turn into something you keep coming back to, a quiet little secret that feels like comfort wrapped up in a crispy golden hug.
Why You’ll Love This Recipe
After testing this recipe more times than I can count, it’s clear why these crispy ultimate grilled cheese roll ups have become a staple. They’re straightforward, fast, and exactly what snack time dreams are made of. Here’s why this recipe stands out:
- Quick & Easy: Ready in under 20 minutes, these roll ups fit perfectly into busy schedules or sudden snack attacks.
- Simple Ingredients: No need for fancy cheese or artisan bread—just basics from your pantry and fridge.
- Perfect for Any Occasion: Whether it’s a casual snack, a kid-friendly lunchbox addition, or a party appetizer, these roll ups hit the spot.
- Crowd-Pleaser: Kids and adults alike can’t resist the crispy, melty charm of these cheesy bites.
- Unbelievably Delicious: The combination of crunchy exterior and gooey interior is pure comfort food magic.
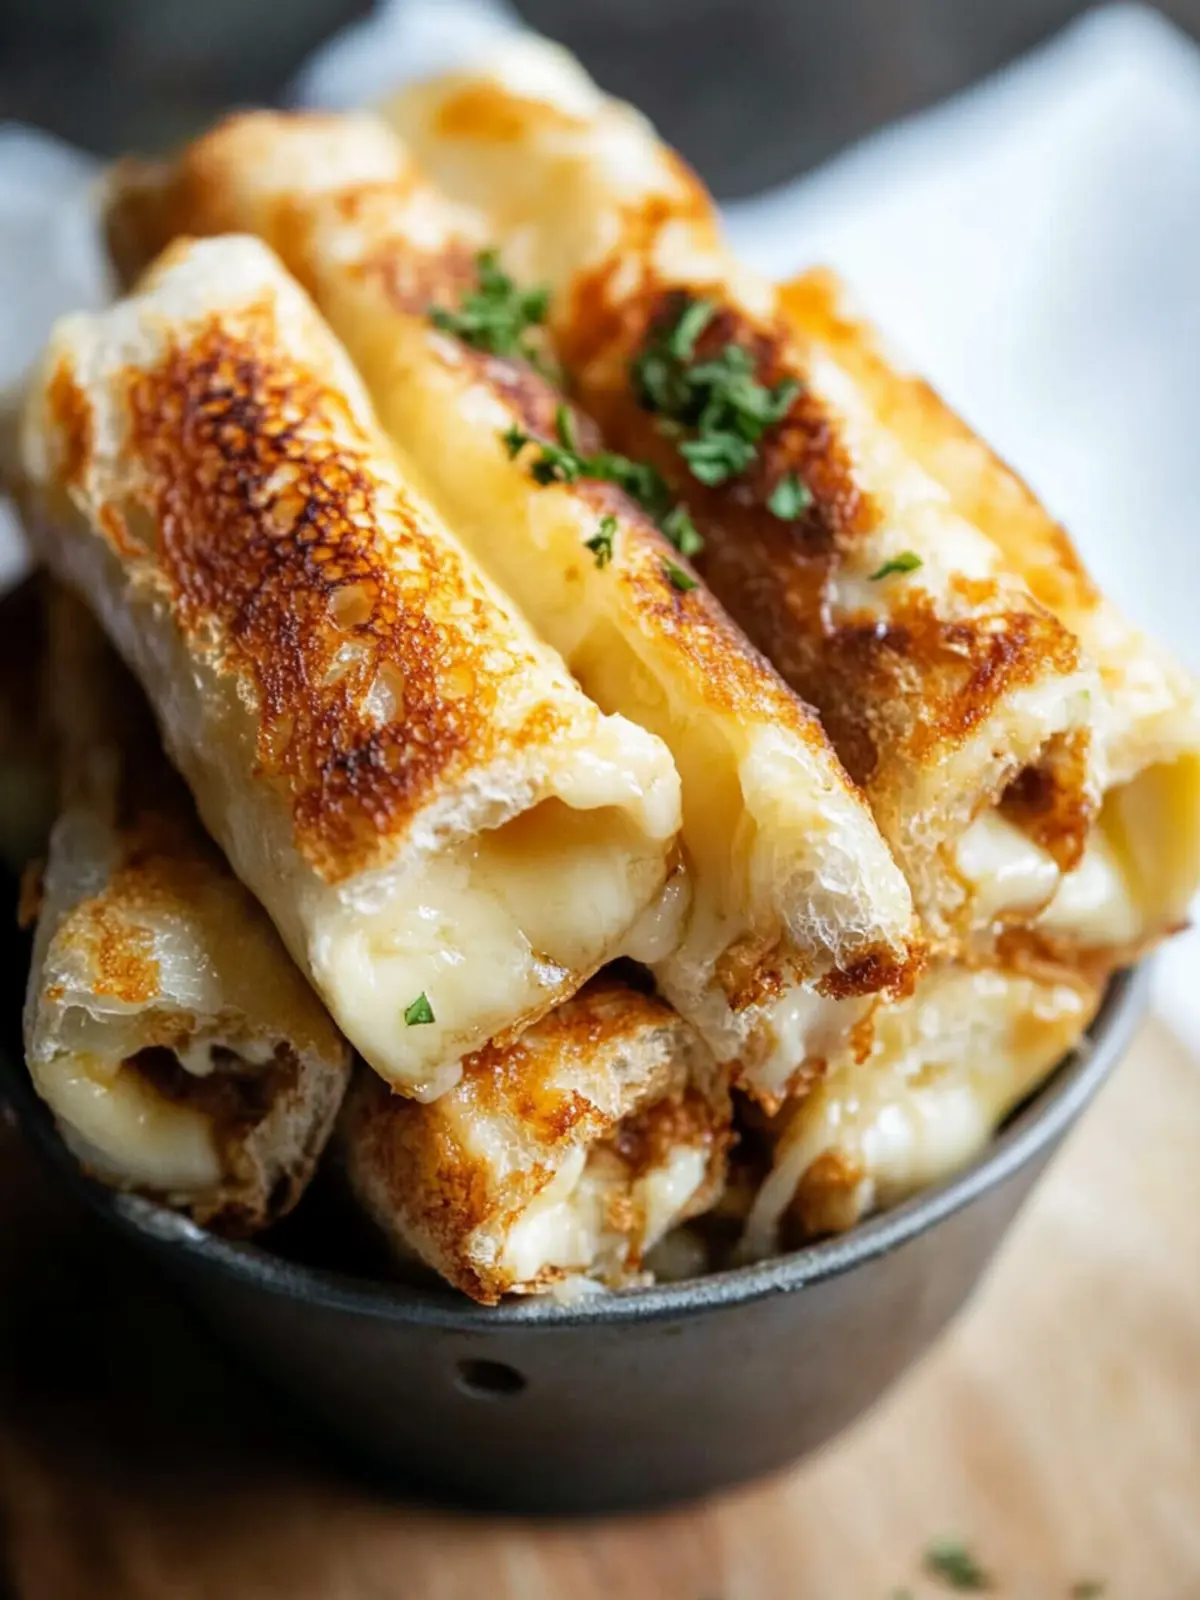
What makes these roll ups different from your average grilled cheese? It’s the method—rolling the bread tight around the cheese and frying it to a golden crisp. This technique traps the cheese in a creamy, molten center while creating a satisfyingly crunchy shell. Plus, dipping the bread in an egg wash before frying gives it a slightly richer flavor and a texture that’s reminiscent of a savory French toast. It’s a little twist that makes a big difference.
Honestly, this recipe isn’t just a snack—it’s the kind of food that makes you pause and smile after that first bite. It’s a cozy, crispy hug for your taste buds, perfect for those moments when you need a little comfort without the fuss.
What Ingredients You Will Need
This recipe uses simple, wholesome ingredients to deliver bold flavor and satisfying texture without the fuss. Most of these are probably already hanging out in your kitchen, which makes it even easier to whip up a batch whenever the craving hits.
- Sliced Bread – White or whole wheat, slightly stale bread works best as it’s easier to roll without tearing. I usually go with a soft sandwich loaf like Wonder Bread for the perfect texture.
- Cheese – Sharp cheddar is classic, but feel free to mix in mozzarella for extra gooey stretch or pepper jack for a little kick.
- Eggs – Large eggs, beaten, for the egg wash that helps create that crispy, golden crust.
- Butter – Unsalted, melted, to brush the roll ups before frying or baking. Adds richness and helps achieve that perfect crunch.
- Milk – A splash (about 2 tablespoons) mixed into the egg wash to lighten it up.
- Seasonings – A pinch of salt and pepper in the egg wash, and optionally garlic powder or smoked paprika for an extra flavor punch.
- Oil for Frying – Neutral oil like canola or vegetable oil works best for shallow frying.
If you want to mix things up, you can swap the bread for gluten-free slices or use almond flour for a low-carb coating option. For dairy-free cheese, look for plant-based shreds that melt well. I’ve found that smaller-curd cottage cheese doesn’t work as well here, so stick with good melting cheeses for that luscious texture.
Equipment Needed
- Non-stick Skillet or Frying Pan: A good-quality pan makes shallow frying easier and helps prevent sticking. I’m a fan of cast iron because it retains heat well, but non-stick pans save cleanup time.
- Mixing Bowls: One for the egg wash and another for prepping ingredients.
- Spatula or Tongs: To carefully flip the roll ups without breaking them apart.
- Rolling Pin (Optional): Helps flatten bread slices if they’re thick or fresh, making rolling easier.
- Paper Towels: For draining excess oil after frying.
If you don’t have a frying pan, you can bake these roll ups in the oven on a parchment-lined sheet. Just brush them generously with butter and bake at 375°F (190°C) for about 15–20 minutes, turning halfway through.
Preparation Method
- Prepare the Bread: Trim the crusts off the bread slices to make rolling easier and neater. Use a rolling pin to flatten each slice gently—about 1/4 inch (0.6 cm) thick. This helps prevent breakage when rolling.
- Add Cheese: Place about 1 to 1.5 ounces (30 to 45 grams) of shredded cheese evenly along one edge of the bread slice. Don’t overfill or the cheese may spill out during cooking.
- Roll Up: Starting from the cheese edge, roll the bread tightly but gently to form a neat cylinder. Pinch the seam slightly to seal. Repeat with all slices.
- Make Egg Wash: In a bowl, whisk together 2 large eggs, 2 tablespoons (30 ml) milk, a pinch of salt, pepper, and optional seasonings like garlic powder. This wash will give the roll ups their golden crust.
- Coat the Roll Ups: Dip each roll up into the egg wash, turning to coat all sides well. Let excess drip off before frying.
- Heat the Pan: Add about 2 tablespoons (30 ml) of oil to a non-stick skillet over medium heat. Once hot (but not smoking), place the roll ups seam side down to start cooking.
- Fry Until Golden: Cook for 2 to 3 minutes on each side, gently rolling with tongs or a spatula, until all sides are golden and crispy. Reduce heat if they start browning too fast before the cheese melts.
- Drain and Serve: Transfer to a paper towel-lined plate to drain excess oil. Let cool for a minute before serving so the cheese sets slightly.
Quick tip: If you notice the bread browning too fast but the cheese isn’t melted inside, lower the heat and cover the pan loosely for a minute to create steam. This melts the cheese without burning the crust.
Cooking Tips & Techniques
Rolling the bread tightly is key to keeping the cheese inside and preventing leaks. If your bread is too fresh or thick, it might tear—flattening helps a lot here. Another thing I learned the hard way is not to overfill with cheese because it can ooze out and cause a mess in the pan.
When frying, medium heat is your friend. Too hot, and you get burnt outsides with cold insides; too low, and the crust won’t crisp properly. I usually keep an eye on the color and adjust the heat as needed. Using a non-stick skillet or a well-seasoned cast iron pan makes flipping these roll ups easier and cleaner.
For consistent results, prepare all your roll ups and egg wash before heating the pan. This way, you can fry them in batches without rushing or crowding the pan, which can lead to soggy crusts.
One handy multitasking trick: while the roll ups cook, you can quickly whip up a simple dipping sauce, like ketchup mixed with a bit of smoked paprika or a honey mustard blend. It takes the snack to another level and keeps guests happy.
Variations & Adaptations
These crispy ultimate grilled cheese roll ups are a great canvas for creativity:
- Spicy Jalapeño Kick: Add finely chopped jalapeños or a dash of hot sauce inside with the cheese for a smoky heat.
- Herbed & Cheesy: Mix fresh herbs like basil or chives into the cheese before rolling for fresh flavor notes.
- Sweet & Savory: Try a blend of sharp cheddar and a thin layer of apple butter or fig jam inside for a surprising twist.
- Gluten-Free Option: Use gluten-free sandwich bread and almond flour for coating instead of egg wash, then bake or fry carefully.
- Vegan Variation: Substitute vegan cheese and a plant-based egg wash (like aquafaba or a flaxseed mix) to keep it crispy and melty.
I personally love adding a sprinkle of everything bagel seasoning on the outside before frying—it gives an extra crunch and a burst of flavor. It’s one of those little personal twists that makes this recipe feel like my own.
Serving & Storage Suggestions
Serve these crispy grilled cheese roll ups warm, ideally right out of the pan for that satisfying crunch. They pair beautifully with a tangy tomato soup or even a fresh, crisp salad like a Refreshing Ambrosia Fruit Salad to balance the richness.
If you’re making them ahead, store cooled roll ups in an airtight container in the refrigerator for up to 2 days. To reheat, pop them in a 350°F (175°C) oven for about 10 minutes or re-fry briefly in a pan to regain crispness. Avoid microwaving if you want to keep that crunch intact.
Flavors actually deepen after resting overnight, so these roll ups can make a surprisingly good snack the next day. Just bring them back to crisp with a quick reheat before serving.
Nutritional Information & Benefits
Each serving of these grilled cheese roll ups (about 2 pieces) contains roughly:
| Calories | Fat | Carbohydrates | Protein |
|---|---|---|---|
| ~300 kcal | 17g | 25g | 10g |
The cheese provides a good source of calcium and protein, while the bread offers carbohydrates for energy. Using whole wheat bread can boost fiber content. If you’re watching fat intake, try using lower-fat cheese or baking instead of frying.
For those with gluten sensitivities, swapping the bread for gluten-free varieties keeps this snack accessible. Just note that texture may vary slightly. This recipe also fits nicely into a balanced diet when enjoyed in moderation as a comfort snack.
Conclusion
These crispy ultimate grilled cheese roll ups have become one of those recipes I turn to when I want something that feels special but doesn’t take forever. They’re fun to make, easy to customize, and honestly, just plain fun to eat. Whether you’re feeding kids after school, hosting a casual get-together, or just need a quick snack for yourself, these roll ups deliver every time.
Feel free to tweak the cheeses, spices, or even dipping sauces to make the recipe your own. I find that small changes keep it exciting and fresh. I hope you enjoy this little crispy, cheesy treat as much as I do—it’s a snack that’s stood the test of many busy evenings and hungry moments.
Have a go and let me know how your version turns out! Sharing your own twists or questions always makes my day brighter.
FAQs About Crispy Ultimate Grilled Cheese Roll Ups
Can I use any type of bread for these roll ups?
Yes, but sandwich bread with a soft texture works best. Slightly stale bread is easier to roll without tearing. Avoid very thick or crusty bread unless you flatten it first.
What cheeses melt best in these roll ups?
Sharp cheddar, mozzarella, Monterey Jack, or a blend of these are ideal for gooey, melty centers. Avoid crumbly cheeses that don’t melt well.
Is it possible to bake these instead of frying?
Absolutely! Brush them with melted butter and bake at 375°F (190°C) for 15-20 minutes, turning once. Baking yields a slightly less crispy but still delicious result.
Can I prepare these roll ups ahead of time?
You can roll and coat them in egg wash, then refrigerate for up to 4 hours before frying. For longer storage, freeze them uncooked and fry directly from frozen, adding a couple of minutes to cooking time.
What dipping sauces pair well with these grilled cheese roll ups?
Classic ketchup, honey mustard, ranch, or a smoky chipotle mayo all complement the crispy, cheesy flavors beautifully. Don’t hesitate to experiment with your favorites!
Pin This Recipe!

Crispy Ultimate Grilled Cheese Roll Ups

These crispy grilled cheese roll ups are a quick, easy, and delicious snack featuring a crunchy exterior and gooey melted cheese inside. Perfect for busy schedules, kid-friendly lunches, or party appetizers.
- Prep Time: 10 minutes
- Cook Time: 8 minutes
- Total Time: 18 minutes
- Yield: 4 servings 1x
- Category: Snack
- Cuisine: American
Ingredients
- Sliced bread (white or whole wheat, slightly stale works best)
- Sharp cheddar cheese (or a mix with mozzarella or pepper jack), about 1 to 1.5 ounces per roll
- 2 large eggs, beaten
- 2 tablespoons milk
- Unsalted butter, melted (for brushing)
- Salt and pepper, to taste
- Optional seasonings: garlic powder, smoked paprika
- Neutral oil for frying (canola or vegetable oil)
Instructions
- Trim the crusts off the bread slices to make rolling easier and neater. Use a rolling pin to flatten each slice gently to about 1/4 inch thick.
- Place about 1 to 1.5 ounces of shredded cheese evenly along one edge of each bread slice.
- Roll the bread tightly starting from the cheese edge to form a neat cylinder. Pinch the seam slightly to seal.
- In a bowl, whisk together 2 large eggs, 2 tablespoons milk, a pinch of salt, pepper, and optional seasonings like garlic powder.
- Dip each roll up into the egg wash, coating all sides well. Let excess drip off.
- Heat about 2 tablespoons of oil in a non-stick skillet over medium heat. Once hot, place the roll ups seam side down.
- Fry for 2 to 3 minutes on each side, gently rolling with tongs or a spatula, until all sides are golden and crispy. Reduce heat if browning too fast before cheese melts.
- Transfer roll ups to a paper towel-lined plate to drain excess oil. Let cool for a minute before serving.
Notes
If bread browns too fast before cheese melts, lower heat and cover pan loosely to create steam. For baking, brush roll ups with butter and bake at 375°F for 15-20 minutes, turning halfway. Store cooled roll ups in an airtight container in the refrigerator for up to 2 days. Reheat in oven or pan to retain crispness. Avoid microwaving to keep crunchy texture.
Nutrition
- Serving Size: About 2 roll ups
- Calories: 300
- Fat: 17
- Carbohydrates: 25
- Protein: 10
Keywords: grilled cheese, roll ups, crispy snack, easy snack, cheesy snack, quick recipe, kid-friendly, party appetizer


