Love this? Save it for later!
Share the inspiration with your friends
The berries were starting to look a little sad in the fridge. You know the ones—a bit soft, a little wrinkled, past their prime for snacking but still holding onto that deep, jammy promise. I had bought two pints of black raspberries on a whim at the farmers market, thinking we’d polish them off in a day. But life got busy, and there they sat, staring at me every time I opened the refrigerator door.
I couldn’t throw them out. Not these ones. Black raspberries are special—darker, more complex, and somehow sweeter and tangier at the same time than their red cousins. So I did what any slightly stubborn home cook would do: I decided to turn them into jam. The problem? No pectin in the pantry. And honestly, I wasn’t about to run to the store just for that.
A quick search confirmed what I suspected—black raspberries have enough natural pectin to set up beautifully on their own. I grabbed a heavy pot, dumped in the berries and sugar, and crossed my fingers. An hour later, I had three jars of the most gorgeous, ruby-dark jam I’d ever seen. It wasn’t a happy accident. It was just the fruit doing what it does best.
That first morning, I spread it on toast and took a bite. The flavor was pure summer—bright, intense, and not too sweet. It tasted like the kind of jam you’d find at a fancy farm stand, but I made it in my own kitchen with two ingredients and a little patience. This easy homemade no pectin black raspberry jam has become my go-to ever since. It’s the kind of recipe that makes you feel like you’ve discovered a secret.
Why You’ll Love This Recipe
Let me tell you why this jam is different from all the others I’ve tried. First off, it’s genuinely simple. You don’t need a candy thermometer, special equipment, or a degree in food science. Just fruit, sugar, and a bit of lemon juice.
- No Pectin Required: Black raspberries have enough natural pectin to thicken beautifully. No boxed stuff needed, and no weird aftertaste.
- Just Three Ingredients: Black raspberries, sugar, and lemon juice. That’s it. You probably have everything already.
- Perfect for Beginners: If you’ve never made jam before, this is the recipe to start with. It’s forgiving and hard to mess up.
- Intense Berry Flavor: Because there’s no added pectin or fillers, the raspberry taste is pure and concentrated. It’s like summer in a jar.
- Great for Gifting: A jar of homemade jam tied with a ribbon is one of the best gifts you can give. People genuinely appreciate the effort.
What really sets this apart is how the fruit does all the work. I’ve made jam with added pectin before, and it always felt a little… processed. This method lets the berries shine. The texture is soft-set, not stiff—perfect for spreading on toast, swirling into yogurt, or spooning over vanilla ice cream. It’s the kind of jam you’ll find excuses to eat.
I’ve tested this recipe multiple times, tweaking the sugar ratio and cooking time until it was just right. The result is a jam that’s not overly sweet, with a gorgeous deep purple color that looks almost jewel-like in the jar. Trust me, once you make this, you’ll never buy store-bought raspberry jam again.
What Ingredients You Will Need
This recipe uses simple, wholesome ingredients to deliver bold flavor and satisfying texture without the fuss. Here’s what you’ll need and why each one matters.
- 4 cups fresh or frozen black raspberries (about 20 oz): The star of the show. If using frozen, no need to thaw first—just add them straight to the pot. Fresh berries will give you a slightly brighter flavor, but frozen work wonderfully too. I’ve used both, and honestly, the difference is minimal.
- 2 cups granulated sugar (400 g): This isn’t just for sweetness. Sugar helps preserve the jam and works with the natural pectin to create that perfect set. Don’t reduce the sugar too much or the jam won’t set properly. If you want a lower-sugar version, look for a recipe specifically designed for that.
- 2 tablespoons fresh lemon juice (about 1 lemon): The acid in lemon juice helps activate the pectin and balances the sweetness. It also brightens the flavor and helps preserve the jam’s color. Use fresh squeezed—bottled lemon juice has a different acidity level.
- Optional: 1/2 teaspoon unsalted butter: This is my little trick. Adding a tiny pat of butter while cooking helps reduce foaming. It’s not necessary, but it makes the process cleaner. You can skip it if you don’t mind skimming foam.
A quick note on berries: Black raspberries are different from blackberries. They’re smaller, hollow in the center (like red raspberries), and have a more delicate, floral flavor. If you can’t find black raspberries, you can substitute red raspberries or a mix of both. The cooking time might vary slightly, but the method stays the same.
I recommend using organic berries if possible, especially since you’re cooking the skins. The flavor is noticeably deeper. And for sugar, any standard white granulated sugar works fine—no need for fancy preserving sugar with added pectin.
Equipment Needed
You don’t need a fancy canning setup for this recipe. Here’s what I use every time.
- Large heavy-bottomed pot or Dutch oven: A wide pot is key for even heat distribution and faster evaporation. I use a 6-quart enameled Dutch oven, and it works perfectly.
- Wooden spoon or silicone spatula: For stirring. Wooden spoons are great because they don’t conduct heat, and they’re sturdy enough to break up berries.
- Glass jars with lids: I use 4 half-pint (8 oz) jars. Make sure they’re clean and sterilized—run them through the dishwasher or boil them for 10 minutes.
- Small plate (for the freezer test): This is how you check if the jam is set without a thermometer. Just pop a plate in the freezer before you start.
- Ladle and wide-mouth funnel: Makes filling jars less messy. If you don’t have a funnel, you can carefully pour from the pot.
- Kitchen towel or jar lifter: For handling hot jars. Safety first!
If you don’t have a Dutch oven, a large stainless steel pot works fine. Just avoid thin aluminum pots—they can cause hot spots and scorch the jam. And honestly, if you only have a nonstick skillet, that’ll work too, but you’ll need to stir more frequently.
Preparation Method
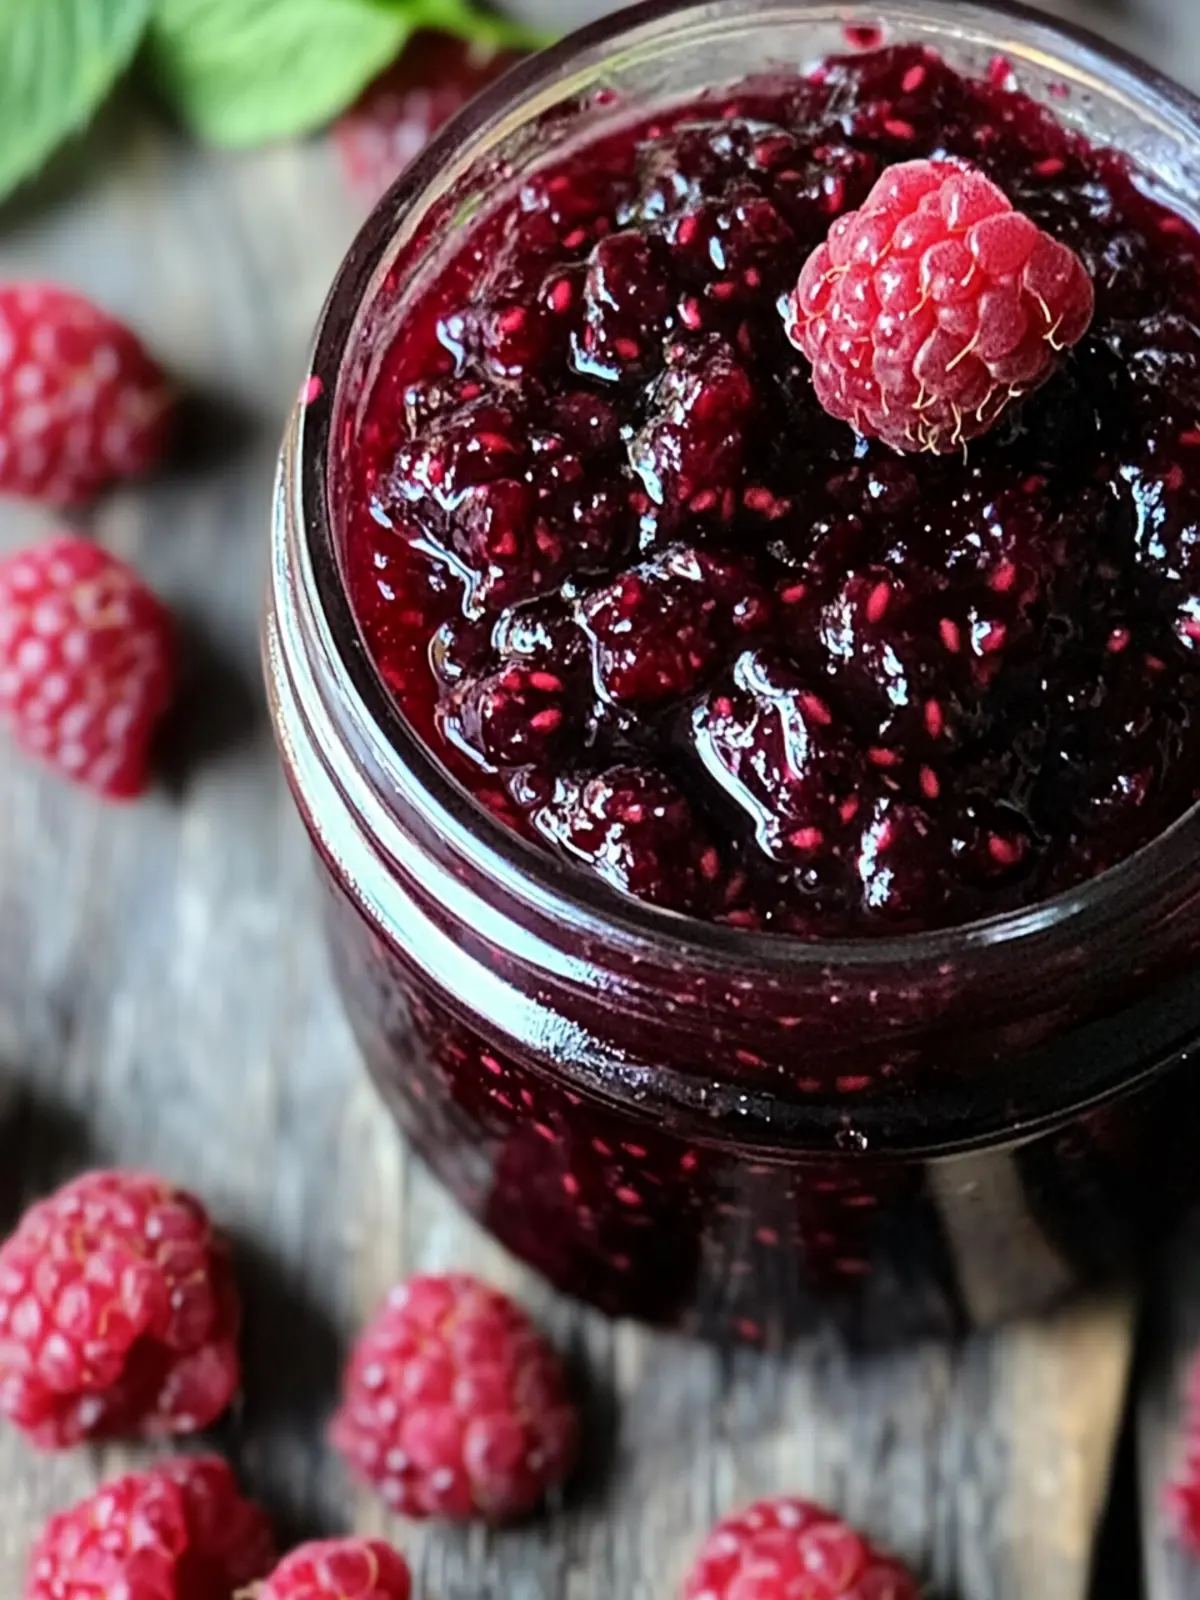
Making this jam is straightforward, but there are a few key moments where things can go wrong. I’ll walk you through each step so you feel confident.
- Prepare your jars and plate: Start by washing your jars and lids in hot soapy water, then place them in a 225°F oven for 15 minutes to sterilize. Pop a small plate in the freezer—this will be your set test later.
- Combine berries and sugar: In your large pot, add the black raspberries and sugar. Stir gently to coat the berries. Let this sit for about 10 minutes. The sugar will start drawing out the berries’ juices, creating a syrupy mixture. This step isn’t strictly necessary, but it helps the berries break down more evenly.
- Start cooking: Place the pot over medium heat and stir occasionally. The berries will release more liquid and start bubbling. Don’t walk away yet—this is where things get interesting. After about 5 minutes, add the lemon juice and butter (if using). The butter will help reduce foaming.
- Bring to a rolling boil: Turn the heat to medium-high and bring the mixture to a full, rolling boil—the kind where bubbles keep rising even when you stir. Let it boil for 8-12 minutes, stirring frequently to prevent scorching. You’ll notice the mixture darkening and thickening. The berries will break down completely, and the jam will start to look glossy.
- Test for set: After 8 minutes, start checking. Turn off the heat. Take your frozen plate from the freezer and spoon a small amount of jam onto it. Let it sit for 30 seconds, then push it with your finger. If it wrinkles and holds its shape, it’s done. If it’s still runny, boil for another 2-3 minutes and test again.
- Skim foam (optional): If there’s foam on top, you can skim it off with a spoon. The butter trick usually keeps foam to a minimum, but a little foam is fine—it will settle as the jam cools.
- Fill the jars: Ladle the hot jam into your sterilized jars, leaving about 1/4 inch of headspace at the top. Wipe the rims clean with a damp paper towel, then screw on the lids.
- Process or cool: If you want shelf-stable jam, process the jars in a boiling water bath for 10 minutes. If you’ll eat it within a few weeks, just let the jars cool on the counter. You’ll hear the satisfying “pop” as the lids seal.
One thing I learned the hard way: don’t overcook the jam. It will continue to thicken as it cools. If it looks a little loose when you test it, that’s okay—it will set more in the jar. Overcooked jam becomes stiff and almost chewy. Trust the freezer test.
Cooking Tips & Techniques
I’ve made this jam at least a dozen times, and I’ve picked up a few tricks along the way. Here’s what I wish someone had told me.
Don’t crush the berries too much. Some people like to mash them with a potato masher before cooking. I prefer to let them break down naturally during boiling. This gives you a jam with lovely whole berry pieces scattered throughout, rather than a uniform paste. If you prefer a smoother jam, go ahead and mash them lightly after they soften.
Watch for scorching. Sugar burns easily, especially once the jam starts thickening. Stir frequently, especially in the last 5 minutes of boiling. A heavy-bottomed pot helps distribute heat evenly, but you still need to pay attention. I’ve had a few batches where I got distracted and ended up with burnt spots—still edible, but with a slightly smoky flavor.
The freezer test is your best friend. I used to rely on a candy thermometer, but the freezer test is more reliable for jam. The temperature method (220°F) works, but altitude and pot size can affect it. The freezer test never lies. Just remember to turn off the heat while you test—if the jam needs more time, you can bring it back to a boil.
Use a wide pot. A wider surface area means faster evaporation, which means quicker cooking and brighter flavor. A narrow, tall pot will take longer and can result in a darker, more caramelized jam. I prefer the bright, fresh taste you get from a quick boil.
Let it rest before jarring. After you turn off the heat, let the jam sit in the pot for 5 minutes. This allows the fruit to settle and the foam to rise to the top. It also makes filling jars easier because the jam isn’t boiling aggressively.
Variations & Adaptations
This recipe is incredibly flexible. Here are some ways I’ve adapted it over the years.
- Mixed Berry Jam: Replace half the black raspberries with red raspberries, blueberries, or chopped strawberries. The cooking time stays the same, but the flavor becomes more complex. My favorite combo is half black raspberries and half red raspberries—it’s like a berry symphony.
- Spiced Black Raspberry Jam: Add 1/2 teaspoon of cinnamon and a pinch of cardamom along with the sugar. The warm spices complement the berries’ natural sweetness beautifully. I made this for a holiday brunch and it was gone in minutes.
- Low-Sugar Version: If you want to reduce sugar, you can use 1 1/2 cups instead of 2, but the jam will be softer and won’t keep as long. You’ll need to store it in the fridge and use within 2 weeks. For a truly low-sugar jam, look for a recipe that uses chia seeds as a thickener.
- Herb-Infused Jam: Add a sprig of fresh thyme or a few basil leaves while the jam cooks. Remove them before jarring. The herbal notes add a surprising sophistication. I once served this with goat cheese and crackers, and people couldn’t stop asking about it.
- No-Cook Freezer Jam: This method uses the same ingredients but skips the boiling. Mash the berries with sugar and lemon juice, then freeze in jars. The texture is looser and more like a sauce, but the flavor is incredibly fresh. Perfect for when you’re short on time.
If you’re feeling adventurous, try this jam in a summer berry icebox cake—it adds a fantastic fruity layer. Or swirl it into a batch of pretty pink cinnamon rolls for a brunch that’s both beautiful and delicious.
Serving & Storage Suggestions
This jam is incredibly versatile. Here’s how I use it throughout the year.
Serving Temperature: Serve at room temperature for the best spreadability. Cold jam straight from the fridge can be a bit stiff, so let it sit out for 15 minutes before serving. It’s perfect on toast, biscuits, scones, or English muffins. I also love it as a filling for thumbprint cookies or layered in a trifle.
Pairings: Black raspberry jam pairs beautifully with creamy cheeses like brie, goat cheese, or cream cheese. Try it on a cheese board with some crusty bread. It’s also amazing swirled into plain yogurt, spooned over pancakes or waffles, or used as a topping for vanilla ice cream.
Storage: Unopened jars of properly processed jam will keep in a cool, dark pantry for up to a year. Once opened, store in the refrigerator and use within 3 months. If you notice any mold or off smells, discard the jam—it’s not worth the risk.
Freezer Option: You can freeze this jam in freezer-safe containers for up to 6 months. Leave about 1/2 inch of headspace for expansion. Thaw in the refrigerator overnight before using. The texture will be slightly softer, but the flavor remains excellent.
How Flavors Develop: The jam’s flavor actually improves after a few days in the jar. The fruit and sugar meld together, and any slight bitterness from cooking mellows out. I always try to save at least one jar for a month later—it’s always the best one.
Nutritional Information & Benefits
While jam isn’t exactly health food, black raspberries are packed with good stuff. Here’s a rough breakdown per 1-tablespoon serving.
- Calories: 45
- Carbohydrates: 11g
- Sugar: 10g
- Fiber: 1g
- Vitamin C: 4% of daily value
Black raspberries are rich in antioxidants, particularly anthocyanins, which give them their deep purple color. These compounds are linked to reduced inflammation and improved heart health. They also contain ellagic acid, a plant compound studied for its potential cancer-fighting properties.
This jam is naturally gluten-free, dairy-free, and vegan. The only potential allergen is the fruit itself, which is rare. If you’re watching your sugar intake, use this jam sparingly or try the low-sugar variation mentioned above.
I’m not a nutritionist, but I feel good about eating this jam because I know exactly what’s in it. No high-fructose corn syrup, no artificial colors, no preservatives. Just fruit, sugar, and lemon juice. That’s a win in my book.
Conclusion
This easy homemade no pectin black raspberry jam has become a staple in my kitchen for good reason. It’s simple, forgiving, and produces jam that tastes like pure summer. The first time I made it, I was shocked at how easy it was. Now I make it every time black raspberries are in season, and I always wish I’d made more.
I love that this recipe lets the fruit do the talking. There’s no complicated technique or special ingredient—just berries, sugar, and a little patience. The result is a jam that’s deeply flavored, beautifully colored, and endlessly versatile. Whether you’re spreading it on toast, gifting it to friends, or using it in other recipes, it never disappoints.
I’d love to hear how your batch turns out. Did you add any twists? Did you use it in a creative way? Drop a comment below and share your experience. And if you’re looking for more easy homemade treats, check out this easy 5-minute buttercream frosting recipe—it pairs perfectly with a raspberry jam-filled cake. Happy cooking, and enjoy every last spoonful of that gorgeous, ruby-dark jam!
Frequently Asked Questions
Can I use frozen black raspberries for this jam?
Absolutely! Frozen berries work just as well as fresh. No need to thaw them first—just add them directly to the pot with the sugar. The cooking time might be slightly longer because of the extra moisture, but the result is the same delicious jam.
How do I know when the jam is set?
The best way is the freezer test. Place a small plate in the freezer before you start cooking. When you think the jam might be ready, spoon a small amount onto the cold plate. Let it sit for 30 seconds, then push it with your finger. If it wrinkles and holds its shape, it’s done. If it’s still runny, boil for another 2-3 minutes and test again.
Why did my jam turn out too runny or too stiff?
If your jam is runny, it probably wasn’t cooked long enough. Just return it to the pot and boil for a few more minutes. If it’s too stiff, you cooked it too long. Unfortunately, you can’t undo overcooked jam, but you can use it as a sauce by warming it up with a little water. Next time, start testing earlier to avoid overdoing it.
Can I reduce the sugar in this recipe?
Yes, but with caveats. Reducing sugar affects both the set and the shelf life. For a soft-set jam that needs refrigeration, you can use 1 1/2 cups of sugar instead of 2. For a truly low-sugar jam, consider using a recipe with chia seeds or a low-sugar pectin. The flavor will still be great, but the texture will be looser.
How long does homemade jam last?
Unopened jars that have been water-bath processed will keep in a cool, dark pantry for up to a year. Once opened, refrigerate the jam and use within 3 months. If you skip the water bath processing, store the jam in the fridge and use within 3-4 weeks. Always check for signs of mold or off smells before using.
Pin This Recipe!
Easy Homemade No Pectin Black Raspberry Jam Recipe
This easy homemade no pectin black raspberry jam is made with just three ingredients and no special equipment. It’s a simple, forgiving recipe that produces intensely flavored, ruby-dark jam that tastes like pure summer.
- Prep Time: 15 minutes
- Cook Time: 20 minutes
- Total Time: 35 minutes
- Yield: 4 half-pint jars (8 oz each) 1x
- Category: Preserves
- Cuisine: American
Ingredients
- 4 cups fresh or frozen black raspberries (about 20 oz)
- 2 cups granulated sugar (400 g)
- 2 tablespoons fresh lemon juice (about 1 lemon)
- Optional: 1/2 teaspoon unsalted butter
Instructions
- Prepare your jars and plate: Wash jars and lids in hot soapy water, then place them in a 225°F oven for 15 minutes to sterilize. Pop a small plate in the freezer for the set test.
- Combine berries and sugar: In a large pot, add black raspberries and sugar. Stir gently to coat. Let sit for about 10 minutes to draw out juices.
- Start cooking: Place pot over medium heat and stir occasionally. After about 5 minutes, add lemon juice and butter (if using).
- Bring to a rolling boil: Turn heat to medium-high and bring to a full rolling boil. Boil for 8-12 minutes, stirring frequently, until mixture darkens and thickens.
- Test for set: Turn off heat. Spoon a small amount of jam onto the frozen plate. Let sit for 30 seconds, then push with finger. If it wrinkles and holds shape, it’s done. If runny, boil 2-3 more minutes and test again.
- Skim foam (optional): Skim off any foam with a spoon.
- Fill the jars: Ladle hot jam into sterilized jars, leaving 1/4 inch headspace. Wipe rims clean and screw on lids.
- Process or cool: For shelf-stable jam, process jars in a boiling water bath for 10 minutes. If eating within a few weeks, let cool on counter.
Notes
Don’t overcook the jam – it will continue to thicken as it cools. The freezer test is more reliable than a candy thermometer. Let jam rest in pot for 5 minutes before jarring to allow fruit to settle and foam to rise. For best flavor, let jam sit for a few days before eating.
Nutrition
- Serving Size: 1 tablespoon
- Calories: 45
- Sugar: 10
- Carbohydrates: 11
- Fiber: 1
Keywords: black raspberry jam, no pectin jam, homemade jam, easy jam recipe, small batch jam, summer preserves


