Love this? Save it for later!
Share the inspiration with your friends
I was staring into the fridge on a Saturday morning, completely out of bread, and honestly, a little tired of the same old scrambled eggs routine. My kids were already circling the kitchen island with that hungry look, and I could feel the pressure mounting. I had a container of rolled oats staring back at me from the pantry, and a crazy thought popped into my head—what if I just made a crust out of them? Not for a pie, but for breakfast. Something I could pile eggs and cheese on top of.
So I grabbed a bowl, mixed some oats with an egg and a pinch of salt, and pressed it into a hot skillet. The smell that filled the kitchen was toasty and nutty, nothing like I expected. I topped that golden-brown oat disc with a fried egg, some shredded cheddar, and a few slices of avocado. My oldest took one bite and said, “This is way better than toast.” And honestly? I haven’t bought a loaf of sandwich bread since. This homemade oatmeal breakfast pizza crust has become my go-to for busy mornings when I need something hearty, fast, and just a little bit different.
It’s the kind of recipe that feels like a happy accident, but now I make it on purpose all the time. The texture is crispy on the outside, a little chewy on the inside, and it holds up to all your favorite breakfast toppings without getting soggy. It’s basically a blank canvas for whatever you have in the fridge, and it comes together in under 15 minutes. That morning, I wasn’t trying to invent anything. I was just trying to feed my family. But this oatmeal breakfast pizza crust turned a chaotic morning into a quiet win, and I knew I had to share it.
Why You’ll Love This Recipe
This isn’t just another healthy breakfast hack. This is a recipe I’ve tested at least a dozen times to get the texture just right. I’ve made it thick, thin, crispy, and soft, and I can tell you exactly what works. Here’s why this one sticks:
- Quick & Easy : From bowl to plate in under 15 minutes. No yeast, no rising, no complicated techniques.
- Simple Ingredients : You probably have rolled oats, an egg, and a pinch of salt in your kitchen right now. No fancy grocery trips needed.
- Perfect for Busy Mornings : Great for rushed weekday breakfasts or lazy weekend brunches when you want something satisfying without the effort.
- Crowd-Pleaser : My kids devour it, and I’ve had friends text me for the recipe after trying it at a brunch gathering.
- Unbelievably Delicious : The toasty oat flavor paired with savory toppings is next-level comfort food. It’s crunchy, warm, and totally satisfying.
What makes this recipe different from other oat-based breakfasts is the technique. By pressing the mixture thin and cooking it in a hot skillet, you get a crust that’s sturdy enough to hold eggs, cheese, and even a drizzle of hot sauce without falling apart. It’s not mushy or bland. It’s a real crust with real texture. This isn’t just another version of oatmeal. It’s your best version of breakfast pizza, and it’s going to change your morning routine.
Honestly, this recipe makes me close my eyes after the first bite every single time. It’s comfort food reimagined—healthier, faster, but with the same soul-soothing satisfaction. Perfect for impressing weekend guests without stress, or turning a simple Tuesday breakfast into something memorable.
What Ingredients You Will Need
This recipe uses simple, wholesome ingredients to deliver bold flavor and satisfying texture without the fuss. Most of these are pantry staples, which is exactly what you want on a busy morning.
- Rolled oats (1 cup / 90g) – I recommend old-fashioned rolled oats for the best texture. Quick oats work in a pinch, but the crust won’t be as chewy. I prefer Bob’s Red Mill or Quaker for consistent results.
- Large egg (1) – This acts as the binder. It holds the oats together and gives the crust structure. For a vegan version, you can use a flax egg (1 tablespoon ground flaxseed mixed with 3 tablespoons water, let sit for 5 minutes).
- Salt (¼ teaspoon) – A little salt enhances the nutty flavor of the oats. Don’t skip it, even if you’re adding salty toppings later.
- Garlic powder (¼ teaspoon, optional) – Adds a subtle savory note that pairs beautifully with eggs and cheese. I add this about half the time, depending on my mood.
- Olive oil or butter (1 tablespoon, for cooking) – For crisping the crust. Butter adds more flavor, but olive oil works great and keeps it dairy-free.
- Toppings (your choice) – This is where you get creative. I usually use 1 fried or scrambled egg, ¼ cup shredded cheddar or mozzarella, a few slices of avocado, and a sprinkle of red pepper flakes. You can also add cooked sausage, bacon, sautéed mushrooms, or fresh tomatoes.
When selecting your oats, look for a brand that offers whole grain rolled oats without added sugars or preservatives. The texture really matters here. If you’re gluten-sensitive, make sure to use certified gluten-free oats. For a lower-carb option, you can substitute half the oats with almond flour, though the texture will be a bit more delicate.
One thing I’ve learned through trial and error: don’t use steel-cut oats. They won’t soften enough during the short cooking time, and your crust will be crunchy in a bad way. Stick with rolled oats, and you’ll get that perfect crispy-chewy balance every time.
Equipment Needed
You don’t need any fancy tools for this recipe, which is part of the beauty. Here’s what you’ll need:
- Medium mixing bowl – For combining the oats, egg, and seasonings.
- Fork or whisk – To mix everything together until well combined.
- Non-stick skillet or well-seasoned cast iron pan (8 to 10 inches) – A non-stick surface is key for easy flipping. I’ve used my trusty 10-inch cast iron skillet for years, and it works beautifully once it’s well-seasoned.
- Spatula – A thin, flexible spatula makes flipping the crust much easier.
- Measuring cups and spoons – For accurate ingredient portions.
If you don’t have a non-stick skillet, you can use a regular pan with a generous amount of oil or butter. Just be careful when flipping, as the crust might stick a little more. A well-seasoned cast iron pan is actually my favorite choice because it gives the crust an extra-crispy bottom. Budget-friendly tip: a basic non-stick skillet from any grocery store works perfectly. No need to spend big money here.
Preparation Method
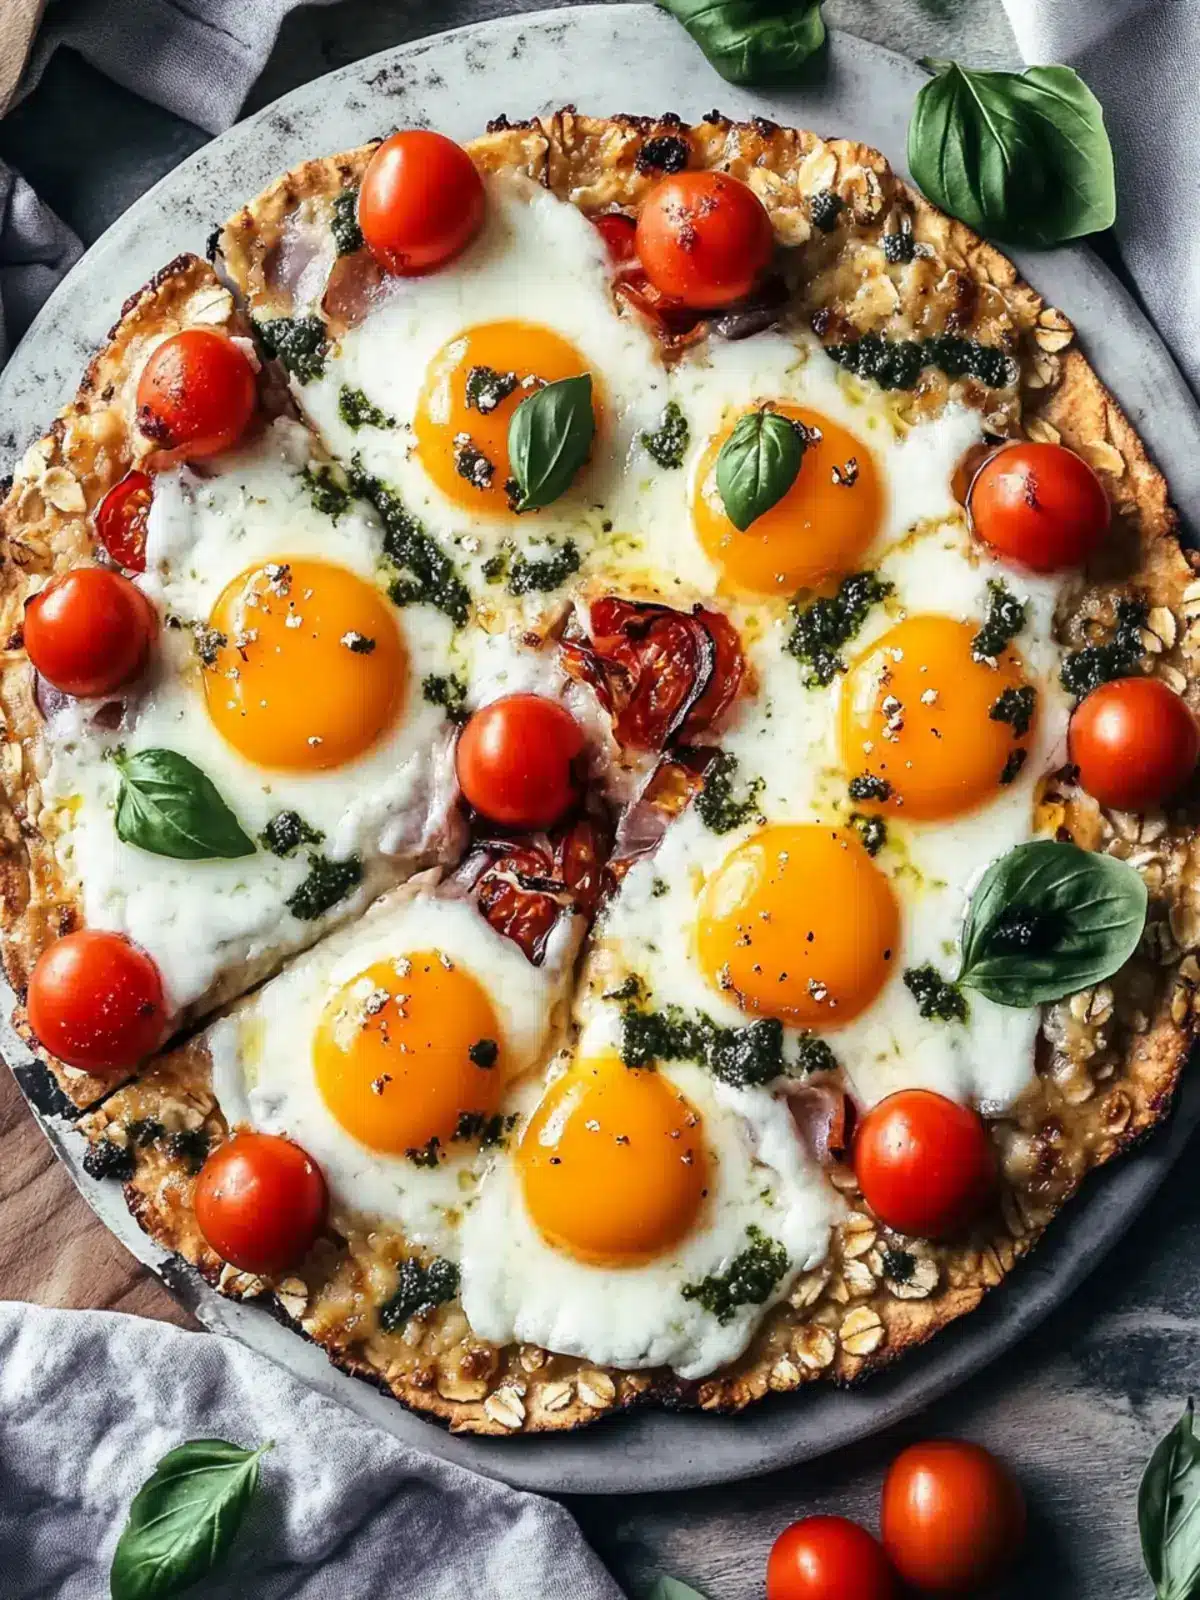
Let’s get cooking. This comes together fast, so have your toppings ready before you start.
- Mix the crust base. In a medium bowl, combine 1 cup (90g) rolled oats, 1 large egg, ¼ teaspoon salt, and ¼ teaspoon garlic powder (if using). Stir with a fork until everything is evenly moistened and the oats are fully coated. The mixture will look a bit loose, but that’s exactly right. Let it sit for 2 minutes so the oats can absorb some moisture.
- Heat your skillet. Place your non-stick skillet or cast iron pan over medium heat and add 1 tablespoon of olive oil or butter. Swirl to coat the bottom. You want the pan hot but not smoking—test it by flicking a drop of water; if it sizzles, you’re ready.
- Press the crust. Pour the oat mixture into the center of the hot skillet. Using the back of a spoon or your spatula, press it down evenly into a round shape, about ¼-inch thick. Make sure the edges are as thick as the center so they cook evenly. Don’t worry if it’s not a perfect circle—rustic is charming.
- Cook the first side. Let the crust cook undisturbed for 4 to 5 minutes. You’ll see the edges start to turn golden brown and the surface will look set. Peek under the edge with your spatula; it should be a deep golden color. If it’s still pale, give it another minute.
- Flip the crust. Slide your spatula carefully under the entire crust. It should release easily from the pan. Flip it confidently in one motion. If you’re nervous, you can slide it onto a plate first, then invert it back into the pan. Cook the second side for 3 to 4 minutes, until golden and crispy.
- Add your toppings. Once the crust is cooked on both sides, reduce the heat to low. Sprinkle your shredded cheese directly onto the crust, then crack an egg on top or add your pre-cooked scramble. Cover the pan with a lid for 2 to 3 minutes, until the cheese melts and the egg is cooked to your liking. If you’re adding avocado or fresh herbs, do that after cooking.
- Serve immediately. Slide the pizza onto a plate, add any finishing toppings (hot sauce, flaky salt, fresh herbs), and cut into wedges. The crust stays crispy for about 5 minutes, so eat it right away for the best texture.
One thing I’ve learned: don’t rush the first side. Letting it cook fully before flipping ensures that the crust holds together. If you flip too early, it might fall apart. Trust the process, and you’ll get a perfect crust every time.
Cooking Tips & Techniques
After making this recipe more times than I can count, I’ve picked up a few tricks that make a real difference.
Getting the perfect crisp. The key to a crispy crust is a hot pan and patience. Medium heat is your sweet spot. Too high, and the outside burns before the inside sets. Too low, and the crust turns out soft and soggy. I’ve made that mistake more than once—it’s still edible, but nowhere near as good.
Don’t skip the rest time. Letting the oat mixture sit for 2 minutes before cooking allows the oats to absorb the egg. This makes the crust hold together much better. I learned this the hard way when I rushed and ended up with a crumbly mess that fell apart in the pan.
Flipping without fear. If your crust sticks, it probably needs another minute of cooking. A properly cooked crust will release easily from the pan. Use a thin spatula and slide it all the way under before flipping. If you’re really nervous, you can slide the crust onto a cutting board, place the pan upside down over it, and flip them together. Works like a charm.
Multitasking tip. While the first side of the crust is cooking, I prep my toppings. I’ll grate the cheese, slice the avocado, and maybe fry some sausage in another pan. This way, everything comes together at the same time, and breakfast is on the table in under 15 minutes.
Consistency is key. If your mixture looks too dry, add a teaspoon of water or milk. If it looks too wet, add an extra tablespoon of oats. The ideal texture is like a thick, sticky batter that holds its shape when pressed. Once you’ve made it a couple of times, you’ll know exactly how it should feel.
Variations & Adaptations
This recipe is incredibly flexible, so feel free to play around based on what you have or what you’re craving.
- Savory Mediterranean. Top the crust with crumbled feta, sun-dried tomatoes, a handful of spinach, and a drizzle of balsamic glaze. It’s like a Greek salad on a crispy oat base, and it’s absolutely delicious.
- Sweet Breakfast Version. Skip the salt and garlic powder, and add 1 tablespoon of maple syrup and ½ teaspoon of cinnamon to the oat mixture. Top with fresh berries, a dollop of Greek yogurt, and a drizzle of honey. It tastes like a warm oatmeal cookie in pizza form. If you’re in the mood for something similarly fun and colorful, try my rainbow tie-dye blondies for a dessert that’s just as playful.
- Vegan Option. Use a flax egg (1 tablespoon ground flaxseed + 3 tablespoons water) and cook the crust in olive oil. Top with vegan cheese, sautéed mushrooms, and roasted red peppers. It holds together beautifully and tastes just as satisfying.
- Spicy Southwestern. Add ¼ teaspoon cumin and a pinch of chili powder to the crust mixture. Top with pepper jack cheese, black beans, a fried egg, and a dollop of salsa. This one has serious weekend brunch energy.
- Low-Carb Adaptation. Replace half the rolled oats with almond flour. The crust will be a bit more delicate, so handle it gently when flipping. It’s still delicious and cuts the carbs significantly.
I’ve personally tried the sweet cinnamon version more times than I’ll admit. It’s become my go-to Sunday morning treat when I want something that feels indulgent but is actually pretty wholesome.
Serving & Storage Suggestions
This breakfast pizza is best enjoyed fresh out of the pan, when the crust is at its crispiest. I like to serve it on a warm plate with a side of fresh fruit or a simple green salad for a balanced meal.
For presentation, cut the pizza into 4 wedges and arrange them on a wooden board or a colorful plate. Sprinkle with fresh herbs like chives or parsley for a pop of color. If you’re serving a crowd, you can make multiple crusts and set up a topping bar so everyone can customize their own.
Storage: If you have leftovers (rare in my house!), let the crust cool completely, then store it in an airtight container in the refrigerator for up to 2 days. Keep the toppings separate if possible, as they can make the crust soggy.
Reheating: The best way to revive the crispiness is in a dry skillet over medium heat for 2 to 3 minutes per side. You can also pop it in a toaster oven or air fryer at 350°F for about 3 minutes. The microwave will work in a pinch, but the crust will be soft rather than crispy.
One thing I’ve noticed: the flavors actually meld together nicely after a day in the fridge. If you’re meal-prepping, you can make the crusts ahead of time, store them plain, and add fresh toppings when you’re ready to eat.
Nutritional Information & Benefits
Here’s an approximate breakdown for one serving (the entire crust with one egg and ¼ cup shredded cheddar, without additional toppings):
- Calories: 385
- Protein: 20g
- Carbohydrates: 35g
- Fiber: 6g
- Fat: 18g
- Sugar: 2g
This recipe is naturally high in fiber thanks to the rolled oats, which help keep you full and support healthy digestion. Oats are also rich in beta-glucan, a type of soluble fiber that’s great for heart health. The egg provides high-quality protein and essential vitamins like B12 and choline, which supports brain function.
If you’re watching your sodium, you can reduce or skip the added salt and rely on the natural flavors of your toppings. For a lower-calorie option, use egg whites instead of a whole egg in the crust and choose lighter toppings like fresh vegetables. This recipe is naturally gluten-free if you use certified gluten-free oats, and it’s easy to adapt for dairy-free or vegan diets as mentioned above.
I love that this breakfast pizza feels indulgent but is actually packed with nutrients that keep me energized through the morning. It’s a win-win in my book.
Conclusion
This homemade oatmeal breakfast pizza crust has honestly changed how I think about breakfast. It’s proof that you don’t need complicated ingredients or hours in the kitchen to make something that feels special. Whether you’re rushing out the door or taking a slow Saturday morning, this recipe delivers every single time.
I’d love for you to try it and make it your own. Maybe you’ll discover a topping combination I haven’t thought of, or maybe you’ll find that it becomes your new go-to for busy mornings. That’s the beauty of this recipe—it’s a starting point, not a rigid set of rules.
If you give this oatmeal breakfast pizza crust a try, I’d love to hear how it goes. Leave a comment below and tell me your favorite topping combo. Share a photo on Pinterest and tag me so I can see your creation. And if you’re looking for another quick and satisfying breakfast idea, don’t miss my easy fluffy sausage pancake bites—they’re just as fun and family-friendly. Happy cooking, and remember: breakfast doesn’t have to be boring!
Frequently Asked Questions
Can I use quick oats instead of rolled oats?
Yes, you can use quick oats in a pinch. The crust will be a bit softer and less chewy, but it will still hold together. I recommend reducing the cooking time by about 1 minute per side, as quick oats cook faster.
Can I make this recipe ahead of time?
Absolutely. You can prepare the crusts up to 2 days in advance and store them in the refrigerator. When you’re ready to eat, simply reheat the crust in a dry skillet and add your fresh toppings. This is a great meal prep option for busy weeks.
Is this recipe gluten-free?
It can be! Rolled oats are naturally gluten-free, but they are often processed in facilities that also handle wheat. To ensure your recipe is gluten-free, look for certified gluten-free oats at your local grocery store.
Can I freeze the cooked crust?
Yes, the crust freezes beautifully. Let it cool completely, then wrap it tightly in plastic wrap and place it in a freezer-safe bag. It will keep for up to 3 months. To reheat, thaw in the refrigerator overnight and crisp it up in a hot skillet.
What if my crust falls apart when I flip it?
Don’t worry, it happens to the best of us! If your crust breaks, just press it back together in the pan and continue cooking. The egg will help it re-bond as it sets. For next time, make sure you let the first side cook for the full 4 to 5 minutes before attempting to flip.
Pin This Recipe!

Homemade Oatmeal Breakfast Pizza Crust

A quick and easy breakfast pizza crust made from rolled oats, perfect for busy mornings. Crispy on the outside, chewy on the inside, and ready in under 15 minutes.
- Prep Time: 5 minutes
- Cook Time: 10 minutes
- Total Time: 15 minutes
- Yield: 1 serving 1x
- Category: Breakfast
- Cuisine: American
Ingredients
- 1 cup (90g) rolled oats
- 1 large egg
- ¼ teaspoon salt
- ¼ teaspoon garlic powder (optional)
- 1 tablespoon olive oil or butter (for cooking)
- Toppings of choice (e.g., 1 fried or scrambled egg, ¼ cup shredded cheddar or mozzarella, avocado slices, red pepper flakes)
Instructions
- In a medium bowl, combine 1 cup (90g) rolled oats, 1 large egg, ¼ teaspoon salt, and ¼ teaspoon garlic powder (if using). Stir with a fork until everything is evenly moistened and the oats are fully coated. Let it sit for 2 minutes.
- Place a non-stick skillet or cast iron pan over medium heat and add 1 tablespoon of olive oil or butter. Swirl to coat the bottom.
- Pour the oat mixture into the center of the hot skillet. Using the back of a spoon or a spatula, press it down evenly into a round shape, about ¼-inch thick.
- Let the crust cook undisturbed for 4 to 5 minutes, until the edges are golden brown and the surface looks set.
- Slide a spatula carefully under the entire crust and flip it. Cook the second side for 3 to 4 minutes, until golden and crispy.
- Reduce heat to low. Add shredded cheese and any other toppings (e.g., an egg). Cover the pan with a lid for 2 to 3 minutes, until the cheese melts and the egg is cooked to your liking.
- Slide the pizza onto a plate, add finishing toppings (e.g., avocado, hot sauce, fresh herbs), and cut into wedges. Serve immediately.
Notes
For a vegan version, use a flax egg (1 tablespoon ground flaxseed mixed with 3 tablespoons water, let sit for 5 minutes). For a lower-carb option, replace half the rolled oats with almond flour. The crust is best enjoyed fresh out of the pan for maximum crispiness.
Nutrition
- Serving Size: 1 pizza (entire crus
- Calories: 385
- Sugar: 2
- Fat: 18
- Carbohydrates: 35
- Fiber: 6
- Protein: 20
Keywords: oatmeal breakfast pizza crust, healthy breakfast, easy breakfast recipe, oat crust, breakfast pizza


