Love this? Save it for later!
Share the inspiration with your friends
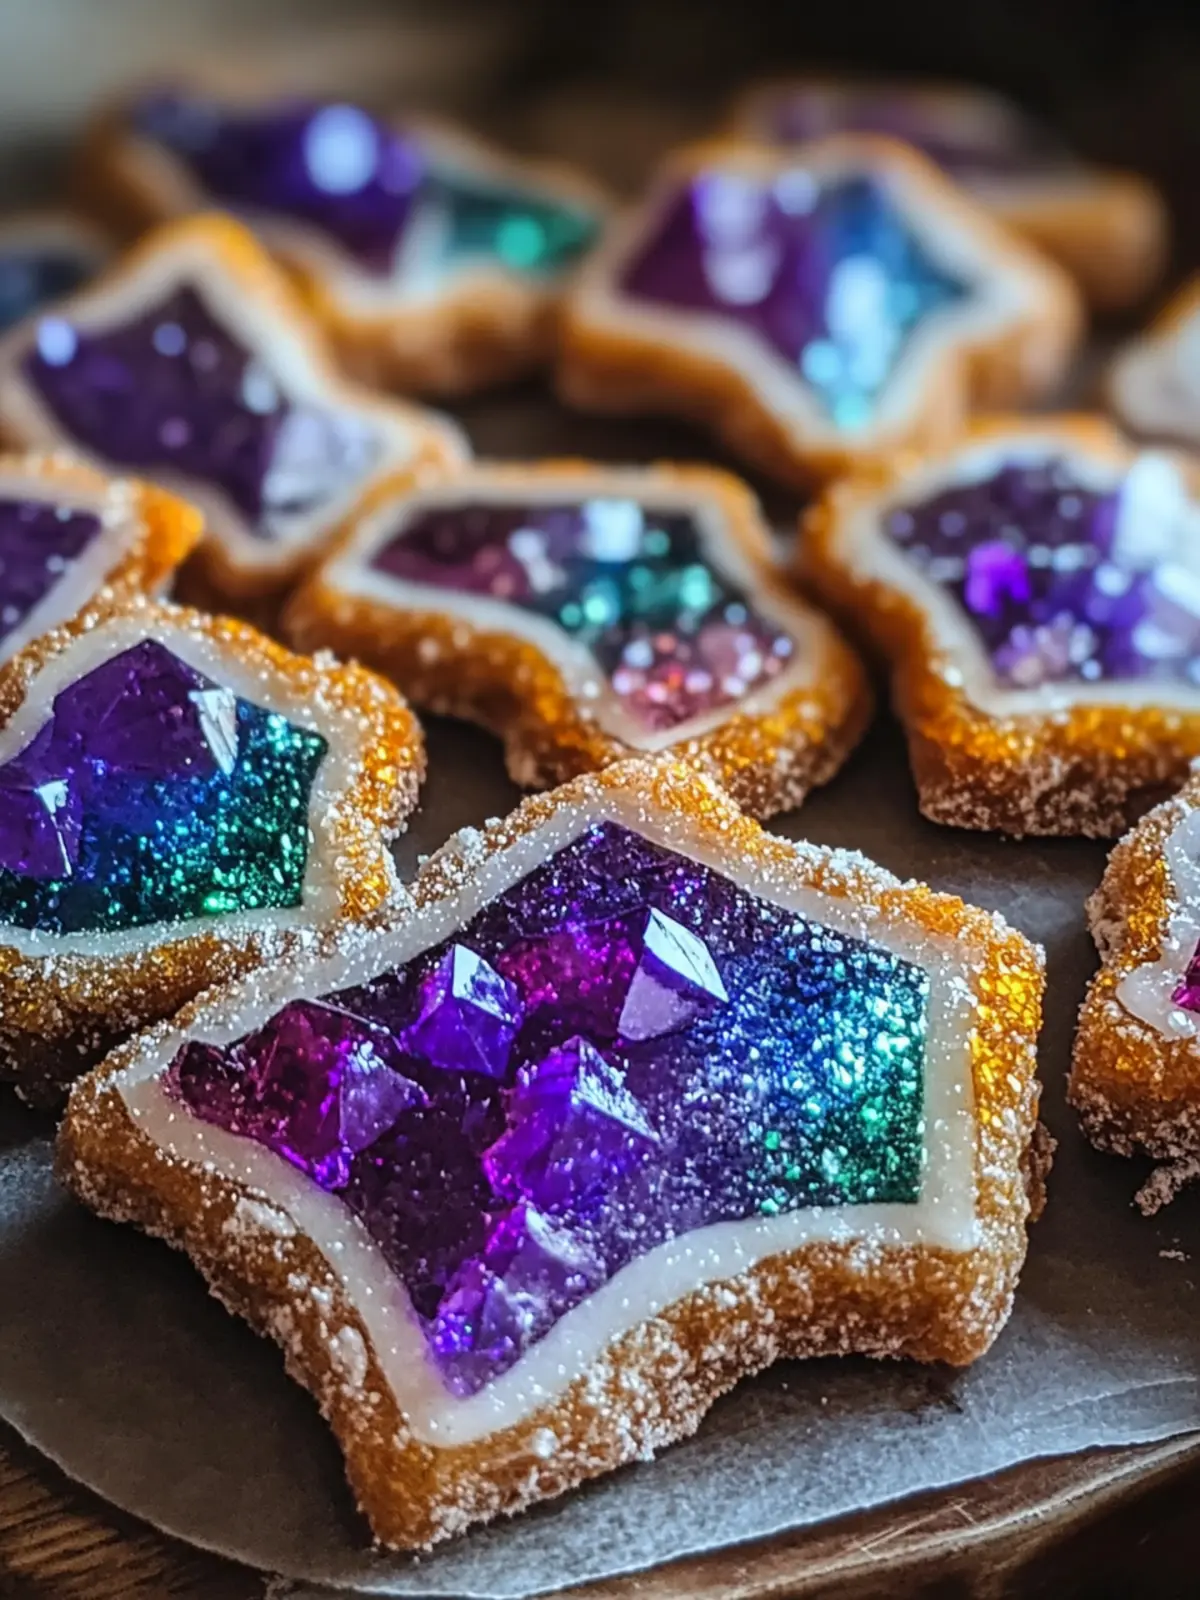
“Are you seriously telling me those are cookies?” my friend gasped, peering over the kitchen counter as the light hit the shimmering edges of my Perfect Dazzling Geode Cookies. Honestly, I was half as surprised as she was. This recipe started as a bit of playful curiosity—an afternoon when I had leftover sugar crystals and a vague memory of those mesmerizing geode rocks from a childhood museum trip. Instead of a typical batch of sugar cookies, I ended up crafting these edible gemstones that looked like something out of a fantasy novel.
It wasn’t overnight perfection, though. I remember the first tries being a bit too crunchy or the colors blending into a muddy mess. But after a few rounds of tweaking the sugar ratios and playing with edible glitter (because, why not?), these cookies turned into magical homemade treats that stunned everyone from my skeptical partner to my kids. The crackling crystalline centers sparkled just right, and the flavor? Let’s just say it wasn’t all just for show.
What really stuck was how this recipe transformed a simple baking session into a moment of wonder, a little celebration of creativity you can actually eat. And now, every time I bake a batch, there’s this quiet thrill seeing those dazzling geode-like crystals catch the light. It feels like bringing a tiny treasure to the table. That’s why this recipe stayed in my rotation — it’s not just a cookie, it’s a small, sparkling surprise.
Why You’ll Love This Recipe
After countless experiments and sharing with family and friends, I can say these Perfect Dazzling Geode Cookies are truly special. Here’s why this recipe stands out:
- Quick & Easy: You can create these dazzling treats in about an hour, including baking and decorating—perfect for last-minute celebrations or when you just want to impress without stress.
- Simple Ingredients: No exotic or hard-to-find items here; most of the ingredients are pantry staples you likely have on hand already.
- Perfect for Magical-Themed Parties: Whether it’s a birthday, a fantasy book club, or just a fun weekend project with kids, these cookies fit right in.
- Crowd-Pleaser: Their stunning appearance is a conversation starter, and the subtle sweetness keeps everyone coming back for more.
- Unbelievably Delicious: The combination of buttery cookie dough and crunchy sugar crystals gives a satisfying texture and flavor that’s anything but ordinary.
Unlike other geode cookie recipes that can be overly complicated or require tricky candy work, this one uses a clever layering technique that’s been tested until the crystals form with that signature sparkle. The secret? Choosing the right type of coarse sugar and carefully timing the bake so the crystals melt just enough without losing their shape. These cookies aren’t just pretty; they carry that perfect balance of crunch and chew that keeps you reaching for more.
Plus, you know that feeling when you nail something that looks straight from a bakery display case? That’s the quiet magic this recipe promises every single time.
What Ingredients You Will Need
This recipe blends simple, wholesome ingredients to create a cookie that’s both eye-catching and tasty, without the fuss of complicated candy making. Here’s what you’ll want to gather before you start:
- For the Cookie Dough:
- All-purpose flour, 2 ½ cups (312 g) – the sturdy base for these cookies
- Unsalted butter, 1 cup (227 g), softened – adds richness and tenderness
- Granulated sugar, ¾ cup (150 g) – for sweetness and a fine crumb
- Brown sugar, ¼ cup (50 g), packed – brings a hint of caramel depth
- Large eggs, 2, room temperature – binds everything beautifully
- Vanilla extract, 2 teaspoons – for warm, inviting flavor
- Baking powder, 1 teaspoon – gives a subtle lift
- Salt, ½ teaspoon – balances the sweetness
- For the Geode Effect:
- Coarse sanding sugar in assorted colors (purple, blue, pink, or your favorite) – about 1 cup (200 g) total
- Edible pearl dust or glitter (optional) – for extra sparkle
- Rock candy crystals or crushed hard candy (optional) – adds crystal texture inside the cookie
For the best sparkle, I recommend brands like Wilton for sanding sugar, as they offer vibrant colors that hold up well during baking. If you’re feeling adventurous, swapping in natural food colorings for the sanding sugar can give a more muted, earthy look. Seasonal variations include using pink and red sugars for Valentine’s Day or icy blues for winter celebrations.
For a gluten-free twist, you can try substituting the all-purpose flour with a gluten-free blend, but expect a slight change in texture. And if dairy is a concern, replacing butter with a plant-based alternative like vegan butter works surprisingly well without losing that buttery mouthfeel.
Equipment Needed
To create these dazzling geode cookies, you won’t need fancy gadgets, but a few key tools will make the process smoother:
- Stand mixer or hand mixer – for creaming butter and sugar evenly. I’ve used both, and a stand mixer saves your arms on larger batches.
- Mixing bowls – at least two, to keep the dough and sugar crystals separate.
- Baking sheets – lined with parchment paper or silicone mats to prevent sticking and promote even baking.
- Cookie scoop or spoon – to portion dough uniformly, which helps the cookies bake evenly.
- Small offset spatula or butter knife – perfect for creating the indentation in the cookie where the sugar crystals will nestle.
- Measuring cups and spoons – accuracy is key to balancing the dough and sugar ratios.
If you don’t have a stand mixer, a sturdy hand mixer will do just fine, though mixing the dough by hand is doable if you don’t mind a little elbow grease. For those on a budget, parchment paper is a must-have to avoid scrubbing your pans later, and silicone mats can be a worthwhile investment if you bake often.
Preparation Method
- Prep Your Ingredients (10 minutes): Take the butter and eggs out of the fridge to warm to room temperature. Measure out all dry ingredients separately. Preheat your oven to 350°F (175°C).
- Cream Butter and Sugars (5-7 minutes): In your mixing bowl, beat the softened butter with granulated and brown sugar until light and fluffy. You’ll notice the mixture becomes pale and airy—this helps create a tender cookie.
- Add Eggs and Vanilla (2 minutes): Beat in the eggs one at a time, making sure each is fully incorporated before adding the next. Stir in the vanilla extract for that warm aroma.
- Mix Dry Ingredients (3 minutes): In a separate bowl, whisk together flour, baking powder, and salt. Gradually add this to the wet ingredients, mixing on low just until combined. Don’t overmix—stop as soon as the dough comes together.
- Shape the Cookies (15 minutes): Scoop tablespoon-sized balls of dough onto your prepared baking sheet, spacing them about 2 inches (5 cm) apart. Using your finger or an offset spatula, gently create a shallow well in the center of each dough ball—this is where your dazzling crystals will go.
- Fill with Sugar Crystals (5 minutes): Spoon coarse sanding sugar and crushed rock candy into each indentation. Be generous but don’t overfill, or the sugar may spill over during baking.
- Bake (12-15 minutes): Bake in the preheated oven until the cookies are lightly golden on the edges and the sugar centers begin to melt and glisten. You’ll smell that sweet, buttery aroma filling the kitchen.
- Cool and Add Sparkle (10 minutes): Let the cookies cool completely on the baking sheet to allow the sugar to harden into crystal-like formations. If you want an extra magical touch, brush lightly with edible pearl dust once cooled.
Keep an eye on the sugar centers during baking—too long in the oven and the crystals melt flat; too short and they won’t form that signature crackled look. If the edges brown too quickly, rotate your baking sheet halfway through.
Cooking Tips & Techniques
Getting those Perfect Dazzling Geode Cookies just right takes a bit of patience and attention, but it’s well worth it. Here’s what I’ve learned from baking these over and over:
- Don’t Skip Softening Butter: Using cold butter can lead to uneven dough and tough cookies. I once rushed this step and ended up with a crumbly mess.
- Use the Right Sugar: Coarse sanding sugar is non-negotiable here. Regular granulated sugar melts too quickly and won’t hold that gem-like texture.
- Indentations Are Key: Creating a shallow well before adding sugar crystals helps keep them contained and lets the crystals shine through without spreading all over.
- Work Quickly: The dough can get sticky if left out too long, making shaping harder. If it softens too much, pop the dough in the fridge for 10-15 minutes.
- Monitor Your Oven: Every oven is a bit different, so start checking your cookies a minute or two before the timer. They should be golden but not dark.
- Multitasking Tip: While the cookies bake, prep your edible glitter or pearl dust so you can add that final sparkle as soon as they’re cool.
One time, I forgot to create the wells before adding the sugar crystals—big mistake! The sugar just melted flat and lost all that dazzling sparkle. So trust me, that step is your best friend.
Variations & Adaptations
This recipe is pretty versatile, and I’ve had fun tweaking it to suit different tastes and occasions:
- Chocolate Geode Cookies: Add ¼ cup (25 g) cocoa powder to the dry ingredients for a rich chocolate base. Use dark sanding sugar for a dramatic look.
- Gluten-Free Version: Swap the all-purpose flour for a gluten-free baking blend. I’ve tried Bob’s Red Mill with great results, though the texture is a bit more crumbly.
- Vegan Adaptation: Replace butter with vegan butter and eggs with flax eggs (1 tablespoon flaxseed meal + 3 tablespoons water per egg). The cookies hold up well but may need a minute extra in the oven.
- Seasonal Colors: Use red and green sanding sugars for holiday cookies or pastel colors for springtime. For a spooky Halloween twist, black and orange sugars make a fun combo.
- Flavor Infusions: Add a teaspoon of almond extract or lemon zest to the dough for a subtle flavor twist that pairs beautifully with the crystal centers.
I once tried using crushed peppermint candies instead of rock candy inside for Christmas — the minty surprise inside was a hit, and the crystals sparkled just like ice.
Serving & Storage Suggestions
These Perfect Dazzling Geode Cookies are best served at room temperature so the sugar crystals stay crunchy and the cookie texture is soft but firm. Arrange them on a pretty platter to really show off their gem-like centers—trust me, they’re a showstopper.
Pair these magical treats with a cup of hot tea or a cold glass of milk for a cozy snack. They also make a stunning addition to any dessert table or party spread, just like the pretzel dogs I whipped up for game day, which always get rave reviews.
Store cookies in an airtight container at room temperature for up to 5 days. If you want to keep them longer, freeze them for up to 2 months—just thaw at room temperature before serving. Reheating isn’t necessary, but if you prefer a warm cookie, a quick 10-second zap in the microwave works without softening the crystals too much.
Flavors deepen a bit after a day, making these cookies even more delightful if you prepare them ahead of time.
Nutritional Information & Benefits
On average, one Perfect Dazzling Geode Cookie contains approximately:
| Calories | 150 |
|---|---|
| Fat | 7 g |
| Carbohydrates | 22 g |
| Sugar | 14 g |
| Protein | 2 g |
These cookies are a treat, so moderation is key, but the use of real butter and eggs means they offer some nourishment beyond just sugar. Using coarse sanding sugar instead of melted candy is a slightly lighter approach, and the recipe can be adapted for gluten-free or vegan diets as needed.
From a wellness standpoint, baking at home means you can skip artificial colors and preservatives often found in store-bought decorated cookies. Plus, the joy and creativity you get from crafting these cookies is a sweet boost to your day in itself.
Conclusion
Making these Perfect Dazzling Geode Cookies is like unlocking a little magic in your kitchen. They bring sparkle and joy to any gathering and offer a fun, hands-on baking experience that’s truly rewarding. Whether you stick to the classic version or try one of the colorful variations, these cookies have a way of making you feel proud and inspired with every bite.
I love how they bring out the kid in me (and everyone else around the table), turning simple ingredients into something extraordinary. Plus, they pair beautifully with other homemade favorites like the pineapple coconut loaf that’s perfect for a tropical escape while you wait for your cookies to cool.
Give these a try and don’t be shy about making the recipe your own — the magic is in the details you add. And hey, if you make a batch, drop a comment sharing your favorite color combos or tweaks. Nothing beats swapping stories about kitchen wins and glittery mishaps!
FAQs
- Can I make these cookies without rock candy crystals?
Yes, you can use just coarse sanding sugar for the geode effect, but adding rock candy gives a more textured crystal look inside the cookie. - How do I prevent the sugar crystals from melting too much?
Make sure to create a shallow well in the dough and avoid overbaking. Keep an eye on the cookies starting at 12 minutes in the oven. - Can I prepare the dough ahead of time?
Absolutely! Chill the dough in the fridge for up to 24 hours before shaping and baking. This helps the cookies hold their shape better. - Are these cookies safe for kids to help make?
Definitely. Kids love filling the wells with colorful sugar crystals and watching the transformation during baking. Just supervise the oven part for safety. - What’s the best way to store leftover cookies?
Store them in an airtight container at room temperature for up to 5 days or freeze for longer storage. Avoid refrigerating as it can soften the crystals.
Pin This Recipe!
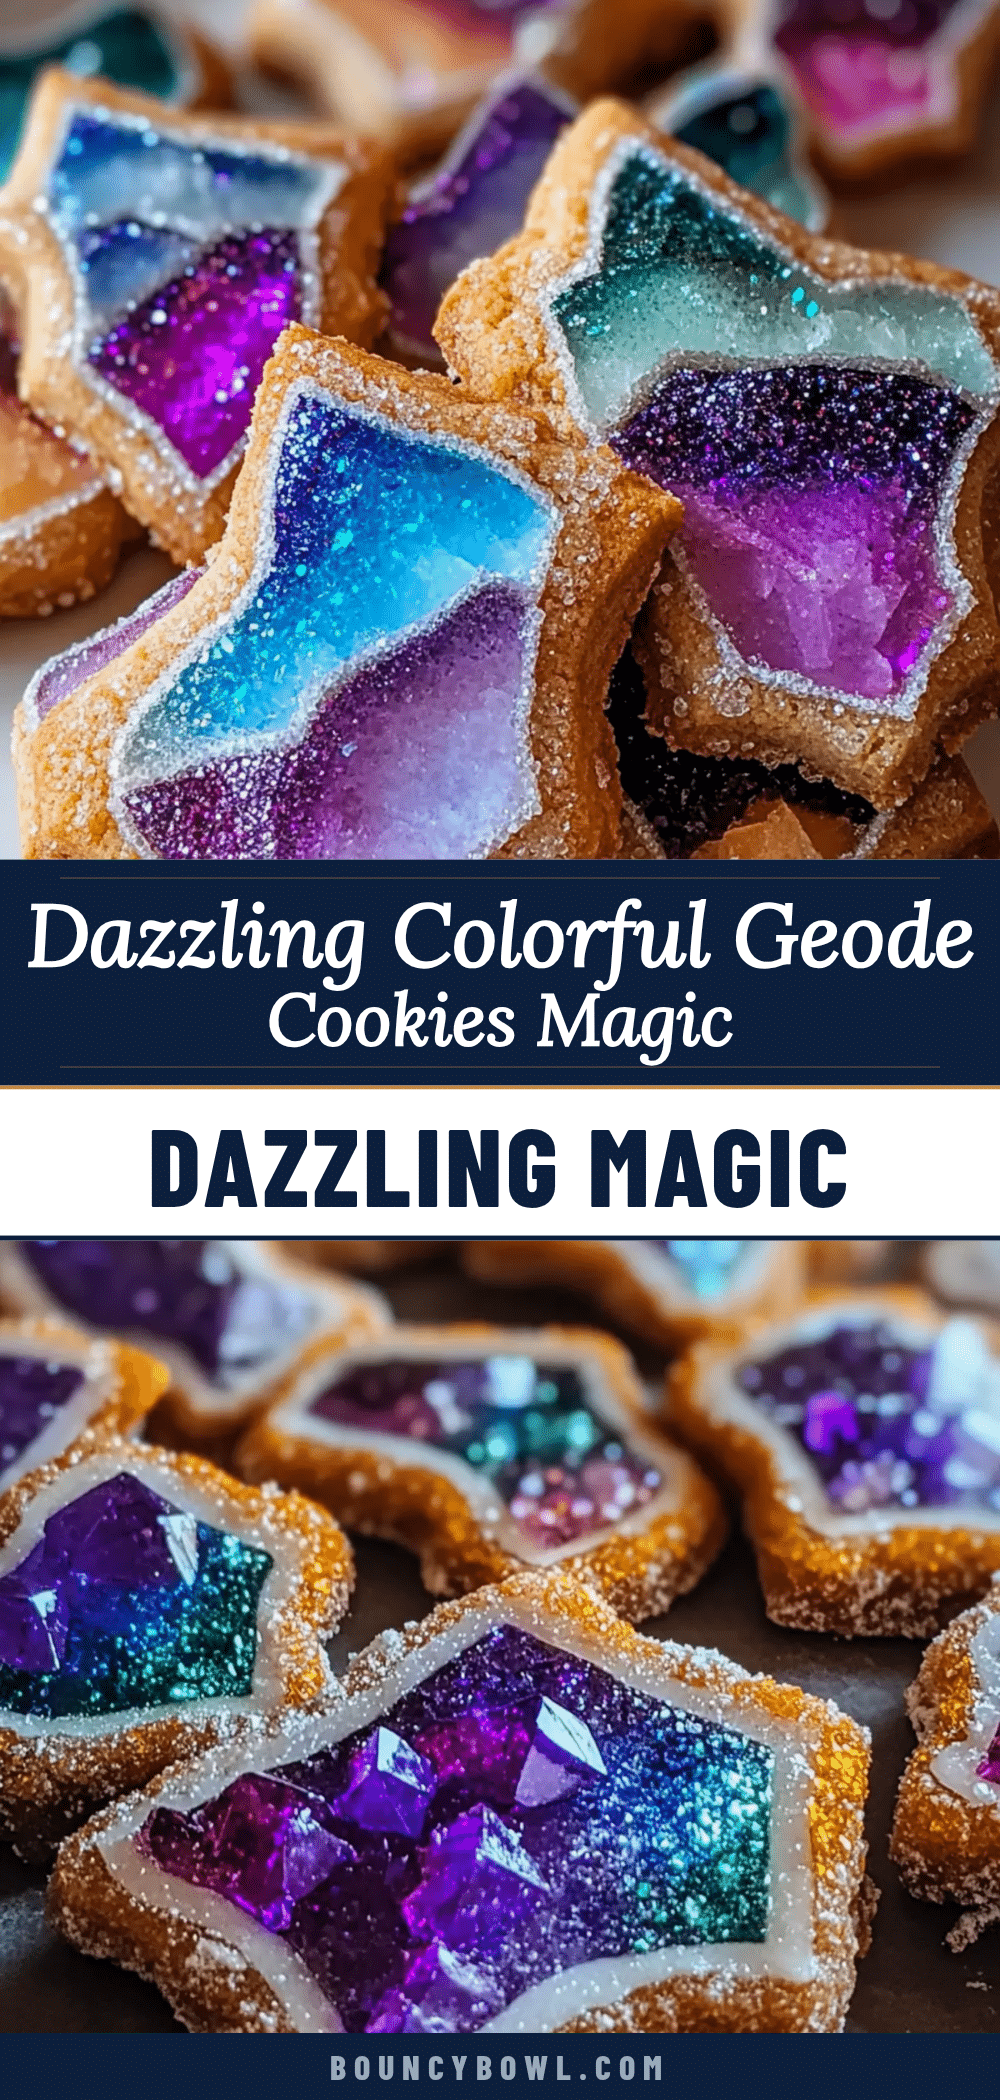
Perfect Dazzling Geode Cookies
These dazzling geode cookies feature shimmering sugar crystal centers that look like edible gemstones. They combine a buttery cookie dough with crunchy sugar crystals for a magical homemade treat perfect for parties and celebrations.
- Prep Time: 20 minutes
- Cook Time: 12-15 minutes
- Total Time: 35-40 minutes
- Yield: 24 cookies 1x
- Category: Dessert
- Cuisine: American
Ingredients
- 2 ½ cups all-purpose flour (312 g)
- 1 cup unsalted butter, softened (227 g)
- ¾ cup granulated sugar (150 g)
- ¼ cup brown sugar, packed (50 g)
- 2 large eggs, room temperature
- 2 teaspoons vanilla extract
- 1 teaspoon baking powder
- ½ teaspoon salt
- About 1 cup coarse sanding sugar in assorted colors (purple, blue, pink, or your favorite) (200 g)
- Edible pearl dust or glitter (optional)
- Rock candy crystals or crushed hard candy (optional)
Instructions
- Prep Your Ingredients (10 minutes): Take the butter and eggs out of the fridge to warm to room temperature. Measure out all dry ingredients separately. Preheat your oven to 350°F (175°C).
- Cream Butter and Sugars (5-7 minutes): In your mixing bowl, beat the softened butter with granulated and brown sugar until light and fluffy.
- Add Eggs and Vanilla (2 minutes): Beat in the eggs one at a time, making sure each is fully incorporated before adding the next. Stir in the vanilla extract.
- Mix Dry Ingredients (3 minutes): In a separate bowl, whisk together flour, baking powder, and salt. Gradually add this to the wet ingredients, mixing on low just until combined. Do not overmix.
- Shape the Cookies (15 minutes): Scoop tablespoon-sized balls of dough onto your prepared baking sheet, spacing them about 2 inches apart. Using your finger or an offset spatula, gently create a shallow well in the center of each dough ball.
- Fill with Sugar Crystals (5 minutes): Spoon coarse sanding sugar and crushed rock candy into each indentation. Be generous but don’t overfill.
- Bake (12-15 minutes): Bake in the preheated oven until the cookies are lightly golden on the edges and the sugar centers begin to melt and glisten.
- Cool and Add Sparkle (10 minutes): Let the cookies cool completely on the baking sheet to allow the sugar to harden into crystal-like formations. Optionally, brush lightly with edible pearl dust once cooled.
Notes
Use coarse sanding sugar for the best crystal effect; regular granulated sugar melts too quickly. Create shallow wells in the dough to contain sugar crystals and prevent spreading. Monitor baking time closely to avoid melting crystals flat. Chill dough if it becomes too soft to handle. Optionally brush cooled cookies with edible pearl dust for extra sparkle.
Nutrition
- Serving Size: 1 cookie
- Calories: 150
- Sugar: 14
- Fat: 7
- Carbohydrates: 22
- Protein: 2
Keywords: geode cookies, dazzling cookies, sugar crystal cookies, edible gemstones, party cookies, easy baking, homemade treats


