Love this? Save it for later!
Share the inspiration with your friends
I was standing at the stove, spatula in hand, watching the first crepe bubble up and turn a pale gold. My friend had texted an hour earlier saying she was stopping by with some leftover smoked salmon from her weekend brunch, and I had nothing planned. Nothing except a fridge with eggs, milk, and a vague memory of a trip to Paris where I ate a crepe so thin and buttery I could see the light through it. So I grabbed a bowl and started whisking, hoping for the best.
That first crepe stuck to the pan. The second one tore when I tried to flip it. But the third—the third one slid right onto the plate, perfectly golden with those lacy edges that make you feel like a real chef. By the time my friend arrived, I had a neat stack cooling on the counter, ready for both her savory salmon and the leftover Nutella I had stashed in the pantry. It was one of those accidental wins that makes you wonder why you ever bought pre-made mixes in the first place.
This perfect thin crepes recipe is now my go-to for everything from quick weekday breakfasts to lazy Sunday gatherings. It is the kind of recipe that feels fancy but is secretly simple, and once you get the hang of it, you will find yourself making it for absolutely everything. Honestly, it is just a really good thing to have in your back pocket.
Why You Will Love This Recipe
I have tested a lot of crepe recipes over the years, and this one wins every time. It is the texture that gets me—thin enough to fold but sturdy enough to hold a filling without falling apart. You can use it for a sweet breakfast with berries and cream, or roll it up with ham and cheese for a quick dinner. It is basically the most versatile thing you can make with a few pantry staples.
- Quick & Easy: From bowl to plate in under 30 minutes. No fancy equipment or complicated steps.
- Simple Ingredients: You probably have everything already—flour, eggs, milk, butter, and a pinch of salt.
- Perfect for Any Occasion: Great for brunch, dessert, a light lunch, or even a savory dinner when you want something different.
- Crowd-Pleaser: Everyone loves a crepe. Kids go crazy for them with Nutella, and adults appreciate the elegance of a savory version with fresh herbs.
- Unbelievably Delicious: The texture is so delicate and silky, you will honestly close your eyes after the first bite. It is comfort food that feels like a special occasion.
What makes this recipe different from the rest is the resting time. I know, it sounds like an annoying extra step, but letting the batter sit for at least 15 minutes is the secret to that tender, melt-in-your-mouth texture. It allows the gluten to relax and the flour to fully hydrate, which means your crepes will be silky smooth instead of tough and rubbery. This is the kind of detail that turns a good crepe into a perfect one.
What Ingredients You Will Need
This recipe uses simple, everyday ingredients to create something truly special. The beauty of crepes is their simplicity, so the quality of each ingredient really shines through.
- All-Purpose Flour – 1 cup (120 grams). The foundation of the crepe. I have tested this with whole wheat flour too, but the texture is noticeably denser. Stick with all-purpose for that classic delicate feel.
- Large Eggs – 2, at room temperature. Eggs give the crepes structure and richness. If your eggs are cold, just place them in a bowl of warm water for 5 minutes before using.
- Whole Milk – 1 ½ cups (360 ml). Whole milk creates the best flavor and texture, but 2% works fine too. I have even used oat milk in a pinch, and it was surprisingly good.
- Water – ¼ cup (60 ml). This thins the batter just enough to make the crepes whisper-thin. It is a trick I learned from a French cookbook.
- Unsalted Butter – 3 tablespoons (42 grams), melted and slightly cooled, plus more for the pan. Butter adds flavor and helps prevent sticking. I prefer using salted butter for the pan itself, but unsalted in the batter gives me more control over the salt level.
- Salt – ¼ teaspoon. Just a pinch to balance the flavors. Do not skip it, even for sweet crepes.
- Sugar – 1 tablespoon (optional). Only add this if you are making sweet crepes. For savory fillings, leave it out entirely.
- Vanilla Extract – 1 teaspoon (optional). For sweet crepes, this adds a lovely warmth. For savory versions, you can skip it or add a pinch of black pepper or fresh herbs to the batter instead.
Equipment Needed
You do not need a lot of fancy tools to make crepes, which is part of why I love this recipe so much. Here is what you will need:
- Non-Stick Skillet or Crepe Pan – An 8 or 9-inch non-stick skillet is ideal. If you have a dedicated crepe pan, great, but a regular non-stick pan works perfectly. I have a cheap one from the grocery store that I have been using for years.
- Mixing Bowl – Any medium-sized bowl will do. I use a glass one so I can see if the batter is smooth.
- Whisk – A whisk is better than a fork for getting rid of lumps. If you are in a rush, you can use a blender instead—just pulse for 10 seconds.
- Measuring Cups and Spoons – Accuracy matters here. Crepe batter is all about ratios.
- Liquid Measuring Cup – For the milk and water. A spout makes pouring easier.
- Spatula – A thin, flexible spatula is your best friend for flipping. I use a fish spatula because it is thin and angled.
- Ladle or Small Measuring Cup – For pouring the batter into the pan. A ¼ cup measure works perfectly.
- Plate or Baking Sheet – To stack the finished crepes. I usually put a sheet of parchment paper between each one to prevent sticking.
Preparation Method
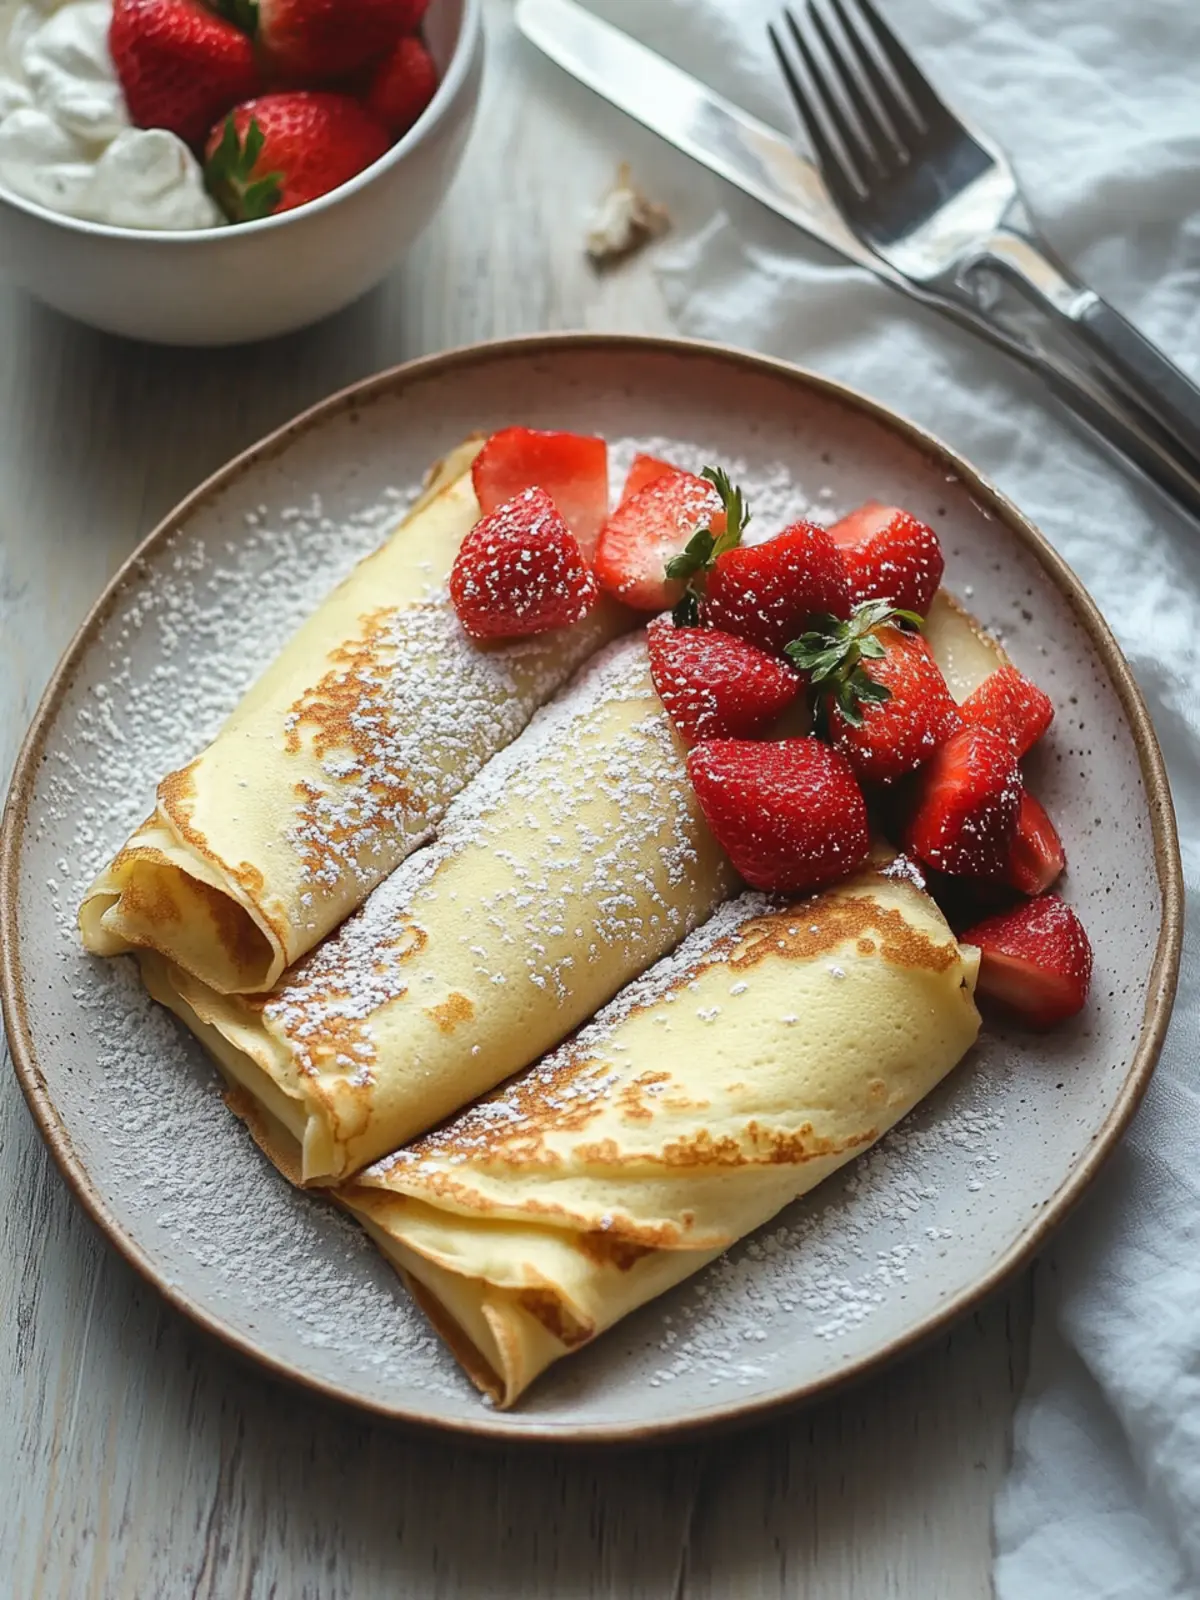
Making crepes is easier than you think, but a little technique goes a long way. Follow these steps, and you will be a pro in no time.
- Make the Batter: In a large mixing bowl, whisk together the flour and salt. If you are making sweet crepes, whisk in the sugar now. Create a well in the center and crack the eggs into it. Whisk the eggs gently, then slowly pour in about half of the milk while whisking continuously. The goal is to create a smooth paste before adding the rest of the liquid. This prevents lumps.
- Add the Remaining Liquid: Pour in the rest of the milk, the water, and the melted butter. Whisk until the batter is completely smooth. It should be very thin, about the consistency of heavy cream. If it looks thick, add a tablespoon more milk. Stir in the vanilla extract if using.
- Rest the Batter: This is the most important step. Cover the bowl with plastic wrap or a clean kitchen towel and let the batter rest at room temperature for at least 15 minutes, or up to 2 hours in the refrigerator. You will see tiny bubbles form on the surface. This rest allows the flour to fully absorb the liquid and the gluten to relax, resulting in tender, delicate crepes. Do not skip this.
- Prepare the Pan: Place your non-stick skillet over medium heat. Add a small pat of butter (about ½ teaspoon) and let it melt, swirling the pan to coat the bottom. When the butter stops sizzling and starts to smell nutty, the pan is ready. You want it hot but not smoking.
- Pour and Swirl: Give the batter a quick stir (it settles as it rests). Using a ladle or small measuring cup, pour about ¼ cup of batter into the center of the pan. Immediately pick up the pan and tilt it in a circular motion, letting the batter spread evenly across the bottom. Work quickly—the batter will start setting almost immediately. Pour any excess batter back into the bowl.
- Cook the First Side: Let the crepe cook undisturbed for about 45 seconds to 1 minute. You will know it is ready when the edges start to lift away from the pan and the surface looks matte instead of shiny. The bottom should be a light golden brown. Peek underneath with your spatula to check.
- Flip It: Slide your thin spatula under the crepe, lift the edge, and gently flip it over. You can also use your fingers if you are brave—just grab the edge and flip. Cook the second side for about 30 seconds. It will be even more lightly colored than the first side. Slide the crepe onto a plate.
- Repeat: Continue with the remaining batter, adding a tiny pat of butter to the pan every 2 to 3 crepes. Stack the crepes on a plate as you go. The first one is often a test crepe—do not worry if it is not perfect. I always eat that one myself while I cook the rest.
- Keep Warm: If you are not serving the crepes immediately, you can keep them warm in a 200°F oven. Place them on a baking sheet, cover loosely with foil, and they will stay soft and pliable for up to 20 minutes.
Cooking Tips & Techniques
I have made more crepes than I can count, and I have definitely made my share of mistakes. Here is what I have learned the hard way so you do not have to.
The Pan Temperature Matters More Than You Think: If your first crepe sticks or tears, your pan is probably too cold. If it browns too quickly and looks spotted, the pan is too hot. Adjust the heat between crepes. Medium heat is usually perfect, but every stove is different. I keep a small bowl of cold water nearby and sprinkle a drop on the pan—if it dances and evaporates quickly, I am ready.
Do Not Overmix the Batter: Overmixing develops too much gluten, which makes crepes tough. Whisk just until the flour is incorporated and the batter is smooth. A few tiny lumps are fine; they will disappear as the batter rests.
The Flipping Technique: If you are nervous about flipping, do not be. Use a thin spatula and slide it all the way under the crepe. Lift the edge, then quickly flip it over in one smooth motion. Alternatively, you can use the “toss and catch” method, but I have definitely dropped a few crepes on the floor that way. Stick with the spatula for reliability.
Butter the Pan Lightly: Too much butter will make the crepes greasy and uneven. Use a paper towel to spread a thin, even layer across the pan. This is especially helpful for the first few crepes.
Let the Batter Rest: I cannot say this enough. Resting the batter is non-negotiable for tender crepes. If you skip this step, your crepes will be chewy and dense. Trust the process.
Variations & Adaptations
One of the best things about crepes is how endlessly adaptable they are. Here are some of my favorite ways to change things up.
- Gluten-Free Version: Substitute the all-purpose flour with a good 1-to-1 gluten-free baking flour blend. I have used Bob’s Red Mill with great results. The texture is slightly more delicate, so be gentle when flipping.
- Dairy-Free Version: Use almond milk, oat milk, or coconut milk in place of whole milk. Substitute the melted butter with coconut oil or a neutral vegetable oil. The flavor will be slightly different, but the texture stays lovely.
- Savory Herb Crepes: Add 1 tablespoon of finely chopped fresh chives, parsley, or dill to the batter. A pinch of black pepper is also nice. These are perfect for wrapping around smoked salmon, cream cheese, and capers—a combination that reminds me of a creamy tzatziki chicken salad I make for quick dinners.
- Chocolate Crepes: Replace 2 tablespoons of the flour with unsweetened cocoa powder. Add an extra tablespoon of sugar and a splash more milk. These are incredible filled with whipped cream and fresh strawberries.
- Lemon Sugar Crepes: After cooking, sprinkle the crepe with granulated sugar and a squeeze of fresh lemon juice. Roll it up and eat it warm. It is the simplest thing and honestly one of the best.
- Savory Buckwheat Crepes (Galettes): Replace half the all-purpose flour with buckwheat flour. These are traditional in Brittany, France, and have a nutty, earthy flavor that pairs beautifully with ham, cheese, and a fried egg.
Serving & Storage Suggestions
Crepes are best served warm, right off the pan, but they are also incredibly forgiving when it comes to storage.
Serving Suggestions: For a sweet breakfast, serve crepes with a dusting of powdered sugar, fresh berries, whipped cream, or a drizzle of maple syrup. For dessert, fill them with Nutella, sliced bananas, and a scoop of vanilla ice cream. On the savory side, fill them with scrambled eggs, cheese, and sautéed mushrooms, or roll them up with leftover cozy creamy chicken pot pie soup for a unique twist. I have even used them as a wrap for quick Chinese-style sautéed shrimp for a fun fusion dinner.
Storage: Stack cooled crepes between sheets of parchment paper and place them in an airtight container or zip-top bag. They will keep in the refrigerator for up to 3 days. To freeze, wrap the stack tightly in plastic wrap and then foil. They will last for up to 2 months.
Reheating: The best way to reheat crepes is in a non-stick pan over medium heat for about 15 seconds per side. You can also microwave them for 10 to 15 seconds, but they will be slightly less tender. If reheating from frozen, let them thaw in the refrigerator overnight first.
Flavor Development: Crepes are best the day they are made, but they are still very good the next day. The texture softens slightly, which actually makes them even more pliable for rolling. If you are making them for a party, you can cook them a day ahead and reheat just before serving.
Nutritional Information & Benefits
Crepes are a relatively light treat compared to pancakes or waffles. One plain crepe (without fillings) contains approximately 90 calories, 3 grams of protein, 3 grams of fat, and 12 grams of carbohydrates. They are lower in sugar than most breakfast pastries, especially if you skip the optional sugar in the batter.
The eggs provide a good dose of protein and essential vitamins like B12 and D. The milk adds calcium for bone health. If you use whole milk, you also get a small amount of healthy fats that help keep you full longer. For a more nutrient-dense version, you can add a tablespoon of ground flaxseed or chia seeds to the batter for extra fiber and omega-3s.
If you are watching your carb intake, you can enjoy crepes in moderation as part of a balanced diet. They are also a great vehicle for loading up on vegetables in savory versions. I often make a batch on Sunday and use them for quick lunches throughout the week, filled with leftover roasted vegetables and a dollop of Greek yogurt.
Conclusion
This perfect thin crepes recipe has become a staple in my kitchen, and I hope it becomes one in yours too. It is the kind of recipe that makes you feel like you have a secret superpower—the ability to turn simple ingredients into something that feels elegant and special. Whether you fill them with Nutella and strawberries for a weekend treat or wrap them around leftover chicken for a quick dinner, they always deliver.
Do not be afraid to experiment. Crepes are forgiving, and even the imperfect ones taste amazing. I have made them for birthday breakfasts, lazy Sunday brunches, and even as a quick dessert when friends showed up unexpectedly. Every time, they disappear within minutes.
I would love to hear how yours turn out. Leave a comment below and let me know your favorite filling, or share a photo of your crepe stack. And if you try a variation that blows your mind, tell me about it. Happy cooking!
Frequently Asked Questions
Can I make the crepe batter ahead of time?
Yes, absolutely. You can make the batter up to 24 hours in advance and store it in the refrigerator. Just give it a good stir before using, as the flour will settle at the bottom. The batter may thicken slightly overnight, so add a tablespoon of milk or water to thin it out if needed.
Why are my crepes tearing when I flip them?
This usually happens for one of two reasons: the pan is not hot enough, or the batter is too thick. Make sure your pan is at medium heat before you pour the batter. If the batter is thick, add a little more milk until it reaches the consistency of heavy cream. Also, be gentle when flipping—use a thin spatula and slide it all the way under the crepe.
Can I use this recipe for gluten-free crepes?
Yes, you can substitute the all-purpose flour with a 1-to-1 gluten-free baking flour blend. The texture will be slightly more delicate, so handle them gently. I recommend letting the batter rest for at least 30 minutes to help the gluten-free flour absorb the liquid fully.
How do I keep crepes warm while I cook the rest?
Preheat your oven to 200°F (95°C). Place a baking sheet in the oven and transfer each finished crepe to the sheet as you go. Cover them loosely with aluminum foil to prevent them from drying out. They will stay soft and warm for up to 20 minutes.
Can I freeze leftover crepes?
Yes, crepes freeze beautifully. Let them cool completely, then stack them with a sheet of parchment paper between each one. Wrap the stack tightly in plastic wrap and then aluminum foil. They will keep in the freezer for up to 2 months. To thaw, transfer them to the refrigerator overnight and reheat in a pan or microwave.
Pin This Recipe!

Perfect Thin Crepes Recipe: Best for Sweet or Savory

This perfect thin crepes recipe is now my go-to for everything from quick weekday breakfasts to lazy Sunday gatherings. It is the kind of recipe that feels fancy but is secretly simple, and once you get the hang of it, you will find yourself making it for absolutely everything.
- Prep Time: 15 minutes
- Cook Time: 15 minutes
- Total Time: 30 minutes
- Yield: 8 servings 1x
- Category: Breakfast, Brunch, Dessert
- Cuisine: French
Ingredients
- 1 cup (120 grams) all-purpose flour
- 2 large eggs, at room temperature
- 1 ½ cups (360 ml) whole milk
- ¼ cup (60 ml) water
- 3 tablespoons (42 grams) unsalted butter, melted and slightly cooled, plus more for the pan
- ¼ teaspoon salt
- 1 tablespoon sugar (optional, for sweet crepes)
- 1 teaspoon vanilla extract (optional, for sweet crepes)
Instructions
- Make the Batter: In a large mixing bowl, whisk together the flour and salt. If you are making sweet crepes, whisk in the sugar now. Create a well in the center and crack the eggs into it. Whisk the eggs gently, then slowly pour in about half of the milk while whisking continuously. The goal is to create a smooth paste before adding the rest of the liquid. This prevents lumps.
- Add the Remaining Liquid: Pour in the rest of the milk, the water, and the melted butter. Whisk until the batter is completely smooth. It should be very thin, about the consistency of heavy cream. If it looks thick, add a tablespoon more milk. Stir in the vanilla extract if using.
- Rest the Batter: This is the most important step. Cover the bowl with plastic wrap or a clean kitchen towel and let the batter rest at room temperature for at least 15 minutes, or up to 2 hours in the refrigerator. You will see tiny bubbles form on the surface. This rest allows the flour to fully absorb the liquid and the gluten to relax, resulting in tender, delicate crepes. Do not skip this.
- Prepare the Pan: Place your non-stick skillet over medium heat. Add a small pat of butter (about ½ teaspoon) and let it melt, swirling the pan to coat the bottom. When the butter stops sizzling and starts to smell nutty, the pan is ready. You want it hot but not smoking.
- Pour and Swirl: Give the batter a quick stir (it settles as it rests). Using a ladle or small measuring cup, pour about ¼ cup of batter into the center of the pan. Immediately pick up the pan and tilt it in a circular motion, letting the batter spread evenly across the bottom. Work quickly—the batter will start setting almost immediately. Pour any excess batter back into the bowl.
- Cook the First Side: Let the crepe cook undisturbed for about 45 seconds to 1 minute. You will know it is ready when the edges start to lift away from the pan and the surface looks matte instead of shiny. The bottom should be a light golden brown. Peek underneath with your spatula to check.
- Flip It: Slide your thin spatula under the crepe, lift the edge, and gently flip it over. You can also use your fingers if you are brave—just grab the edge and flip. Cook the second side for about 30 seconds. It will be even more lightly colored than the first side. Slide the crepe onto a plate.
- Repeat: Continue with the remaining batter, adding a tiny pat of butter to the pan every 2 to 3 crepes. Stack the crepes on a plate as you go. The first one is often a test crepe—do not worry if it is not perfect. I always eat that one myself while I cook the rest.
- Keep Warm: If you are not serving the crepes immediately, you can keep them warm in a 200°F oven. Place them on a baking sheet, cover loosely with foil, and they will stay soft and pliable for up to 20 minutes.
Notes
Resting the batter is non-negotiable for tender crepes. If you skip this step, your crepes will be chewy and dense. The first crepe is often a test crepe—do not worry if it is not perfect. Adjust the heat between crepes; medium heat is usually perfect. Too much butter will make the crepes greasy and uneven; use a paper towel to spread a thin, even layer.
Nutrition
- Serving Size: 1 crepe
- Calories: 90
- Sugar: 1
- Sodium: 80
- Fat: 3
- Saturated Fat: 1.5
- Carbohydrates: 12
- Protein: 3
Keywords: crepes, thin crepes, French crepes, sweet crepes, savory crepes, easy crepe recipe, homemade crepes


