Love this? Save it for later!
Share the inspiration with your friends
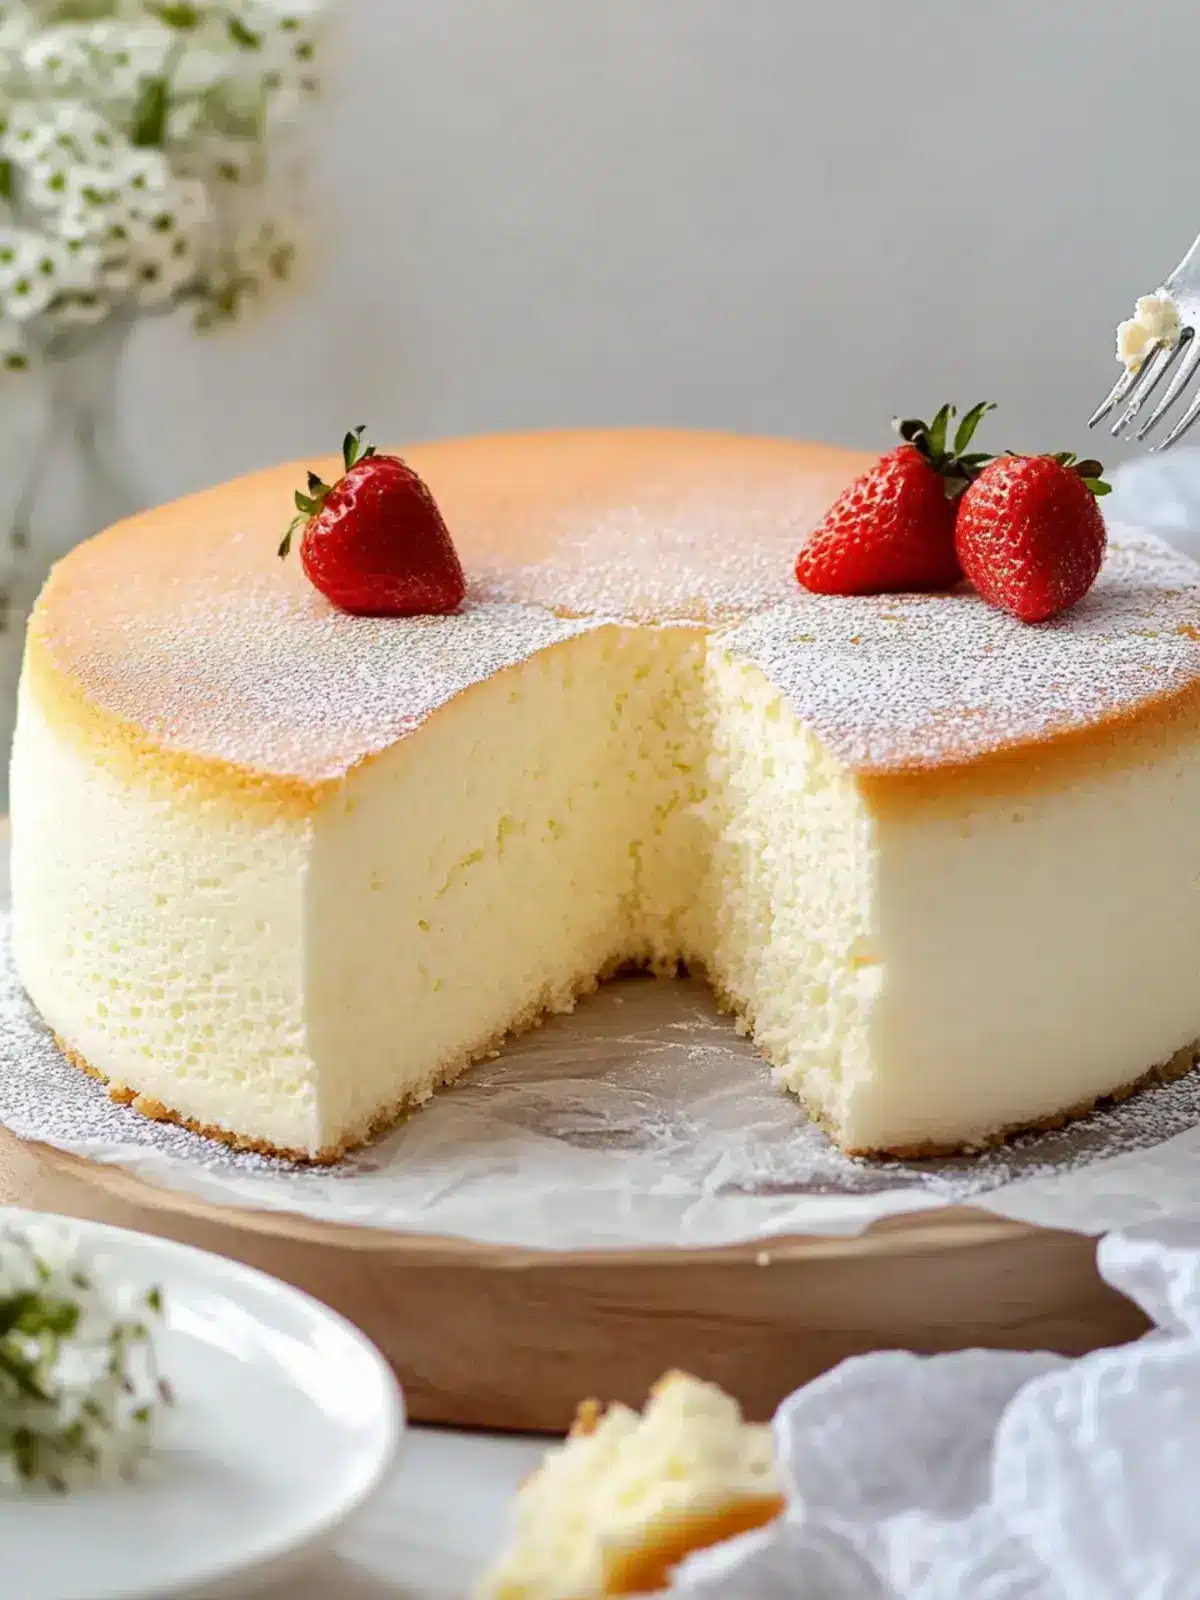
The first time I pulled a Japanese cotton cheesecake out of the oven, I honestly didn’t believe it was going to work. I had read about the legendary jiggly texture for years, watched countless videos of the cake wobbling like a happy little cloud, and felt pretty sure that my home oven would never cooperate. But there it was—pale gold on top, trembling slightly in the pan, and smelling like a dreamy cross between cheesecake and angel food cake.
I slid a knife around the edges, held my breath, and flipped it onto a cooling rack. The cake barely sank. A full inch of pillowy, airy cheesecake sat there, looking almost too perfect to cut. I waited for it to cool completely—which, let me tell you, takes real patience—and then sliced into it. The knife went through like it was cutting through a thick layer of whipped cream. No cracks, no dense spots, just pure, tender fluffiness.
That was the moment I got hooked. This fluffy Japanese cotton cheesecake isn’t just another dessert. It’s the kind of thing you make when you want to impress someone without using fancy equipment or hard-to-find ingredients. It’s also the kind of thing you make when you just need a quiet afternoon project that ends with something beautiful. Honestly, I’ve made this cake for birthdays, brunches, and even just a random Tuesday when I wanted to prove to myself that I could still pull off a tricky bake. And you know what? It works every single time.
So if you’ve ever been curious about making that famously soft, jiggly cheesecake at home, this is the recipe that will get you there. No complicated water bath setup, no special pan required—just a few simple tricks and a little bit of faith.
Why You’ll Love This Recipe
- Light as air, rich as cheesecake—The texture is what makes this cake famous. It’s like biting into a sweet, creamy cloud that melts on your tongue. You get the tangy cream cheese flavor you love, but without the dense, heavy feeling of a traditional New York style cheesecake.
- Simple pantry ingredients—You probably already have cream cheese, eggs, sugar, butter, and flour in your kitchen. No weird stabilizers, no gelatin, no complicated cream whipping. Just good, honest ingredients that work together beautifully.
- No water bath needed—Traditional cheesecakes often require a fussy water bath to prevent cracking. This Japanese version uses a steamy oven technique that’s way easier. You just put a pan of hot water on the bottom rack and let the steam do the work. So much less stressful.
- Perfect for any occasion—This cake looks stunning on a dessert table, but it’s also humble enough for a cozy night in. I’ve brought it to potlucks and watched it disappear faster than almost anything else. People always ask for the recipe.
- Foolproof once you know the tricks—I’ve tested this recipe over a dozen times, tweaking the mixing method, oven temperature, and cooling process until it was practically bulletproof. The instructions here include every little detail I wish someone had told me the first time.
This isn’t just another cheesecake recipe. It’s the one that makes you feel like a pastry chef in your own kitchen. And honestly, the first time you watch that cake jiggle when you pull it out of the oven, you’re going to feel pretty proud of yourself.
What Ingredients You Will Need
This fluffy Japanese cotton cheesecake uses a short list of ingredients, but each one plays a crucial role in creating that signature texture. Here’s what you’ll need and why each ingredient matters.
For the Cream Cheese Base
- 8 oz (226 g) cream cheese, softened to room temperature—Full-fat cream cheese gives the best flavor and texture. I recommend Philadelphia brand for consistent results. Let it sit out for at least 30 minutes before you start, or microwave it in short 10-second bursts until soft but not hot.
- 3 tbsp (42 g) unsalted butter, softened—Butter adds richness and helps create a smooth, velvety batter. Use unsalted so you control the salt level.
- 1/2 cup (120 ml) whole milk—Whole milk adds moisture and helps thin the cream cheese mixture just enough. You can use 2% milk in a pinch, but the cake will be slightly less tender.
For the Batter
- 6 large eggs, separated into yolks and whites—Eggs are the backbone of this cake. The yolks add richness and structure, while the whites are whipped into a meringue that gives the cake its incredible lift. Make sure your eggs are at room temperature for best results.
- 1/4 cup (30 g) all-purpose flour—Just a small amount of flour provides enough structure to hold the cake together without making it heavy. You can substitute with cake flour for an even softer crumb.
- 1 tbsp (8 g) cornstarch—Cornstarch helps stabilize the meringue and gives the cake its tender, almost melt-in-your-mouth texture. Don’t skip this—it makes a real difference.
- 1/2 cup (100 g) granulated sugar—Sugar sweetens the cake and also helps stabilize the egg white meringue. Use fine granulated sugar so it dissolves easily.
- 1 tsp vanilla extract—Pure vanilla extract adds warmth and depth to the flavor. Avoid imitation vanilla if you can—it makes a noticeable difference.
- 1 tbsp fresh lemon juice—A little acidity brightens the flavor and helps stabilize the egg whites. You won’t taste lemon in the finished cake, I promise.
- 1/4 tsp salt—Salt balances the sweetness and enhances all the other flavors.
For the Pan
- Butter or non-stick spray for greasing
- Parchment paper—Line the bottom and sides of your pan so the cake releases easily. The cake is delicate, so parchment is a must.
That’s it. Seven main ingredients plus a few pantry staples. No cream of tartar, no cake flour hunt, no specialty items. The magic really is in the method, not the grocery list.
Equipment Needed
- 8-inch (20 cm) round cake pan—A standard round cake pan works perfectly. Avoid springform pans for this recipe—they tend to leak when you use the steam method. A solid pan is safer.
- Electric hand mixer or stand mixer—You need to whip egg whites to stiff peaks, and doing that by hand is honestly exhausting. A hand mixer works great and is easier to control than a stand mixer for this recipe.
- Large mixing bowls (at least 2)—You’ll need one for the cream cheese mixture and one for the egg whites. Make sure the bowl for the egg whites is completely clean and dry—any grease will prevent them from whipping properly.
- Rubber spatula—For folding the meringue into the batter. A wide spatula works best.
- Roasting pan or large baking dish—This goes on the bottom oven rack to hold hot water and create steam.
- Kettle or pot for boiling water—You’ll need about 2 cups of hot water for the steam pan.
- Cooling rack—The cake needs to cool completely before slicing. A wire rack allows air to circulate evenly.
- Parchment paper—For lining the pan. Parchment is non-stick and makes removal a breeze.
If you don’t have an electric mixer, you can whip the egg whites by hand with a whisk, but be prepared for a serious arm workout. I’ve done it once—never again.
Preparation Method
This recipe has several steps, but none of them are difficult. The key is to take your time and follow the order carefully. Here’s exactly how to make the fluffiest Japanese cotton cheesecake of your life.
- Preheat your oven to 325°F (165°C). Place a rack in the middle position and another rack on the very bottom. Put your roasting pan or baking dish on the bottom rack. Boil about 2 cups of water in a kettle or pot—you’ll add it to the pan right before the cake goes in.
- Prepare your cake pan. Grease the inside of an 8-inch round cake pan with butter or non-stick spray. Cut a circle of parchment paper for the bottom and a long strip for the sides. Press the parchment into place. The sides should come up about 2 inches above the rim of the pan—this helps the cake rise tall without spilling over.
- Melt the cream cheese mixture. In a large heatproof bowl, combine the softened cream cheese, butter, and milk. Set the bowl over a pot of simmering water (double boiler style) and stir gently until everything is melted and smooth. You can also microwave this in 20-second bursts, stirring between each, until smooth. Let it cool slightly—about 5 minutes.
- Add the egg yolks and dry ingredients. Whisk the egg yolks into the cream cheese mixture one at a time, mixing well after each. Then sift in the flour, cornstarch, and salt. Stir until just combined—don’t overmix. Add the vanilla extract and lemon juice, and give it one final stir. Set this mixture aside.
- Whip the egg whites. In a completely clean, dry bowl, beat the egg whites on medium speed until they become frothy and bubbly. Gradually add the sugar, about a tablespoon at a time, while continuing to beat. Increase the speed to high and whip until stiff peaks form. You’ll know it’s ready when you lift the beaters and the meringue stands up in firm peaks that don’t droop. This takes about 4-5 minutes with a hand mixer. Don’t overwhip—if the meringue looks grainy or separates, you’ve gone too far.
- Fold the meringue into the batter. Take about one-third of the meringue and stir it into the cream cheese mixture to lighten it. This step is important—it makes folding the rest easier. Then gently fold in the remaining meringue using a rubber spatula. Use a cutting motion down through the center, then sweep up along the side of the bowl. Rotate the bowl as you go. Fold just until no white streaks remain. Be gentle—you want to keep as much air in the batter as possible.
- Pour the batter into the pan. Gently pour the batter into your prepared pan. Tap the pan on the counter a few times to release any large air bubbles. Don’t overdo it—you don’t want to deflate the batter.
- Create the steam bath. Carefully pour the hot water from your kettle into the roasting pan on the bottom oven rack. The water should be about 1 inch deep. Place the cake pan on the middle rack, directly above the water. Close the oven door quickly to trap the steam.
- Bake. Bake at 325°F (165°C) for 15 minutes. Then reduce the oven temperature to 300°F (150°C) without opening the door. Bake for another 40-45 minutes. The cake should be golden on top and slightly jiggly in the center when you gently shake the pan. A toothpick inserted in the center should come out clean or with just a few moist crumbs. If the top is browning too quickly, tent it loosely with foil after 30 minutes.
- Cool in the oven. This is the secret step that prevents cracking. Turn off the oven and crack the door open slightly (use a wooden spoon handle to prop it open). Let the cake sit in the warm oven for 15 minutes. This gradual cooling helps the cake settle without collapsing.
- Remove and cool completely. Take the cake out of the oven and let it cool in the pan on a wire rack for 10 minutes. Then run a knife around the edges and carefully lift the cake out using the parchment paper. Peel off the parchment and let the cake cool completely on the rack—about 1 hour.
- Chill before serving. For the best texture, wrap the cooled cake in plastic wrap and refrigerate for at least 4 hours, or overnight. Chilling firms up the texture and makes it easier to slice. The cake actually tastes even better the next day, when the flavors have had time to meld.
And there you have it—a tall, jiggly, cloud-like Japanese cotton cheesecake that will make you feel like a baking wizard.
Cooking Tips & Techniques
Over the many times I’ve made this cake, I’ve learned a few things the hard way. Here are the tips that will save you from making the same mistakes I did.
Room temperature ingredients are non-negotiable. Cold cream cheese and cold eggs won’t blend smoothly, and cold egg whites don’t whip as well. Take everything out of the fridge at least 30 minutes before you start. If you’re in a hurry, you can warm the eggs in a bowl of warm water for 5 minutes.
Don’t skip the lemon juice. I know it sounds like an odd addition, but the acid in lemon juice stabilizes the egg white meringue and helps the cake rise evenly. It also balances the sweetness without making the cake taste lemony. I’ve tried making this without it, and the cake didn’t rise as high.
Fold, don’t stir. When you combine the meringue with the cream cheese batter, use a gentle folding motion. Stirring vigorously will deflate all the air you worked so hard to whip into the egg whites. Be patient—it might take 20-30 folds to incorporate everything, but it’s worth it.
Watch the oven temperature. Every oven runs a little differently. If your oven runs hot, the cake will brown too quickly on the outside while staying undercooked in the middle. Use an oven thermometer if you have one. If you notice the top getting too dark, tent it with foil about halfway through baking.
Don’t open the oven door during baking. I know it’s tempting to peek, but opening the door lets out the steam and can cause the cake to sink. Trust the process and wait until the timer goes off.
Let it cool slowly. That 15-minute rest in the turned-off oven is the difference between a perfectly smooth top and a cracked, sunken mess. The gradual temperature change allows the cake to settle gently without shocking it.
I once forgot to add the lemon juice and ended up with a slightly flatter cake. Another time, I opened the oven door to check on it after 20 minutes, and it sank in the middle like a deflated soufflé. Learn from my mistakes—follow the steps exactly, and you’ll get perfect results every time.
Variations & Adaptations
Once you’ve mastered the basic recipe, there are so many ways to make this cake your own. Here are some of my favorite variations.
Matcha Green Tea Cotton Cheesecake—Sift 1 tablespoon of matcha powder with the flour and cornstarch. The earthy, slightly bitter matcha flavor pairs beautifully with the creamy sweetness of the cheesecake. Plus, the pale green color is gorgeous. I made this for a friend’s birthday, and she said it was the most beautiful cake she’d ever seen.
Lemon Cotton Cheesecake—Increase the lemon juice to 2 tablespoons and add 1 tablespoon of finely grated lemon zest to the cream cheese mixture. The bright citrus flavor cuts through the richness and makes the cake taste even lighter. This version is especially refreshing in the spring and summer.
Chocolate Cotton Cheesecake—Replace 2 tablespoons of the flour with 2 tablespoons of unsweetened cocoa powder. Sift the cocoa with the flour and cornstarch to avoid lumps. The chocolate version is rich but still airy—think chocolate mousse in cake form. My kids go crazy for this one.
Gluten-Free Version—Substitute the all-purpose flour with a gluten-free all-purpose blend that contains xanthan gum. I’ve used Bob’s Red Mill 1-to-1 Baking Flour with great results. The texture is slightly more delicate, so handle the batter gently and be extra careful when folding in the meringue.
Dairy-Free Version—Use dairy-free cream cheese (like Kite Hill or Tofutti) and replace the butter with coconut oil or a vegan butter stick. Use oat milk or almond milk instead of whole milk. The texture will be slightly less rich, but it still comes out surprisingly fluffy. I tested this for a friend with dairy allergies, and she couldn’t believe it was dairy-free.
Mini Cheesecake Cups—Line a muffin tin with paper liners and fill each cup about three-quarters full with batter. Bake at 300°F (150°C) for 18-20 minutes. These individual servings are perfect for parties or portion control. They also freeze beautifully.
Don’t be afraid to experiment. This recipe is forgiving enough to handle small tweaks, and you might discover a new favorite flavor combination.
Serving & Storage Suggestions
This Japanese cotton cheesecake is delicious on its own, but a few simple additions can make it feel extra special.
Serving. Serve the cheesecake chilled or at room temperature. I prefer it cold straight from the fridge—the texture is firmer and almost creamy, like a light cheesecake mousse. Dust the top with powdered sugar just before serving for a pretty finish. You can also top it with fresh berries, a drizzle of honey, or a dollop of whipped cream. For a truly indulgent treat, serve it with a side of warm berry compote or chocolate sauce.
What to serve with it. This cake pairs beautifully with a cup of hot green tea or coffee. The mild sweetness and airy texture complement the bitterness of tea or coffee perfectly. If you’re serving it for dessert, a glass of sparkling wine or a light fruit cocktail works wonderfully. For a brunch spread, serve it alongside fresh fruit and maybe a batch of homemade kolaches for a fun breakfast pastry option.
Storage. Store the cheesecake in an airtight container in the refrigerator for up to 5 days. Wrap it tightly in plastic wrap first to prevent it from drying out or absorbing other odors from the fridge. The cake actually tastes better on day two—the flavors meld and the texture becomes even more velvety.
Freezing. This cake freezes exceptionally well. Wrap the completely cooled cake (or individual slices) tightly in plastic wrap, then in a layer of aluminum foil. Freeze for up to 2 months. To thaw, transfer to the refrigerator overnight. Don’t thaw at room temperature—it can become too soft and lose its structure.
Reheating. I don’t recommend reheating this cake. It’s meant to be served cold or at room temperature. If you want a warm dessert, try serving it with a warm fruit sauce or a drizzle of warm caramel instead.
One thing I love about this cake is how the texture changes over time. Fresh out of the oven, it’s incredibly soft and almost soufflé-like. After a few hours in the fridge, it firms up into a more stable but still incredibly tender cake. Both versions are delicious—it just depends on your mood.
Nutritional Information & Benefits
Here’s the approximate nutritional breakdown per serving (based on 8 servings):
- Calories: 285
- Total Fat: 18g
- Saturated Fat: 10g
- Cholesterol: 165mg
- Sodium: 220mg
- Total Carbohydrates: 24g
- Dietary Fiber: 0g
- Sugars: 18g
- Protein: 7g
While this is definitely a treat, it’s a lighter option compared to traditional cheesecake. The whipped egg whites add volume without extra fat, so each serving is smaller and more satisfying. Cream cheese provides calcium and protein, and eggs are a good source of vitamin D and B12.
This recipe is naturally vegetarian. For a gluten-free version, use a gluten-free flour blend. It is not suitable for vegan diets in its current form, but you can try the dairy-free variation mentioned earlier.
I like to think of this cake as a dessert you can enjoy without guilt. One slice is enough to satisfy your sweet tooth, and the airy texture means you feel satisfied, not stuffed. It’s the kind of treat that feels indulgent but doesn’t weigh you down.
Conclusion
This fluffy Japanese cotton cheesecake is one of those recipes that looks complicated but is actually pretty straightforward once you understand the method. The key is patience—room temperature ingredients, gentle folding, and a slow, steamy bake. But the reward is a cake that’s so light and tender, it practically floats off the plate.
I’ve made this cake for birthdays, holiday dinners, and quiet weekends when I just wanted to bake something beautiful. Every single time, it gets the same reaction—wide eyes, a big smile, and the inevitable question, “How did you make it so fluffy?” And honestly, that never gets old.
Now it’s your turn. Give this recipe a try, and don’t be afraid to make it your own. Maybe you’ll add a swirl of berry compote, a dusting of matcha, or just enjoy it plain with a cup of tea. However you serve it, I think you’re going to love it.
If you make this cake, I’d love to hear how it turned out. Leave a comment below and let me know if your cake jiggled as beautifully as you hoped. And if you’re looking for more easy, impressive desserts, check out this easy no-bake summer berry icebox cake for a no-oven option, or these easy homemade chocolate croissants for another bakery-worthy treat. Happy baking, friend!
Frequently Asked Questions
Why did my Japanese cotton cheesecake crack on top?
Cracking usually happens when the cake cools too quickly or the oven temperature is too high. Make sure to cool the cake in the oven with the door cracked open for 15 minutes after baking. Also, check your oven temperature with an oven thermometer—if it runs hot, reduce the temperature by 10-15 degrees.
Can I use a springform pan for this recipe?
I don’t recommend it. Springform pans have a seam at the bottom that can leak when you use the steam method. A solid 8-inch round cake pan lined with parchment is much safer. If you only have a springform pan, wrap the outside tightly with two layers of aluminum foil to prevent leaks.
Why did my cake sink in the middle?
A sunken center usually means the egg whites were under-whipped or overmixed into the batter. Make sure your egg whites reach stiff peaks that stand up straight when you lift the beaters. And when folding, stop as soon as the batter is uniform—no more streaks of white, but don’t keep mixing beyond that.
Can I make this cake without an electric mixer?
Technically yes, but I wouldn’t recommend it. Whipping egg whites to stiff peaks by hand takes about 15-20 minutes of continuous whisking. It’s a serious arm workout. If you’re determined to try, use a large metal bowl and a balloon whisk, and be prepared for some sore muscles.
How do I get clean slices without the cake sticking to the knife?
Use a sharp, thin-bladed knife and run it under hot water before each slice. Wipe the blade clean and dry between cuts. This melts through the cake cleanly without dragging or sticking. Chilling the cake for at least 4 hours before slicing also helps a lot.
Pin This Recipe!
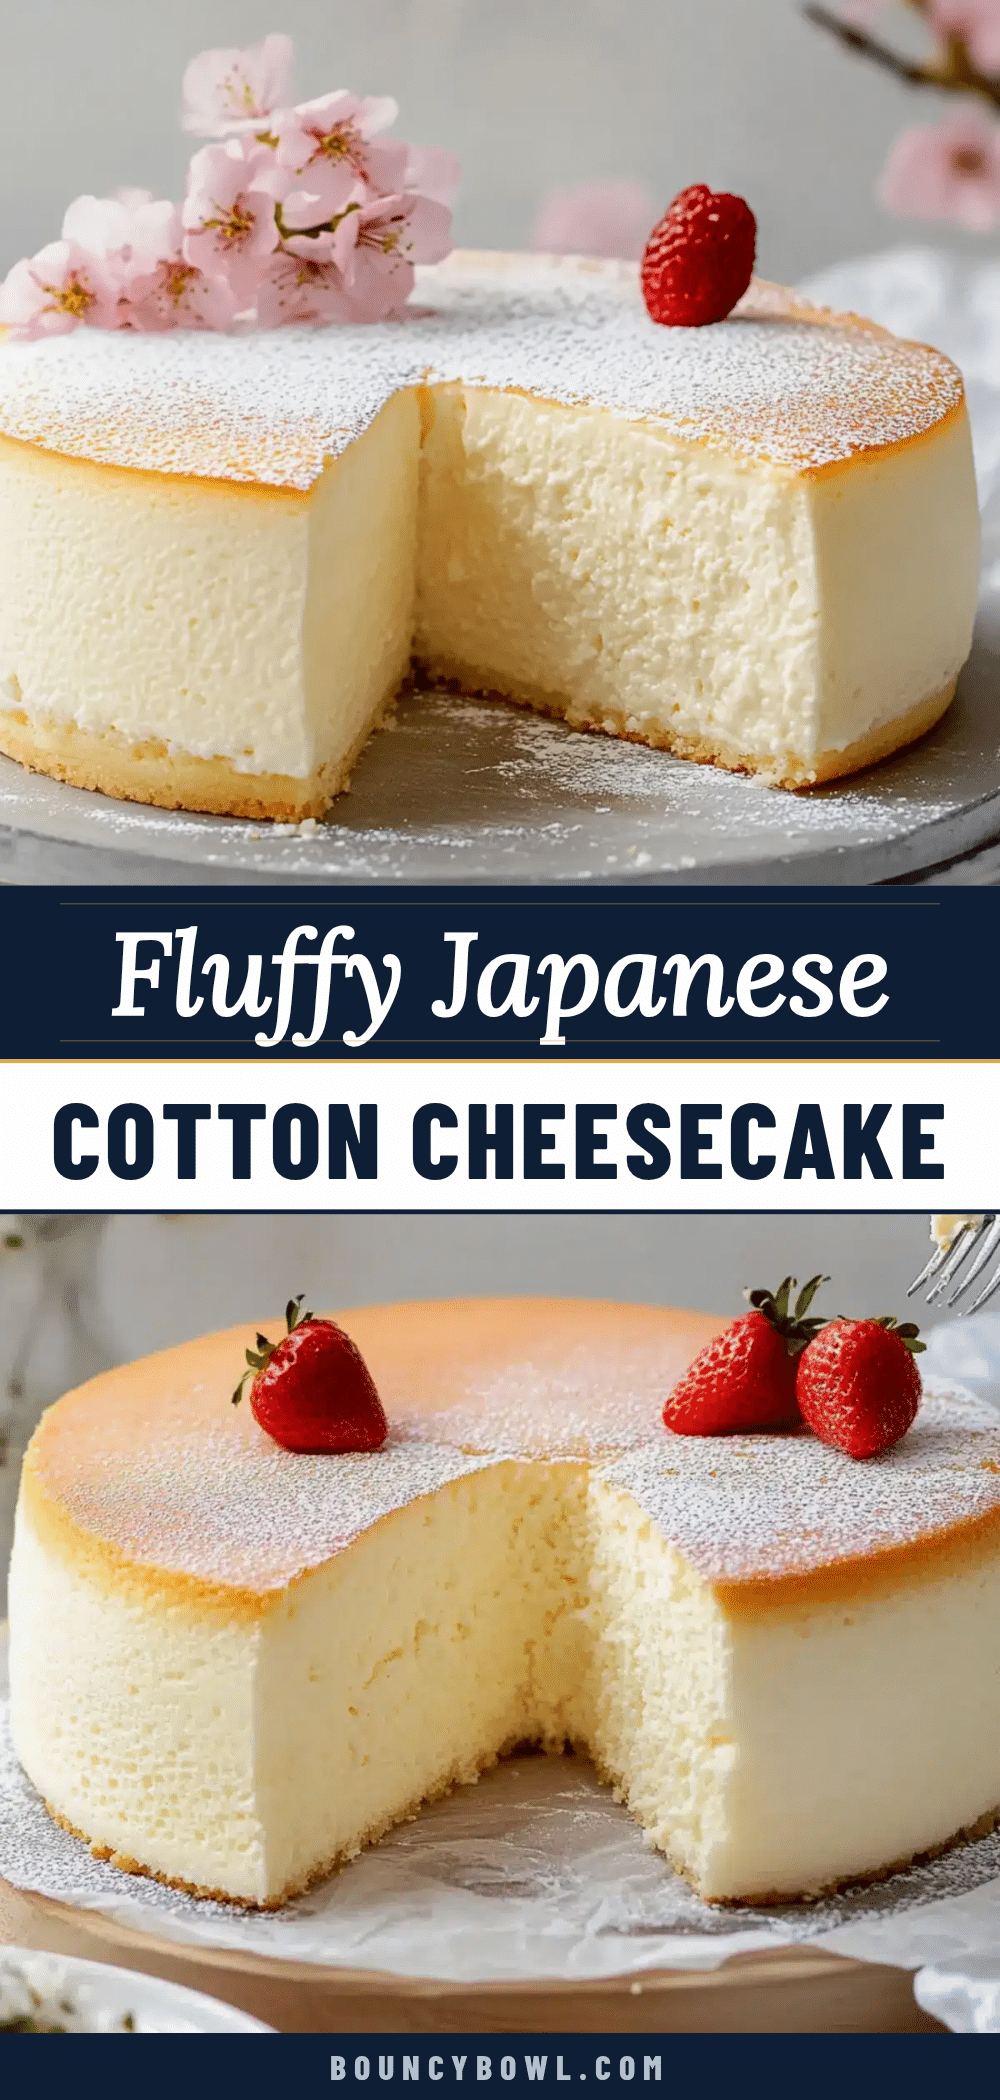
Fluffy Japanese Cotton Cheesecake: Best Easy Homemade Recipe
This fluffy Japanese cotton cheesecake is light as air, rich as cheesecake, and uses simple pantry ingredients. No water bath needed—just a steamy oven technique for a perfectly jiggly, cloud-like texture.
- Prep Time: 30 minutes
- Cook Time: 55 minutes
- Total Time: 1 hour 25 minutes (plus 4 hours chilling)
- Yield: 8 servings 1x
- Category: Dessert
- Cuisine: Japanese
Ingredients
- 8 oz (226 g) cream cheese, softened to room temperature
- 3 tbsp (42 g) unsalted butter, softened
- 1/2 cup (120 ml) whole milk
- 6 large eggs, separated into yolks and whites
- 1/4 cup (30 g) all-purpose flour
- 1 tbsp (8 g) cornstarch
- 1/2 cup (100 g) granulated sugar
- 1 tsp vanilla extract
- 1 tbsp fresh lemon juice
- 1/4 tsp salt
- Butter or non-stick spray for greasing
- Parchment paper
Instructions
- Preheat your oven to 325°F (165°C). Place a rack in the middle position and another rack on the very bottom. Put your roasting pan or baking dish on the bottom rack. Boil about 2 cups of water in a kettle or pot—you’ll add it to the pan right before the cake goes in.
- Prepare your cake pan. Grease the inside of an 8-inch round cake pan with butter or non-stick spray. Cut a circle of parchment paper for the bottom and a long strip for the sides. Press the parchment into place. The sides should come up about 2 inches above the rim of the pan—this helps the cake rise tall without spilling over.
- Melt the cream cheese mixture. In a large heatproof bowl, combine the softened cream cheese, butter, and milk. Set the bowl over a pot of simmering water (double boiler style) and stir gently until everything is melted and smooth. You can also microwave this in 20-second bursts, stirring between each, until smooth. Let it cool slightly—about 5 minutes.
- Add the egg yolks and dry ingredients. Whisk the egg yolks into the cream cheese mixture one at a time, mixing well after each. Then sift in the flour, cornstarch, and salt. Stir until just combined—don’t overmix. Add the vanilla extract and lemon juice, and give it one final stir. Set this mixture aside.
- Whip the egg whites. In a completely clean, dry bowl, beat the egg whites on medium speed until they become frothy and bubbly. Gradually add the sugar, about a tablespoon at a time, while continuing to beat. Increase the speed to high and whip until stiff peaks form. You’ll know it’s ready when you lift the beaters and the meringue stands up in firm peaks that don’t droop. This takes about 4-5 minutes with a hand mixer. Don’t overwhip—if the meringue looks grainy or separates, you’ve gone too fa…
- Fold the meringue into the batter. Take about one-third of the meringue and stir it into the cream cheese mixture to lighten it. This step is important—it makes folding the rest easier. Then gently fold in the remaining meringue using a rubber spatula. Use a cutting motion down through the center, then sweep up along the side of the bowl. Rotate the bowl as you go. Fold just until no white streaks remain. Be gentle—you want to keep as much air in the batter as possible.
- Pour the batter into the pan. Gently pour the batter into your prepared pan. Tap the pan on the counter a few times to release any large air bubbles. Don’t overdo it—you don’t want to deflate the batter.
- Create the steam bath. Carefully pour the hot water from your kettle into the roasting pan on the bottom oven rack. The water should be about 1 inch deep. Place the cake pan on the middle rack, directly above the water. Close the oven door quickly to trap the steam.
- Bake. Bake at 325°F (165°C) for 15 minutes. Then reduce the oven temperature to 300°F (150°C) without opening the door. Bake for another 40-45 minutes. The cake should be golden on top and slightly jiggly in the center when you gently shake the pan. A toothpick inserted in the center should come out clean or with just a few moist crumbs. If the top is browning too quickly, tent it loosely with foil after 30 minutes.
- Cool in the oven. This is the secret step that prevents cracking. Turn off the oven and crack the door open slightly (use a wooden spoon handle to prop it open). Let the cake sit in the warm oven for 15 minutes. This gradual cooling helps the cake settle without collapsing.
- Remove and cool completely. Take the cake out of the oven and let it cool in the pan on a wire rack for 10 minutes. Then run a knife around the edges and carefully lift the cake out using the parchment paper. Peel off the parchment and let the cake cool completely on the rack—about 1 hour.
- Chill before serving. For the best texture, wrap the cooled cake in plastic wrap and refrigerate for at least 4 hours, or overnight. Chilling firms up the texture and makes it easier to slice. The cake actually tastes even better the next day, when the flavors have had time to meld.
Notes
Room temperature ingredients are non-negotiable. Don’t skip the lemon juice—it stabilizes the meringue. Fold gently to keep air in the batter. Watch the oven temperature and don’t open the door during baking. Let the cake cool slowly in the oven to prevent cracking.
Nutrition
- Serving Size: 1 slice
- Calories: 285
- Sugar: 18
- Sodium: 220
- Fat: 18
- Saturated Fat: 10
- Carbohydrates: 24
- Protein: 7
Keywords: Japanese cotton cheesecake, fluffy cheesecake, jiggly cheesecake, easy cheesecake recipe, homemade cheesecake, light cheesecake, cloud cheesecake


